
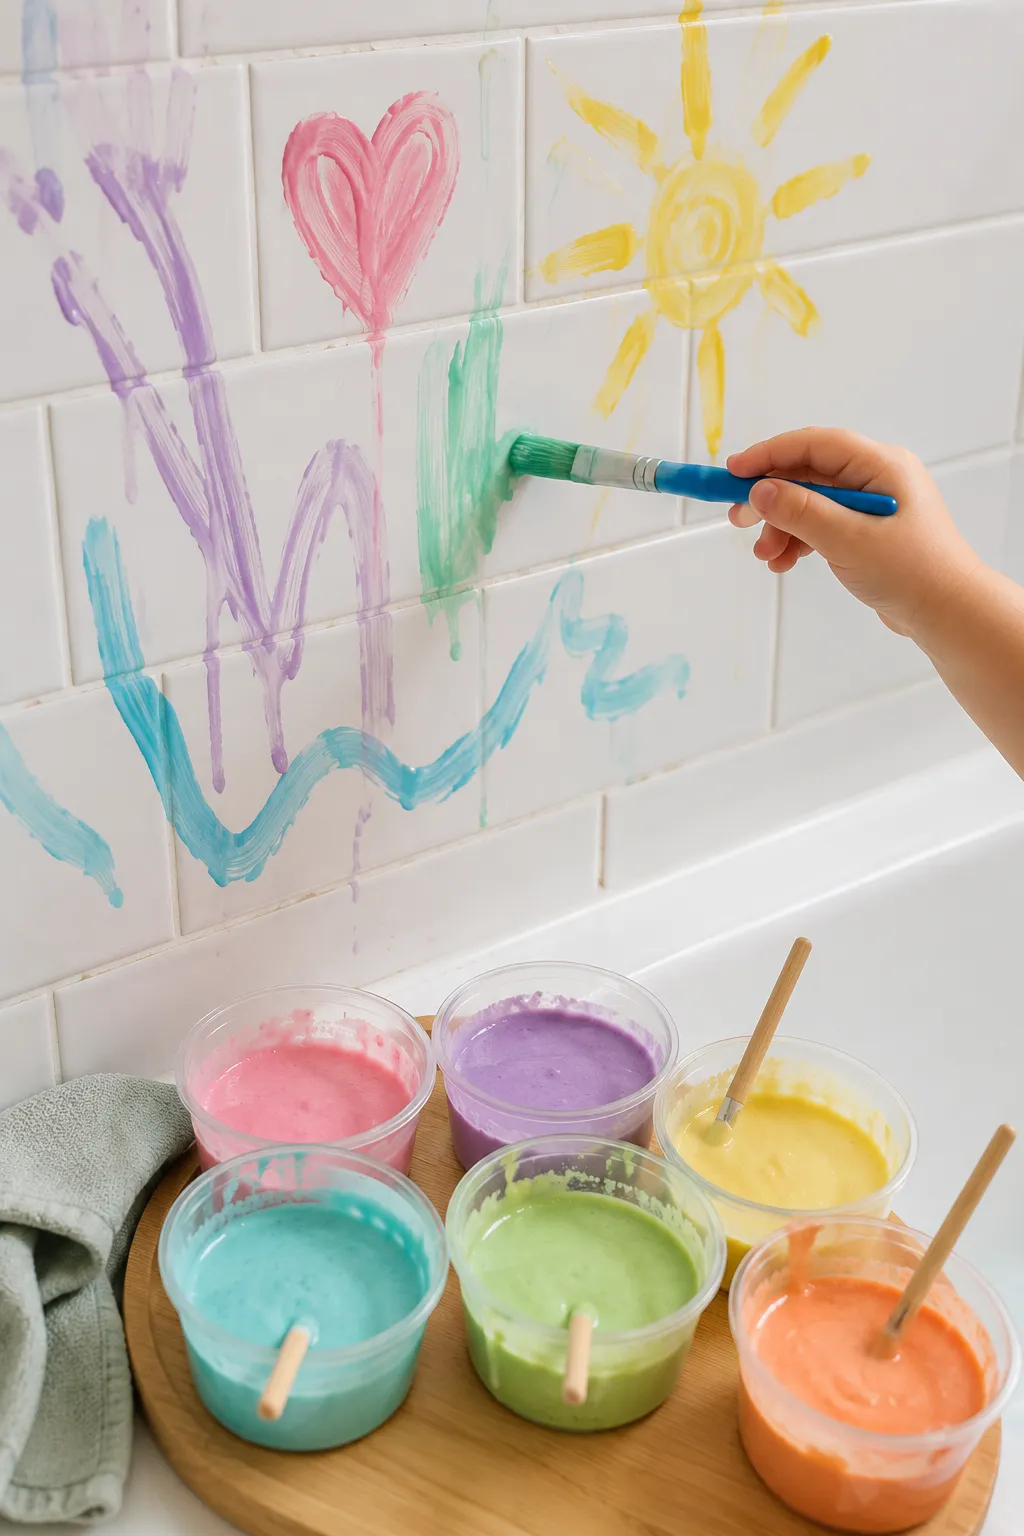
Bath time is one of those daily activities that can go one of two ways—smooth and quick, or a full negotiation with a small person who has suddenly decided water is their enemy. Bath paint reliably tips it toward the first option. Give a toddler paint and a tile wall to cover, and bath time stops being something that happens to them and becomes something they’re actively excited about.
The best part is that bath paint is one of the simplest things you can make at home. Most recipes use two or three ingredients, take under five minutes, and wash off tile, skin, and the tub without scrubbing. You probably have everything you need in your kitchen right now.
This guide covers six different bath paint recipes—from the simplest yogurt base to fizzing paint and glow-in-the-dark versions—matched to different ages, skill levels, and what you have on hand.
What Makes a Good Bath Paint
Not all bath paints are equal. A good bath paint needs to:
- Stick to wet tile long enough to paint with. Too thin and it runs straight down the wall. Too thick and it won’t spread.
- Be genuinely safe if mouthed or swallowed. Especially for children under three who are still exploring with their mouths.
- Wash off easily. The whole point is that cleanup is effortless—if you’re scrubbing grout after bath time, the recipe needs adjusting.
- Hold color well enough to be visually satisfying. Paint that looks washed out before it even touches the wall takes the fun out of it.
Food Coloring Safety
Most of these recipes use food coloring. Standard liquid food coloring (FDA-approved brands like McCormick) is safe in bath water in the small amounts used here. If you prefer to avoid synthetic dyes, natural alternatives work well:
- Pink/red: Beet juice
- Yellow: Turmeric powder mixed with a little water
- Orange: Carrot juice
- Green: Spinach juice or matcha powder
- Purple: Blueberry juice or purple cabbage juice
Natural colorants produce softer, more muted tones than synthetic food coloring. They’re less vivid on the wall but completely dye-free.
Important Notes Before You Start
- Test on a small tile area first if you have natural stone, unsealed grout, or colored grout. Most bath paints wash off easily from ceramic tile and acrylic tubs—but highly porous surfaces or colored grout can sometimes absorb food coloring. A quick test patch saves a potential headache.
- Food coloring can temporarily tint skin and nails. It washes off completely but may require one or two washes to disappear entirely from fingernails and the skin between fingers.
- Supervise young children during bath paint play as you would during any bath time.
- Use white or light-colored containers for mixing so you can accurately assess the color before bath time.
What You’ll Need (Depending on the Recipe)
- Plain full-fat yogurt
- Cornstarch
- Dish soap or baby wash
- Shaving cream
- Baking soda
- White conditioner
- Food coloring or natural colorants
- Small bowls or a muffin tin
- Paintbrushes (silicone or regular—both work)
- Water
Recipe 1: Yogurt Bath Paint (Safest for Babies and Young Toddlers)
Yogurt bath paint is the go-to starting point for babies and very young toddlers—made from a single ingredient they already eat daily, safe in any quantity, and thick enough to stay on the wall for a few minutes of painting before running. It’s the only recipe on this list that requires zero cooking and zero mixing beyond stirring in color.
What you’ll need:
- 1 cup plain full-fat yogurt (full-fat gives a thicker, more opaque paint that sticks better to tile than thin low-fat yogurt)
- Food coloring or natural colorants
- A muffin tin or small bowls
Instructions:
- Divide the yogurt equally into the cups of a muffin tin or into small bowls—one per color. For a typical bath paint session, four to six colors is plenty. More colors are exciting but more bowls to manage in the bath.
- Add food coloring to each portion. Yogurt’s white base requires more drops than a clear base—start with eight to ten drops of liquid food coloring per portion and stir thoroughly before assessing. Add more drops for deeper, more saturated color.
- For gel food coloring, start with a quarter teaspoon per portion—gel is significantly more concentrated and produces much more vivid color in white dairy bases than liquid food coloring.
- For natural colorants, add one to two teaspoons of reduced beet juice, matcha powder mixed with a few drops of water, or turmeric slurry per portion and stir thoroughly.
- Check the consistency. Full-fat yogurt is usually the right thickness straight from the container—it should coat a spoon and hold its shape rather than running. If it’s too thin (some brands are more liquid than others), stir in a small amount of cornstarch half a teaspoon at a time until it thickens slightly.
- Bring the muffin tin into the bath and set it on the edge of the tub or a non-slip surface within reach. Give the child a wide silicone brush or let them use their fingers—both work perfectly.
- Rinse the walls with the showerhead or by splashing water at the end of bath time. Yogurt paint rinses off ceramic tile with no scrubbing required.
Storage: Any unused yogurt paint can be covered and refrigerated for up to two days. Stir before reusing.
Best for: Babies 6 months and up, first bath paint experience, families who want zero non-food ingredients.
Recipe 2: Cornstarch Bath Paint (Best Consistency for Actual Painting)
Cornstarch bath paint has a smooth, slightly glossy consistency that’s closer to real paint than any other recipe on this list. It spreads beautifully with a brush, holds color vibrantly, and sticks to wet tile better than yogurt or soap-based paints. It requires a few minutes of cooking but the result is noticeably more satisfying to paint with.
What you’ll need:
- 3 tablespoons cornstarch per color
- 1 cup cold water per color (or divide one large batch into colors after cooking)
- Food coloring
- A small saucepan
For a multi-color batch:
- 6 tablespoons cornstarch
- 2 cups cold water
- Food coloring added after cooking and dividing
Instructions:
- Whisk cornstarch and cold water together in a small saucepan until fully smooth. Start with cold water—adding cornstarch to hot water causes immediate lumping.
- Heat over medium heat, stirring continuously. The mixture will look thin and slightly milky for several minutes—keep stirring and don’t walk away.
- Watch for the transformation. At around 160°F the mixture thickens rapidly from a thin liquid to a thick, translucent gel. Remove from heat immediately once it reaches a smooth, pudding-like consistency—overcooking makes it too stiff.
- Divide the hot gel equally into small bowls—one per color you want to make.
- Add food coloring to each bowl while still warm and stir thoroughly. Warm gel accepts color more readily than cold and produces more even distribution.
- Allow to cool completely before bath time. The paint thickens as it cools—if any portion becomes too stiff, stir in a few drops of warm water to loosen.
- Present in small bowls with a brush for each color. Cornstarch paint is thick enough to use a brush with real painting control—older toddlers and preschoolers can make more intentional marks with this recipe than with thinner soap-based paints.
- Rinse off tile with warm water at the end of bath time—cornstarch paint dissolves easily without scrubbing.
Storage: Covered in the refrigerator for up to one week. Reheat briefly and stir before reusing if the gel has become too firm.
Best for: Toddlers and preschoolers who want to actually paint rather than just smear, creating more detailed artwork on the tile, families who want a recipe with real paint-like consistency.
Recipe 3: Dish Soap Bath Paint (Quickest to Make, Easiest Cleanup)
Dish soap paint is the fastest recipe on this list—mix soap and cornstarch, add color, done. No cooking, no special ingredients, and cleanup is essentially automatic since the soap in the paint cleans the tile as it rinses off. The consistency is lighter and more translucent than cornstarch or yogurt paint, which makes it great for color mixing and layering but less opaque for covering large areas.
What you’ll need:
- 2 tablespoons clear or white dish soap or baby wash per color
- 1 tablespoon cornstarch per color
- Food coloring
- Small bowls or a muffin tin
Instructions:
- Combine the dish soap and cornstarch in a small bowl and stir until fully smooth. The cornstarch thickens the soap from a thin liquid into a consistency closer to paint.
- Add food coloring and stir thoroughly. Dish soap’s slightly translucent base produces more jewel-toned, transparent colors rather than the opaque, pastel-like colors of yogurt paint—both are beautiful but different aesthetically.
- Adjust the consistency. For a thicker paint that sticks to the wall better, add more cornstarch a half teaspoon at a time. For a thinner, more watercolor-like consistency, add a few drops of water.
- Repeat for each color in separate bowls.
- Bring into the bath with brushes or let children use fingers and palms.
- Cleanup: The soap content means the paint essentially cleans the tile as it rinses—no scrubbing required. The bath water will look slightly soapy and colored, which is normal and harmless.
Note on dish soap choice: Baby wash works slightly better than dish soap for this recipe because it’s gentler on sensitive skin and eyes—important since bath paint inevitably ends up near faces. If dish soap is what you have, use a gentle, fragrance-free version rather than a degreasing formula.
Best for: Quick setups when you need bath paint now, families who want maximum cleanup ease, color mixing play where children layer and blend colors.
Recipe 4: Shaving Cream Bath Paint (Best Texture for Sensory Play)
Shaving cream bath paint has a completely different sensory quality from the other recipes—it’s fluffy, cool, and slightly spongy rather than smooth and slippery. It squishes when pressed, holds shapes made with fingers, and has a satisfying resistance when applied with a brush. Older toddlers and preschoolers tend to love the foam texture for sculpting as much as painting.
What you’ll need:
- 1 can regular foam shaving cream (not gel—foam shaving cream only)
- Food coloring
- Small bowls or a muffin tin
Instructions:
- Squirt approximately two tablespoons of shaving cream into each bowl of a muffin tin or into separate bowls—one per color.
- Add food coloring to each portion—start with five to eight drops of liquid food coloring and fold gently into the foam. Folding rather than stirring preserves the foam texture and produces a marbled effect; stirring fully deflates the foam and produces a flat, liquid paint.
- For a fully colored foam without the marble effect, stir more vigorously to fully incorporate the color. The trade-off is a slightly less fluffy texture.
- Bring into the bath immediately. Shaving cream deflates over time—use it within 15–20 minutes of preparation for the best texture.
- Application options: Brushed onto tile, applied with fingers and palms, or scooped and pressed into shapes directly on the tub surface. Shaving cream paint is versatile in how it can be used.
- Rinse off with warm water—shaving cream dissolves completely and rinses cleanly from tile surfaces.
Age note: Shaving cream contains chemicals that make it less suitable for babies who actively mouth everything. Use for children three and up who are past the mouthing stage, or substitute the shaving cream with whipped cream (the same recipe with a different base) for younger children who might mouth the paint.
Whipped cream variation: Replace shaving cream with plain whipped cream (from a can or freshly whipped) for a completely edible version with the same fluffy texture. Whipped cream deflates faster than shaving cream—use within five minutes of preparation.
Best for: Children three and up, sensory-focused bath play, children who enjoy sculpting and three-dimensional textures rather than flat painting.
Recipe 5: Baking Soda Fizzing Bath Paint (Most Exciting Reaction)
This recipe adds an element of science to bath paint—the baking soda paint fizzes and bubbles when it contacts the acidic bath water, creating a reaction that children find genuinely thrilling. The paint is applied to the dry tile above the water line; when the child splashes water onto it or drags wet hands across it, it fizzes on contact. It’s the most engaging recipe in terms of creating a reaction rather than just a visual.
What you’ll need:
- 3 tablespoons baking soda per color
- 1–2 teaspoons water per color (just enough to form a paste)
- Food coloring
- Small bowls
- Optional: a small spray bottle filled with water or diluted white vinegar for more dramatic fizzing
Instructions:
- Combine baking soda and water in a small bowl to form a thick paste—similar consistency to toothpaste. The paste needs to be thick enough to apply to dry tile and stay in place rather than running.
- Add food coloring and stir thoroughly until the color is fully uniform.
- Repeat for each color in separate bowls.
- Apply the paint to the dry tile above the water line using a brush or fingers before the child gets in the bath, or have the child apply it themselves at the start of bath time before getting fully wet. The paint sticks best to dry tile—application to already-wet tile results in paint that immediately starts running.
- Once the paint is applied, let the child splash water onto the painted sections to trigger the fizzing reaction. For a more dramatic effect, fill a small spray bottle with diluted white vinegar and let the child spray the painted tile—the vinegar reacts more vigorously with baking soda than plain water, producing more visible fizzing.
- Rinse the tile with warm water at the end—baking soda washes off completely with no scrubbing.
The chemistry: The fizzing is a classic acid-base reaction—baking soda (alkaline) reacting with the slightly acidic bath water or vinegar to produce carbon dioxide bubbles. Explaining this to older children while they play is an excellent informal science lesson.
Storage: Baking soda paste keeps for several days in a covered container at room temperature. Stir before reusing.
Best for: Preschoolers and older toddlers who enjoy cause-and-effect play, adding a science element to bath time, children who have moved past sensory exploration into more interactive play.
Recipe 6: Conditioner Bath Paint (Softest on Skin, Best Smell)
Hair conditioner produces bath paint with the silkiest feel of any recipe on this list—it’s nourishing rather than drying on skin, leaves hair and skin feeling soft rather than stripped, and has a pleasant fragrance that makes bath time smell wonderful. It’s also one of the most straightforward recipes to make—just conditioner, cornstarch, and color.
What you’ll need:
- 2 tablespoons white hair conditioner per color (white or clear conditioner—colored conditioner affects the final color)
- 1 tablespoon cornstarch per color
- Food coloring
- Small bowls or a muffin tin
Instructions:
- Combine the conditioner and cornstarch in a small bowl and stir thoroughly until fully smooth. The cornstarch thickens the conditioner from a lotion-like consistency into a paint-like one.
- Add food coloring and stir until the color is fully uniform throughout.
- Adjust consistency. For a thicker paint that holds brushstrokes, add a little more cornstarch. For a thinner consistency that spreads more easily with fingers, add a few drops of water.
- Repeat for each color in separate bowls.
- Bring into the bath with brushes or let children use hands.
- Rinse off with warm water—conditioner dissolves easily and leaves no residue on tile or the tub.
Skin benefit note: Unlike soap-based bath paints that can be slightly drying, conditioner paint is actively moisturizing. For children with dry skin or eczema, this is the most skin-friendly recipe on the list.
Storage: Covered in the refrigerator for up to one week. Stir before reusing.
Best for: Children with dry or sensitive skin, bath time where you want skin to feel soft afterward, families who want paint that smells pleasant rather than neutral.
Recipe Comparison at a Glance
| Recipe | Best Age | Texture | Safe to Mouth | Cleanup |
|---|---|---|---|---|
| Yogurt | 6 months+ | Smooth, opaque | Yes | Easy |
| Cornstarch | 12 months+ | Smooth, glossy | Yes | Easy |
| Dish soap | 12 months+ | Light, translucent | Use baby wash | Very easy |
| Shaving cream | 3 years+ | Fluffy, foamy | No (use whipped cream variation) | Easy |
| Baking soda fizzing | 2 years+ | Paste-like | Yes | Easy |
| Conditioner | 12 months+ | Silky, smooth | No | Easy |
Making Bath Paint More Engaging
The paint is the starting point—a few simple additions extend the play significantly:
Tools that change the experience:
- Wide silicone brushes for broad strokes and covering large areas quickly
- Fine paintbrushes for older children who want more detail
- Sponges cut into shapes for stamping patterns
- Their own hands, feet, and elbows for the most immediately satisfying sensory experience
Activities that extend play:
- Color mixing: Give children two or three primary colors and let them discover what happens when they mix red and blue on the tile wall
- Drawing challenges: Call out simple shapes or letters and see if they can draw them—works well for preschoolers who are starting to recognize letters and numbers
- Painting each other (gently, on arms and feet only)—this is universally hilarious and very popular with toddlers
- Making handprints and footprints on the tile and then watching them rinse off
- Timed painting: Give older children a topic (draw a house, draw a rainbow) and a countdown
Tips for Maximum Tile Coverage Without Mess
- A muffin tin is the ideal container for multiple colors in the bath—it’s stable, won’t tip, and keeps colors separated until children decide to mix them.
- Non-slip mat under the muffin tin if placing it on the tub edge—tile and ceramic are slippery when wet.
- Wide, flat brushes cover tile faster and are easier for young children to control than thin brushes.
- Make more paint than you think you need. Running out of a favorite color mid-bath is a significant event in toddler terms.
- Test the consistency before bath time by applying a small amount to a dry tile—it should hold for at least 30 seconds without running. If it runs immediately, add more thickening agent.
Cleanup Tips
Most of these recipes are designed to rinse off with minimal effort—but a few tips help:
- Rinse while still wet. All of these recipes clean up more easily before they dry. Use the showerhead to rinse tile walls before getting out of the bath.
- Food coloring on grout: If any color clings to grout, a quick wipe with a damp cloth usually resolves it. For stubborn grout staining, a paste of baking soda and water applied for five minutes before rinsing handles it.
- Skin staining: Food coloring can temporarily stain between fingers and under nails. It washes off with normal handwashing within one or two washes. Natural colorants like turmeric and beet are more persistent on skin—a small amount of cooking oil rubbed into the stain before washing helps lift it.
- The tub: Most bath paint recipes leave the tub slightly colored. A quick wipe with a cloth after draining handles this—none of these recipes stain acrylic or ceramic tubs permanently.
FAQ
Will bath paint stain my tiles or grout? On sealed ceramic tile, all of these recipes rinse off completely. Unsealed, porous, or colored grout can absorb food coloring in some cases—do a small test patch first if you’re unsure about your grout. Natural colorants (beet, turmeric) have a slightly higher staining risk on porous surfaces than synthetic food coloring.
Can I use these recipes in a bath with baby siblings? The yogurt, cornstarch, and baking soda recipes are safe for bath water that a baby will be sitting in. Avoid the shaving cream and conditioner recipes for baths shared with babies under 12 months—the non-food ingredients aren’t intended to be ingested.
How do I make the colors more vibrant? Switch from liquid food coloring to gel food coloring—it’s significantly more concentrated and produces much more vivid colors in opaque white bases like yogurt and conditioner. Alternatively, use more drops of liquid food coloring than you think you need—white bases dilute color significantly.
My paint keeps running off the tile. What’s wrong? Either the paint is too thin or the tile is too wet. Thicken by adding more cornstarch (for cornstarch and soap recipes) or leaving in the refrigerator for 20 minutes (for yogurt and conditioner). Apply paint to drier sections of tile above the water line rather than to tile that’s already wet from splash.
The Bottom Line
Bath paint is one of the simplest, highest-return activities in a toddler parent’s toolkit—ten minutes of prep turns a frequently negotiated daily task into something children run toward. Start with the yogurt recipe for babies and very young toddlers—it’s the safest, requires no cooking, and needs only one ingredient beyond color. Move to the cornstarch recipe for older toddlers who want something that actually behaves like paint. Add the fizzing baking soda version when you want to introduce a cause-and-effect element that preschoolers find genuinely exciting. All of them wash off, all of them are safe, and every single one of them will be more effective at making bath time easier than any amount of convincing, bribing, or negotiating.
Enjoyed this project? Get even more DIY ideas that save (and make) you money.
Join our free newsletter for profitable DIY projects, clever cleaning hacks, home ideas, and creative crafts delivered straight to your inbox.
✓ Free forever • No spam • Unsubscribe anytime




