
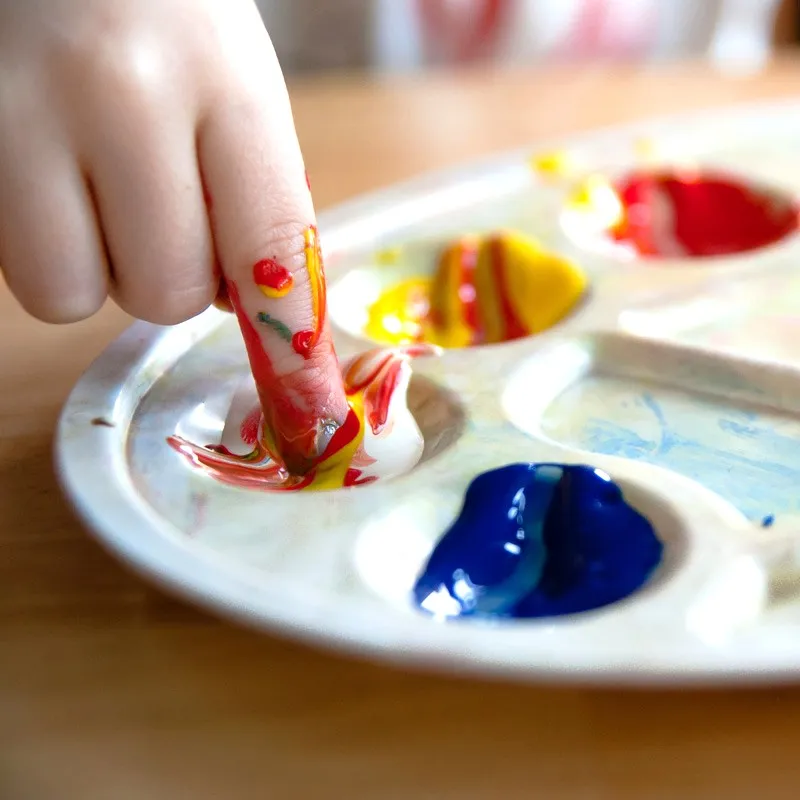
If you have a baby or toddler who puts everything directly into their mouth—which is all of them—regular finger paint is off the table. Most commercial finger paints contain synthetic dyes, thickeners, and preservatives that are labeled non-toxic but weren’t designed to be eaten. And telling a one-year-old not to taste the paint is a conversation that goes exactly nowhere.
Edible finger paint solves the problem completely. Made from food-grade ingredients you already have in the kitchen, these recipes are safe to eat, vibrant enough to actually paint with, and easy enough to make in under ten minutes. Some of them taste genuinely good, which is either a bonus or a problem depending on how much painting versus eating you want to happen.
This guide covers seven different base recipes—each with a different texture, consistency, and set of benefits—so you can match the recipe to what you have on hand and what works best for your child’s age and sensory preferences.
A Few Things to Know Before You Start
Food Coloring Safety
Most of these recipes use food coloring to create the paint colors. Standard liquid food coloring (like McCormick) is FDA-approved and safe for consumption in the small amounts used here. If you prefer to avoid synthetic dyes entirely, natural alternatives work well:
- Red/pink: Beet juice, strawberry puree, raspberry juice
- Yellow: Turmeric powder, mango puree
- Orange: Carrot juice, paprika
- Green: Spinach juice, matcha powder, avocado
- Blue/purple: Blueberry juice, purple cabbage juice
- Brown: Cocoa powder
Natural colorants produce softer, more muted tones than synthetic food coloring—beautiful in their own way, but less vivid.
Allergy Awareness
Several recipes use dairy (yogurt, pudding), eggs, or wheat. Always check for allergies before choosing a recipe, particularly for babies under one year who haven’t been introduced to all foods yet. The corn syrup and gelatin-based recipes are the most allergen-friendly options.
Surface and Setup Tips
- Use a high chair tray, silicone mat, or butcher paper taped to the table as the painting surface.
- Strip babies down to a diaper or dress them in something you don’t mind staining—food coloring can stain clothing even in small amounts.
- Expect eating. The goal is sensory exploration, and tasting is part of that. These recipes are designed with that in mind.
- Make small batches. Most of these recipes keep for a few days in the refrigerator, but fresh batches are easy enough to make that there’s no reason to make more than you’ll use in a session or two.
What You’ll Need (Depending on the Recipe)
- Plain whole milk yogurt
- Instant pudding mix
- Cornstarch
- Corn syrup
- Flour
- Cream of wheat or baby rice cereal
- Avocado
- Food coloring or natural colorants
- Small bowls or a muffin tin for dividing colors
- Spoons for mixing
- Water
Recipe 1: Yogurt Finger Paint (Best for Babies 6 Months and Up)
Yogurt-based finger paint is the most popular edible paint recipe for good reason—it’s thick enough to paint with, smooth enough to spread easily, completely safe to eat in any quantity, and most babies already know and enjoy the taste. It’s the best starting recipe for very young babies who are guaranteed to eat most of what they touch.
What you’ll need:
- 1 cup plain whole milk yogurt (full-fat gives a thicker, more opaque paint)
- Food coloring or natural colorants
- A muffin tin or several small bowls
Instructions:
- Spoon equal amounts of yogurt into each cup of a muffin tin or into separate small bowls—one per color you want to make. A standard batch divides into four to six colors comfortably.
- Add food coloring or natural colorant to each portion. Start with two to three drops of food coloring and stir thoroughly to assess the color before adding more. Yogurt’s white base requires more colorant than a clear base—expect to use more drops than you would for frosting or water.
- Adjust the consistency if needed. Full-fat yogurt is usually thick enough to use as-is. If it’s too thin to hold a mark on paper, stir in a small amount of cornstarch (half a teaspoon at a time) until you reach a consistency similar to thick house paint.
- Place the muffin tin or bowls on the painting surface and let the child begin. For babies under one, place directly on the high chair tray so they can finger-paint directly on the tray surface without paper—it’s less frustrating for young babies who haven’t developed the pincer grip needed to pick up a paintbrush.
- Store leftovers covered in the refrigerator for up to three days. Stir before reusing—yogurt separates slightly during storage.
Color tip: For the most vibrant yogurt paint, use Greek yogurt (strained and denser than regular yogurt) and gel food coloring rather than liquid. Gel food coloring is significantly more concentrated and produces much more vivid color in white dairy bases.
Best for: Babies 6 months and up, first-time sensory painting, children who will definitely eat the paint.
Recipe 2: Cornstarch Finger Paint (Best Texture for Painting on Paper)
Cornstarch-based paint has a smooth, slightly glossy texture that applies beautifully to paper and dries to a finish that looks remarkably similar to commercial finger paint. It’s the best edible recipe if you want the painting to actually look like a painting—the texture holds brushstrokes and finger marks cleanly rather than smearing like yogurt or pudding.
What you’ll need:
- 3 tablespoons cornstarch
- 1 cup cold water
- Food coloring
- A small saucepan
Instructions:
- Whisk the cornstarch and cold water together in a small saucepan until fully smooth. Start with cold water—adding cornstarch to hot water causes immediate lumping that’s difficult to smooth out.
- Heat over medium heat, stirring continuously. The mixture will look thin and milky for the first few minutes—keep stirring and don’t walk away.
- Continue stirring as it thickens. At around 160°F the mixture will suddenly thicken significantly—this happens fast. Keep stirring as it transforms from thin liquid to a thick, translucent gel.
- Remove from heat immediately once it reaches a smooth, thick, pudding-like consistency. Overcooking makes it too stiff and difficult to divide and color.
- Divide into small bowls while still warm and add food coloring to each portion. Stir thoroughly—the warm gel accepts color more readily than cold.
- Allow to cool to room temperature before giving to children. The paint thickens further as it cools—if it becomes too stiff, stir in a few drops of warm water to loosen.
- Store covered in the refrigerator for up to one week. Reheat briefly and stir before reusing if the gel has become too firm.
Why it works on paper: The gelatinized cornstarch creates a film-forming paint that dries to a slightly stiff, glossy finish rather than soaking into the paper. Paintings made with this recipe look genuinely impressive once dry.
Best for: Toddlers 12 months and up, painting on paper, creating artwork to keep, children who enjoy a smooth, cool sensory experience.
Recipe 3: Instant Pudding Finger Paint (Most Fun to Eat)
Pudding paint is the recipe that gets the biggest reaction from toddlers—it tastes great, has a satisfying creamy texture, and comes in flavors that produce naturally beautiful colors. Chocolate makes deep brown, vanilla makes a creamy white-yellow base for coloring, and butterscotch makes a warm amber. It’s less precise as a painting medium than the cornstarch version but significantly more exciting as an edible experience.
What you’ll need:
- 1 box instant pudding mix (vanilla for a neutral base, or chocolate, butterscotch, or pistachio for natural color)
- Milk (as directed on the package—usually 2 cups)
- Food coloring (if using vanilla as the base)
- Small bowls
Instructions:
- Prepare the instant pudding according to the package directions, whisking the mix and milk together for two minutes until the pudding begins to thicken.
- Divide into bowls immediately before the pudding sets fully. It’s easier to divide and color while still pourable.
- Add food coloring to each bowl if using vanilla as a neutral base for multiple colors. Stir thoroughly—pudding’s creamy base gives colors a slightly pastel quality rather than fully saturated.
- Allow to set for five minutes until the pudding has firmed to a spoonable, paint-like consistency.
- Serve immediately on a high chair tray or painting surface—pudding continues to firm in the refrigerator and can become too stiff for finger painting if stored for more than a few hours before use.
- For a looser consistency, add a splash of extra milk before serving and stir to loosen.
Flavor combinations for natural color:
- Chocolate pudding = rich brown
- Pistachio pudding = soft green
- Banana pudding = pale yellow
- Strawberry or cherry pudding mix = pink-red
Best for: Toddlers 12 months and up (check dairy and egg content for younger babies), maximum sensory engagement and eating, shorter painting sessions where the focus is on fun rather than creating artwork to keep.
Recipe 4: Flour and Water Finger Paint (Most Economical)
This is the most budget-friendly edible finger paint on the list—made from nothing but flour, water, salt, and food coloring. The salt acts as a preservative and adds a slight texture that some children find satisfying to finger-paint with. The finished paint has a matte finish on paper and a slightly grainy texture that’s different from the smooth cornstarch version—some children prefer it, particularly those who enjoy more tactile sensory experiences.
What you’ll need:
- 1 cup all-purpose flour
- 1 cup cold water
- 1 cup boiling water
- ½ teaspoon salt
- Food coloring
- A medium saucepan
Instructions:
- Whisk the flour and cold water together in a saucepan until completely smooth. Lumps at this stage will remain lumps in the finished paint—take the time to get it fully smooth before applying heat.
- Add the boiling water slowly while stirring continuously.
- Heat the mixture over medium heat, stirring constantly, until it thickens into a smooth, paste-like consistency. This takes three to five minutes. The salt can be added at any point during heating.
- Remove from heat once the paste has reached a thick, smooth, uniform consistency.
- Divide into bowls while warm and add food coloring to each portion, stirring thoroughly.
- Cool completely before giving to children—flour paste retains heat and needs time to cool to a safe handling temperature.
- Store covered in the refrigerator for up to five days. The paste may thicken significantly in the fridge—add a small amount of water and stir before reusing.
Best for: Budget-conscious batches, large quantities for group activities, toddlers who enjoy a slightly grainy, matte-finish paint.
Recipe 5: Cream of Wheat or Baby Cereal Finger Paint (Best for Babies Under 12 Months)
For very young babies—particularly those being introduced to solid foods—a paint made from their familiar baby cereal is the most reassuring option from a safety perspective. They already eat this food daily, so there’s no risk of an unexpected reaction and no concern about quantity consumed. The texture is smooth, thick, and easy to spread with an open palm.
What you’ll need:
- ¼ cup dry baby rice cereal or cream of wheat
- Breast milk, formula, or whole milk to mix (use whatever the baby already drinks)
- Natural colorants only (beet juice for pink, pureed fruit for color—skip synthetic food coloring for babies under one)
- Small bowls
Instructions:
- Prepare the cereal using a slightly thicker ratio than for eating—less liquid than usual to produce a paint-like consistency rather than a runny porridge. The finished texture should be thick enough to hold a finger impression.
- Divide into small bowls and add natural colorants to each portion. Stir thoroughly to distribute color evenly.
- Serve at room temperature—not warm. Warm paint is uncomfortable for painting and can become runnier than intended as it cools.
- Use immediately. Baby cereal paint doesn’t store well—the cereal continues to absorb liquid and becomes unworkably stiff within a few hours. Make only what you’ll use in a single session.
- Set up on a clean high chair tray with no paper—this paint is best applied directly on the tray surface for babies who don’t yet have the hand control for paper-based painting.
Best for: Babies 4–12 months, first sensory paint experiences, families who prefer to use only foods the baby already eats.
Recipe 6: Corn Syrup Finger Paint (Most Vibrant Colors)
Corn syrup produces the most vivid, translucent colors of any edible finger paint base—almost like painting with stained glass. The thick, sticky consistency gives it excellent staying power on paper, and the transparency of the corn syrup allows food coloring to show at full saturation rather than being diluted by a white base. It’s the best recipe if you want the artwork to look genuinely striking.
What you’ll need:
- ½ cup light corn syrup per color
- Food coloring (gel food coloring produces the most vivid results in clear corn syrup)
- Small bowls or squeeze bottles
Instructions:
- Pour corn syrup into small bowls—one per color. No cooking required.
- Add gel food coloring one drop at a time, stirring thoroughly between each drop. Corn syrup accepts color beautifully and the results are immediate—the translucent base shows full color saturation with just one or two drops of gel coloring.
- Stir until fully uniform in color with no streaks.
- Adjust consistency if needed. Corn syrup is quite thick—if it’s too stiff for young children to spread easily, add a few drops of water and stir. It thins quickly so add water conservatively.
- For squeeze bottles: transfer the colored corn syrup into small squeeze bottles for a different painting experience—children can squeeze patterns and lines onto paper before spreading with fingers.
- Store covered at room temperature for several weeks—corn syrup’s high sugar content inhibits bacterial growth, giving this paint the longest shelf life of any recipe in this guide.
Important note: Corn syrup is very sweet and very sticky. Expect enthusiastic eating and significant stickiness during cleanup. A warm, wet cloth wipe-down after the session handles the stickiness easily.
Best for: Toddlers 12 months and up, creating artwork to display, maximum color vibrancy, sessions where you want the finished painting to look impressive.
Recipe 7: Avocado Finger Paint (Best Natural, Dye-Free Option)
For families who prefer to avoid food coloring entirely—including natural colorants—avocado-based paint offers a genuinely beautiful, naturally green paint that requires no dye at all. It’s rich, creamy, and has a texture that spreads beautifully. The color is what it is—a range of greens from pale to deep—but within that palette there’s natural variation that produces genuinely lovely artwork.
What you’ll need:
- 2 ripe avocados
- 1–2 tablespoons breast milk, formula, or whole milk (to adjust consistency)
- A pinch of salt (optional—preservative and flavor)
- Optional additions for color variation: beet juice for pink-green, turmeric for golden-green, spinach juice for deeper green
Instructions:
- Scoop the avocado flesh into a bowl and mash thoroughly with a fork until completely smooth. For the smoothest possible texture—which paints better than a chunky version—blend with an immersion blender or regular blender.
- Add milk one tablespoon at a time to thin to a paint-like consistency. You want it smooth and spreadable but thick enough to hold a finger mark.
- Add salt if using and stir to combine.
- Divide into separate bowls if creating color variations and add natural colorants to each.
- Use immediately or within one to two hours. Avocado oxidizes and browns quickly—even with lemon juice added, this paint has the shortest shelf life of any recipe in this guide. Make only what you’ll use in a single session and have the painting surface ready before you start mashing.
- To slow browning, press plastic wrap directly against the surface of any unused portions between sessions.
Best for: Families avoiding all food dyes, babies being introduced to avocado, children with multiple food allergies (avocado is one of the least allergenic ingredients in this guide), painting sessions focused on sensory exploration rather than colorful artwork.
Recipe Comparison at a Glance
| Recipe | Best Age | Allergens | Shelf Life | Color Vibrancy |
|---|---|---|---|---|
| Yogurt | 6 months+ | Dairy | 3 days | Moderate |
| Cornstarch | 12 months+ | None | 1 week | Good |
| Instant pudding | 12 months+ | Dairy, egg | Same day | Moderate |
| Flour and water | 12 months+ | Gluten | 5 days | Good |
| Baby cereal | 4 months+ | Varies by cereal | Same day | Soft/natural |
| Corn syrup | 12 months+ | None | Several weeks | Excellent |
| Avocado | 6 months+ | None | Same day | Natural only |
How to Make Natural Colors More Vibrant
Natural colorants produce softer tones than synthetic food coloring, but a few techniques help maximize their intensity:
- Reduce beet or berry juice by simmering in a small saucepan until concentrated before adding to paint. A reduced juice is significantly more vibrant than fresh-pressed.
- Use turmeric powder rather than turmeric juice for yellow—the powder form is far more concentrated.
- Add a pinch of baking soda to purple cabbage juice to shift it toward blue; add a few drops of lemon juice to shift it toward pink-red.
- Layer colors in the corn syrup recipe—a small amount of reduced beet juice swirled into corn syrup produces a stunning deep pink that rivals synthetic coloring.
Cleanup Tips
- Act before it dries. Most edible paints clean up easily with a damp cloth while wet. Dried cornstarch or flour paste requires soaking.
- Warm water is your friend. Most of these recipes wash out of clothing easily with warm water and a small amount of dish soap before going in the washing machine.
- Natural colorants stain more than synthetic. Turmeric and beet juice in particular stain clothing and surfaces. Rinse these off skin and surfaces quickly—they don’t wash out of fabric as easily as synthetic food coloring.
- Protect the table. A silicone mat or sheet of butcher paper under the painting surface contains the mess to a wipeable area.
FAQ
At what age can babies start finger painting? With edible paint, as young as four to six months old—once they have enough core strength to sit supported in a high chair. At this age, the activity is purely sensory rather than creative, but babies respond enthusiastically to the tactile experience of paint on their hands.
Will food coloring stain my child’s skin? Synthetic food coloring can temporarily stain skin, particularly around the mouth and fingernails. It washes off completely within one to two handwashings. Natural colorants like beet juice can be more stubborn on skin—a little bit of cooking oil rubbed on the stain before washing helps lift it.
Can I use these recipes for older children too? Absolutely. The cornstarch and corn syrup recipes in particular produce high-quality paint that works well for children of any age. Older children can also experiment with mixing colors and appreciate the more controllable textures.
How do I preserve the finished artwork? Paintings made with yogurt, pudding, or avocado won’t preserve well—they’ll mold. For artwork you want to keep, use the cornstarch or corn syrup recipes, which dry to a more stable finish. Photograph yogurt and pudding paintings before they deteriorate.
The Bottom Line
The right edible finger paint recipe depends on how old your child is, what ingredients you have on hand, and whether you want art to keep or just a sensory experience. Start with the yogurt recipe for babies under twelve months—it’s the safest and requires no cooking. Move to the cornstarch recipe when you want artwork that actually looks like artwork. Use corn syrup when you want maximum color impact. And if you’re avoiding all additives, avocado gives you a naturally beautiful paint with zero ingredients you’d worry about. All of them wash off, none of them are dangerous if eaten, and all of them are more fun than anything that comes in a plastic tub.
Enjoyed this project? Get even more DIY ideas that save (and make) you money.
Join our free newsletter for profitable DIY projects, clever cleaning hacks, home ideas, and creative crafts delivered straight to your inbox.
✓ Free forever • No spam • Unsubscribe anytime




