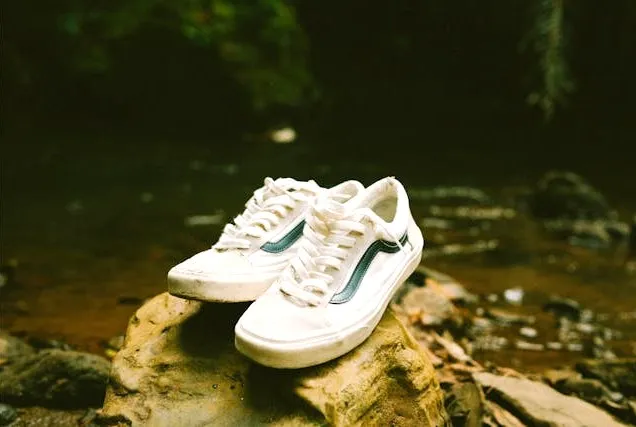
White Vans are one of those shoes that look perfect out of the box and then spend the rest of their lives slowly working against you. They get dirty fast, they’re notoriously difficult to clean without making them worse, and the yellowing problem—where you clean them and they come out looking more yellow than before—is so common it has its own reputation.
The yellowing isn’t a coincidence or bad luck. It’s a predictable chemical reaction that happens when specific cleaning methods, drying conditions, and shoe materials combine in the wrong way. Understanding what causes it is what allows you to avoid it—and to actually get your white Vans clean without the yellow aftermath.
This guide covers seven cleaning methods specifically chosen and adapted for white Vans canvas, the rubber sole, and the rubber toe cap—the three surfaces that behave differently and need slightly different approaches. Each method includes the specific steps that prevent yellowing rather than cause it.
Why White Vans Turn Yellow (The Actual Cause)
Before any cleaning method, it helps to understand the yellowing mechanism—because the same thing that makes Vans look worse after cleaning is avoidable once you know what’s causing it.
Detergent residue oxidation: This is the most common cause of post-cleaning yellowing. When soap or detergent isn’t fully rinsed out of canvas fibers, the residue reacts with UV light (sunlight or even indirect daylight) and oxidizes to a yellow compound. The cleaner your shoes look when you put them out to dry, the worse the yellowing can be—because there’s more residue to react. This is why shoes often come out of the wash looking clean but turn yellow as they dry.
Sun drying: Drying white Vans in direct sunlight accelerates oxidation of both detergent residue and the canvas material itself. The UV rays that make sunlight feel clean and natural are exactly what drives the yellowing reaction.
Heat drying: The dryer does the same thing—heat accelerates oxidation of residue left in the fibers.
Material oxidation: The rubber compound in Vans soles naturally yellows over time through oxidation—a process called “sole oxidation” that’s separate from cleaning-related yellowing. This type of yellowing is harder to reverse but responds to specific treatments.
The fix for all of these: Rinse more thoroughly than you think you need to, dry away from heat and direct sunlight, and use the minimum amount of cleaning product necessary.
What You’ll Need (Depending on the Method)
- Baking soda
- White vinegar
- Dish soap
- White toothpaste (not gel)
- Hydrogen peroxide (3%)
- OxiClean or oxygen bleach
- A magic eraser (melamine foam)
- A soft-bristle brush or old toothbrush
- Clean white cloths or microfiber cloths
- Cold water
- A bowl
- White paper towels or white tissue paper (for stuffing)
- A well-ventilated area away from direct sunlight for drying
Method 1: Baking Soda and White Vinegar Paste (Best All-Around Method)
This is the most reliable method for cleaning white Vans canvas without triggering yellowing—and the one most specifically suited to avoiding the post-clean yellow problem. Baking soda is mildly alkaline and gently lifts dirt; white vinegar is mildly acidic and neutralizes the alkaline residue before it can oxidize. Together they clean effectively and leave no yellowing residue in the fibers.
- Remove the laces first and set aside—clean them separately (see the laces section below). Laces left in during cleaning prevent even coverage and trap dirty water in the eyelets.
- Knock the shoes together over a bin or outside to dislodge any loose dirt and dried mud. Brush with a dry toothbrush to loosen caked-on surface dirt. Attempting to wet-clean shoes with loose dirt on them turns it into muddy streaks that smear across the canvas.
- Mix the cleaning paste: combine one tablespoon of baking soda, one tablespoon of white vinegar, and one tablespoon of warm water in a small bowl. It will fizz briefly—this is normal. Stir until the fizzing subsides and you have a smooth paste with a consistency similar to yogurt.
- Apply the paste to the canvas using an old toothbrush, working it into the fabric in small circular motions. Cover the entire canvas upper, not just the visibly dirty areas—uneven treatment leaves obvious clean-dirty boundaries on white canvas.
- Work the paste into the fabric firmly, paying extra attention to the toe area, sides, and any visible stains. The toothbrush bristles get into the canvas weave where a cloth can’t reach.
- Leave the paste on for 10–15 minutes. Don’t let it dry completely—if it starts to dry before the time is up, add a few drops of water with your finger.
- Rinse thoroughly with cold water. This step is the most important one for preventing yellowing. Use running cold water and continue rinsing long after the water runs clear—residual baking soda left in the fibers can oxidize just like detergent. Squeeze and flex the canvas as you rinse to work water through all the fibers.
- Do a final rinse with a cloth dampened with plain white vinegar wiped across the canvas. This neutralizes any remaining alkaline baking soda residue—the primary source of post-clean yellowing.
- Stuff the shoes with white paper towels or white tissue paper to absorb internal moisture and maintain shape during drying. Never use newspaper—the ink transfers to damp white canvas.
- Dry in a well-ventilated area away from direct sunlight and heat. A shaded outdoor spot with good airflow, or indoors near an open window, is ideal. Expect four to eight hours for full drying depending on humidity.
Best for: General canvas cleaning, removing everyday dirt and grime, first-time deep clean of moderately dirty Vans.
Method 2: Dish Soap and Cold Water (Best for Light Dirt and Regular Maintenance)
For Vans that are lightly dirty—surface dust, minor marks, recent light soiling—dish soap and cold water used correctly is the gentlest effective method and the one that poses the least risk of yellowing when the rinse step is done properly.
- Remove laces and brush off loose dirt as in Method 1.
- Mix one teaspoon of dish soap with two cups of cold water. One teaspoon—not a tablespoon, not a generous squirt. The less soap used, the less residue remains in the canvas after rinsing. More soap does not mean cleaner shoes.
- Dip a soft brush or cloth into the solution and apply to the canvas with gentle circular scrubbing motions. Work across the entire canvas upper.
- For the rubber sole and toe cap, use the same solution but with a slightly stiffer brush—the rubber tolerates more pressure than the canvas.
- Rinse the canvas extremely thoroughly with cold running water—more thoroughly than feels necessary. Dish soap requires more rinsing than baking soda-based methods because it’s a surfactant that clings to fibers. Any remaining soap will yellow under UV exposure.
- Wipe the canvas with a clean cloth dampened with plain white vinegar after rinsing—same as Method 1—to neutralize any residual soap.
- Stuff with white paper towels and dry away from sunlight and heat.
Note on water temperature: Always cold water—never warm or hot. Hot water shrinks canvas slightly, sets protein-based stains, and accelerates oxidation of any cleaning residue left in the fibers.
Best for: Lightly dirty Vans, quick cleans between deeper sessions, maintaining shoes that are already relatively clean.
Method 3: Baking Soda and Hydrogen Peroxide (Best for Stubborn Stains and Whitening)
When white Vans have gone beyond light dirt into genuine staining—grey, brown, or yellowish canvas that needs whitening rather than just cleaning—the combination of baking soda and hydrogen peroxide is the most effective whitening treatment. Hydrogen peroxide is a mild oxidizing agent that breaks down stain pigments and whitens the canvas without the harshness of bleach. This is also the best method for canvas that’s already yellowed and needs to be restored.
- Remove laces and brush off loose dirt as in previous methods.
- Mix one tablespoon of baking soda with one tablespoon of 3% hydrogen peroxide and one teaspoon of warm water. Stir to a smooth paste.
- Apply generously to the entire canvas upper using a toothbrush, working into the fabric with circular motions. Cover every section of canvas including sides and back.
- For already-yellowed canvas, apply a thicker layer and work it in particularly thoroughly to the yellowed areas.
- Place the shoes in indirect natural light—not direct sunlight—for 30 minutes to one hour. This is the critical difference from other methods: controlled UV exposure activates the hydrogen peroxide’s whitening properties without driving oxidation of residue. Indirect light (shaded natural light through a window, or a shaded outdoor spot) activates the peroxide gently; direct sun activates it too aggressively and risks uneven whitening.
- After the UV activation period, the paste will have dried slightly. Brush off any dried residue with a dry toothbrush.
- Rinse very thoroughly with cold running water, squeezing the canvas to work water through all fibers.
- Follow with a white vinegar wipe to neutralize residual alkalinity.
- Stuff with white paper towels and dry in shade or indoors.
Best for: Stained or discolored Vans, already-yellowed canvas that needs whitening, shoes that need a visible restoration rather than just a clean.
Method 4: OxiClean Soak (Best for Overall Brightness and Set-In Stains)
OxiClean and similar oxygen bleach products work through a different mechanism than chlorine bleach—they release oxygen bubbles that lift stains from fibers rather than chemically bleaching them. This makes them effective on canvas without the yellowing risk of chlorine bleach and without the structural weakening that chlorine bleach causes to fabric fibers over time.
- Remove laces and insoles. Insoles cleaned in the soak alongside the shoes often retain moisture unevenly and can cause internal dampness that leads to mildew.
- Mix the OxiClean solution according to the package directions—typically one scoop per gallon of warm water. Stir until fully dissolved before adding shoes.
- Submerge the shoes in the solution, pressing them down so all canvas is in contact with the liquid. They’ll want to float—weigh them down with a bowl or plate.
- Soak for 30 minutes to one hour for general cleaning. For heavily stained or discolored shoes, up to three hours. Don’t soak overnight—extended soaking can weaken canvas adhesives and cause the sole to separate.
- After soaking, scrub lightly with a soft brush to loosen any remaining surface dirt.
- Rinse extremely thoroughly with cold running water. OxiClean residue in canvas is a significant yellowing risk because the oxygen-releasing compounds continue to react after drying. Rinse until the water runs completely clear and then rinse twice more.
- Stuff with white paper towels and dry in shade.
Best for: Overall brightening and restoration, set-in stains that haven’t responded to paste methods, Vans that need a comprehensive clean rather than spot treatment.
Method 5: Magic Eraser for the Rubber Sole and Toe Cap (Best for Rubber Surfaces)
The rubber sole, rubber toe cap, and the rubber foxing tape (the rubber strip around the base of the canvas) on Vans respond to completely different cleaning methods from the canvas upper. The magic eraser (melamine foam) is the single most effective tool for cleaning the rubber components—it removes scuffs, yellowing, and grey rubber oxidation better than any liquid cleaner.
- Dampen the magic eraser with water—just enough to activate it. Squeeze out excess water so it’s damp rather than dripping.
- Rub the eraser firmly along the rubber sole, toe cap, and foxing strip in short, overlapping strokes. Scuffs and grey rubber oxidation will lift almost immediately.
- For the sole rubber, use firm pressure and work methodically across the entire surface rather than focusing on one spot at a time. Uneven pressure leaves obvious clean patches against uncleaned sections.
- For the toe cap, work in the direction of any texture on the rubber surface and pay particular attention to the seam where the toe cap meets the canvas—dirt accumulates heavily in this crease.
- Wipe away the grey residue with a damp cloth as you work—the eraser picks up a significant amount of rubber oxidation and scuff material that needs to be wiped away rather than redistributed.
- For heavily yellowed rubber soles, apply the baking soda and hydrogen peroxide paste (from Method 3) to the rubber after the magic eraser treatment, leave for 30 minutes in indirect light, then scrub and rinse. The combination of mechanical cleaning from the eraser and chemical whitening from the paste produces the best results on severely oxidized rubber.
- Do not use the magic eraser on canvas. Melamine foam is abrasive and damages canvas fibers—use it exclusively on the rubber components.
Best for: Rubber sole cleaning, scuff removal from the toe cap, restoring yellowed rubber foxing tape.
Method 6: White Toothpaste (Best Quick Spot Treatment)
White toothpaste—not gel—is one of the most accessible quick-clean options for white Vans. It contains mild abrasives and whitening agents that work on both canvas and rubber, and it’s something almost everyone has immediately available without needing to mix anything.
- Apply a small amount of white toothpaste directly to the dirty or stained area using a toothbrush or finger. Use plain white toothpaste only—gel toothpastes lack the abrasive compounds, whitening toothpastes are too abrasive for canvas, and colored toothpastes will stain.
- Scrub gently in circular motions with a soft toothbrush. The mild abrasive in the toothpaste lifts surface dirt and the whitening agents address minor discoloration.
- Leave for two to three minutes before rinsing.
- Rinse very thoroughly with cold water. Toothpaste residue in canvas yellows just as soap residue does—it contains similar surfactants and foaming agents.
- Wipe with a white vinegar-dampened cloth after rinsing to neutralize any residual alkalinity.
- Dry in shade, not direct sun.
Best for: Quick spot treatment, specific stained areas, situations where you need to clean a small section rather than the whole shoe.
Method 7: Machine Washing Without Yellowing (For When You Need a Full Clean)
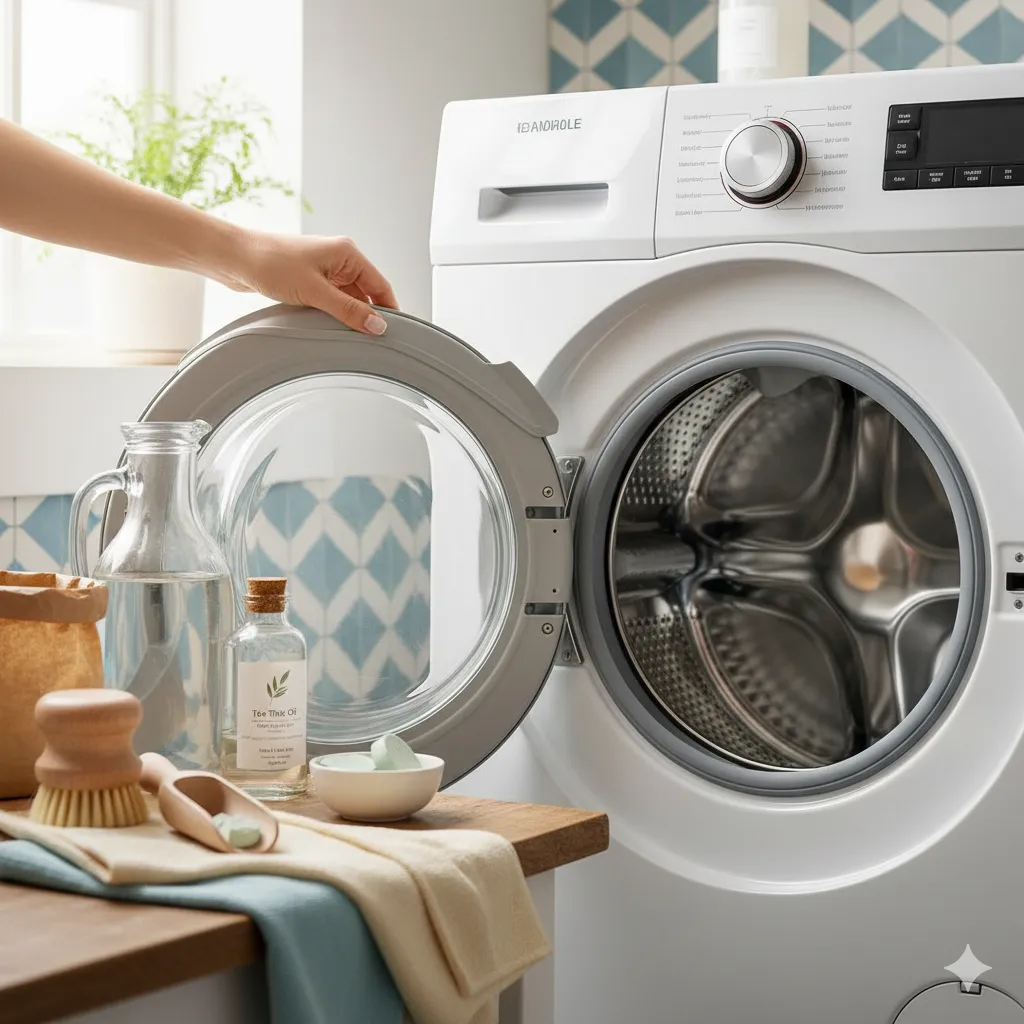
Machine washing Vans is officially not recommended by the brand—it can loosen glue, damage canvas, and warp the shape. But many people do it anyway, and with the right precautions it’s possible to machine wash white Vans and avoid the yellowing that makes most machine-washed white canvas shoes look worse.
- Remove laces and insoles before washing. Laces can be washed in a mesh bag. Insoles should be hand-washed separately.
- Brush off all loose dirt before the machine—dirt in the wash water redeposits on the canvas as grey film.
- Place shoes in a mesh laundry bag to protect them from banging against the drum.
- Add a small amount of liquid detergent—no powder, which doesn’t fully dissolve and leaves residue, and no biological detergent, which contains enzymes that can damage canvas.
- Use the coldest water setting available and the gentlest cycle—delicate or hand wash cycle.
- Add half a cup of white vinegar to the rinse cycle instead of fabric softener. The vinegar rinse is the most important anti-yellowing step in machine washing—it neutralizes detergent alkalinity in the final rinse before the shoes come out of the machine.
- Do not tumble dry. Remove immediately after the cycle ends and stuff with white paper towels.
- Dry indoors or in a shaded, well-ventilated spot away from any direct sunlight or heat source. A fan directed at the shoes (not heat—cool air only) speeds drying time without the yellowing risk of sun drying.
- Replace the paper towel stuffing after the first two hours of drying—the initial stuffing absorbs the most moisture and becomes saturated quickly.
Best for: Heavily soiled Vans that need a comprehensive clean, situations where hand cleaning hasn’t been sufficient.
Method Comparison at a Glance
| Method | Best For | Yellowing Risk | Effort Level |
|---|---|---|---|
| Baking soda + vinegar paste | General cleaning, all-round | Low | Moderate |
| Dish soap + cold water | Light dirt, maintenance | Low if rinsed well | Easy |
| Baking soda + hydrogen peroxide | Stubborn stains, whitening | Low | Moderate |
| OxiClean soak | Overall brightness, set-in stains | Low if rinsed thoroughly | Easy |
| Magic eraser | Rubber sole and toe cap | None (rubber only) | Easy |
| White toothpaste | Quick spot treatment | Low if rinsed well | Easy |
| Machine wash | Heavy soiling | Low with vinegar rinse | Easy (machine does work) |
Cleaning White Vans Laces (Don’t Skip This Step)
Dirty laces make clean shoes look dirty—and clean laces make a mediocre clean look much better. The simplest method:
- Remove laces from the shoes.
- Place in a small bowl with warm water and a teaspoon of OxiClean or baking soda. Soak for 30 minutes.
- Scrub between fingers or with a toothbrush to work out ground-in dirt.
- Rinse very thoroughly and allow to air dry completely before relacing.
For laces that are grey and won’t respond to soaking, replacement laces are widely available and inexpensive—sometimes the better option when laces have yellowed from age rather than just accumulated dirt.
Drying White Vans: The Step Where Most People Cause Yellowing
Drying method is responsible for more post-clean yellowing than the cleaning method itself. The rules are simple but non-negotiable:
- No direct sunlight. UV rays drive oxidation of any residue left in the canvas regardless of how well you rinsed. Dry in shade—outside in the shade, or indoors near a window.
- No tumble dryer. Heat causes the same oxidation reaction as sunlight and also risks warping the shoe shape and loosening adhesives.
- No direct heat sources. Don’t dry near radiators, heat vents, or fan heaters—the warm air causes the same reaction as the dryer.
- Stuff with white paper towels. White paper towels absorb internal moisture, maintain the shoe shape, and prevent the toe box from collapsing during drying. Replace the stuffing after two to three hours when it becomes saturated.
- Allow full drying time. Wearing slightly damp Vans causes immediate resoiling and accelerates yellowing—make sure they’re completely dry before wearing.
How to Keep White Vans White Longer
Prevention is dramatically more effective than cleaning:
- Apply a water and stain repellent spray before the first wear and after every deep clean. A quality protector spray (Crep Protect, Jason Markk Repel) creates a barrier that dramatically reduces how much dirt penetrates the canvas.
- Spot clean immediately after each wear before dirt has time to set into the canvas weave. A quick wipe with a damp cloth takes 30 seconds and prevents the buildup that requires a full clean.
- Store away from sunlight. Even unworn, white canvas yellows with prolonged UV exposure. Store in a box or bag rather than on an open shelf near a window.
- Alternate with other shoes. Wearing the same pair daily doesn’t give any cleaning or treatment time to take full effect and concentrates all wear and soiling on one pair.
FAQ
Why do my white Vans turn yellow even when I haven’t cleaned them? Rubber oxidation—the natural yellowing of rubber compounds over time through air and light exposure—causes soles and canvas to yellow without any cleaning-related trigger. This type of yellowing is addressed by the baking soda and hydrogen peroxide method (Method 3) and the magic eraser treatment (Method 5), both of which reverse oxidation yellowing.
Can I use bleach on white Vans? Diluted bleach (one part bleach to five parts water) can be used on white canvas as an absolute last resort—but it weakens canvas fibers with repeated use, makes future yellowing worse by degrading the material, and risks leaving uneven bleached patches. The hydrogen peroxide method (Method 3) is nearly as effective without these risks.
My Vans yellowed after the last clean. Can I reverse it? Yes—the baking soda and hydrogen peroxide paste (Method 3) with indirect UV activation is the most effective treatment for post-clean yellowing. Apply a thorough coat, activate in indirect light, rinse very thoroughly, finish with a vinegar wipe, and dry in shade. The yellowing usually lifts significantly with one treatment and often completely with two.
How often should I clean white Vans? A light spot clean after every few wears prevents buildup that requires intensive cleaning. A full deep clean every two to four weeks for regularly worn shoes maintains whiteness without the accumulated grime that makes intensive cleaning necessary.
The Bottom Line
Cleaning white Vans without yellowing comes down to three things: using the minimum amount of cleaning product needed, rinsing far more thoroughly than feels necessary, and drying away from sunlight and heat. The baking soda and white vinegar paste handles most general cleaning without yellowing risk. The hydrogen peroxide paste addresses staining and existing yellowing. The magic eraser takes care of the rubber components that no liquid cleaner matches. Combine thorough rinsing with a white vinegar wipe after every clean and shade drying every time, and the yellowing problem becomes almost entirely avoidable.
Enjoyed this project? Get even more DIY ideas that save (and make) you money.
Join our free newsletter for profitable DIY projects, clever cleaning hacks, home ideas, and creative crafts delivered straight to your inbox.
✓ Free forever • No spam • Unsubscribe anytime