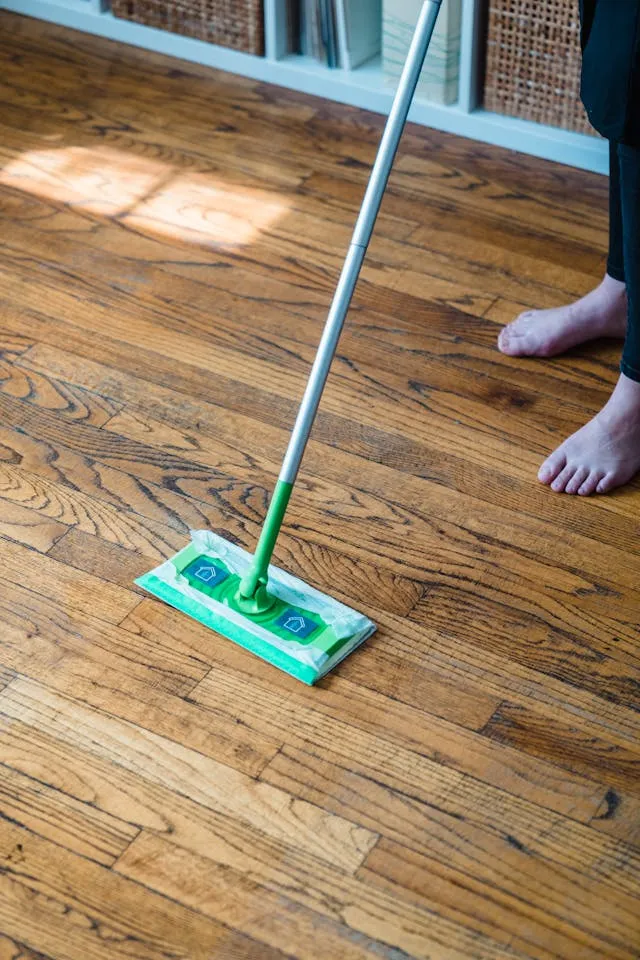
Regular sweeping and a quick mop keeps wood floors looking decent day to day—but it doesn’t touch the buildup that accumulates over months and years. Wax residue, old cleaning product layers, ground-in dirt in the grain, dull finish from soap scum, and grease migration from the kitchen all build up gradually until the floor looks perpetually dull no matter how much you clean it. That’s when surface cleaning stops working and deep cleaning becomes necessary.
The challenge with deep cleaning wood floors is that wood is unforgiving of the wrong method. Too much water warps it. The wrong chemical strips the finish. Too aggressive an abrasive scratches it permanently. What works on tile or vinyl will damage hardwood—and what works on a modern sealed floor can destroy an older waxed or oiled one.
This guide covers seven deep cleaning methods in order of intensity—from a thorough basic clean that goes further than your usual routine, through to stripping and refinishing old wood floors that haven’t responded to anything else. Each method specifies what type of floor it works on and what to avoid.
Before You Start: Know Your Floor Type
This is the most important step in the entire guide. Using the wrong method for your floor type causes permanent damage.
- Polyurethane-sealed floors (most modern hardwood): Have a hard, plastic-like topcoat that’s water-resistant. You can use water-based cleaners, but still minimally. This is the most forgiving floor type.
- Waxed floors: Have a softer, matte finish that water and many cleaners strip immediately. Common in older homes and with some engineered floors. Requires wax-compatible cleaners only.
- Oiled floors: Penetrating oil finish that soaks into the wood rather than sitting on top. Water-sensitive. Requires oil-soap or specific oiled-floor cleaners.
- Unfinished or bare wood: No protective coating at all. Water causes immediate damage—dry cleaning methods only.
- Engineered hardwood: A thin veneer of real wood over a plywood core. More moisture-sensitive than solid hardwood. Always use minimal moisture.
Quick test for finish type: Put a few drops of water on the floor in an inconspicuous area. If the water beads up, the floor is sealed (polyurethane). If the water soaks in and darkens the wood within a minute or two, the floor is unfinished, waxed, or oiled.
What You’ll Need (Depending on the Method)
- A microfiber mop (flat head, not string mop)
- A soft-bristle brush or old toothbrush
- A vacuum with a hard floor attachment
- White vinegar
- Dish soap
- Mineral spirits
- Commercial wood floor cleaner (Bona, Murphy Oil Soap, or equivalent)
- Fine steel wool (0000 grade)
- Wood floor stripper
- Hardwood floor polish or wax
- Warm water
- Clean microfiber cloths
- A spray bottle
- Rubber gloves
Method 1: Thorough Dry Cleaning First (The Step Most People Skip)
No deep cleaning method works properly if you start with loose dirt on the floor. Wet mopping over grit and debris scratches the finish and turns dust into muddy streaks that are harder to remove than the original dirt. The first step of any deep clean is always a thorough dry clean—more thorough than your usual routine sweep.
- Clear the floor completely. Move furniture, rugs, and anything else off the entire area you’re cleaning. Deep cleaning around furniture legs and rug edges is what leaves the most obvious before-and-after difference—those areas accumulate the most concentrated buildup.
- Vacuum with a hard floor attachment, not a beater bar. Beater bar attachments designed for carpet scratch hardwood finish over time. Use the hard floor or bare floor setting, which lifts the beater bar out of contact with the surface. Make two passes in different directions—once along the grain and once across—to pick up debris from all sides of the grain grooves.
- Pay specific attention to the gaps between boards. Dirt, hair, and debris pack into the gaps between floorboards and don’t come out with a single vacuum pass. Use the crevice attachment along all the board gaps, moving slowly so suction can pull material out from depth.
- Wipe baseboards and floor edges with a dry microfiber cloth before wet cleaning. Dust that falls from baseboards during wet mopping creates streaks and undermines the clean.
- Assess the floor in raking light. Angle a lamp to shine across the floor surface at a low angle—this raking light reveals buildup, scuff marks, and dull patches that aren’t visible under normal overhead lighting. Mark problem areas with a piece of painter’s tape so you know where to focus during wet cleaning.
This step alone—done thoroughly—often reveals that the floor needs less intensive treatment than initially assumed. What looked like a deeply dirty floor is sometimes just surface debris that hasn’t been fully removed in routine cleaning.
Method 2: pH-Neutral Wood Floor Cleaner (Best Regular Deep Clean for Sealed Floors)
For polyurethane-sealed floors that have accumulated grime from regular use—foot traffic residue, light grease migration from the kitchen, product buildup from previous cleaners—a pH-neutral wood floor cleaner used correctly produces results significantly better than any DIY solution. This is the recommended method for most modern hardwood floors and should be the starting point before moving to more intensive methods.
- Choose the right product. pH-neutral cleaners specifically formulated for hardwood—Bona Hardwood Floor Cleaner, Rejuvenate All Floors Cleaner, or a similar dedicated product—are formulated to clean without stripping finish or leaving residue. Avoid anything labeled “multi-surface” or “all-purpose”—these are often too alkaline for wood finishes.
- Mix according to directions or use ready-to-spray formulas directly. Most concentrated cleaners call for a capful per gallon of warm water—don’t assume more product means better cleaning. Excess cleaner is what creates the dull, streaky buildup this method is designed to remove.
- Work in sections of roughly 1–1.5 square meters rather than mopping the entire floor continuously. This prevents the cleaning solution from sitting on any section longer than necessary.
- Apply with a well-wrung microfiber flat mop—not dripping, not damp, but barely moist. The microfiber pad should feel slightly damp to the touch, not wet. Wring the mop head until no water drips when squeezed firmly.
- Mop in the direction of the wood grain, using slow, overlapping strokes. Moving with the grain cleans into the grain lines rather than pushing debris across them.
- For stubborn spots, spray cleaner directly onto a microfiber cloth (not the floor) and rub the specific area with firm pressure. A soft-bristle brush dipped in cleaner and used gently on sticky spots or dried spills loosens buildup that the mop can’t shift.
- Buff immediately with a dry microfiber cloth or a dry mop pad as you work through each section. Don’t let cleaning solution dry on the floor—it leaves the exact kind of residue you’re trying to remove.
- Allow the floor to dry completely before walking on it or replacing furniture. Even a minimally moist floor benefits from 15–20 minutes of undisturbed drying.
Best for: Sealed polyurethane hardwood floors with general traffic buildup. Not suitable for waxed, oiled, or unfinished wood.
Method 3: Dish Soap Deep Clean (Best for Greasy Kitchen Wood Floors)
Kitchen hardwood floors accumulate grease from cooking that sits on the finish and gradually builds up a sticky, dirt-trapping layer. This type of buildup doesn’t respond to pH-neutral cleaners because it’s oil-based—it needs a degreaser. Dish soap is a gentle surfactant specifically designed to cut through food grease, making it more effective than dedicated wood floor cleaners for kitchen floors specifically.
- Complete the thorough dry cleaning (Method 1) first—grease on kitchen floors traps grit that will scratch the finish if not removed before wet cleaning.
- Mix one teaspoon of dish soap per gallon of warm water. One teaspoon—not a tablespoon, not a squirt. Dish soap creates suds that leave residue if used in excess, and residue on wood floors is the primary cause of the dull, smeared appearance this method is supposed to fix.
- Wring the mop thoroughly—the floor should be barely damp after each pass, never wet.
- Work in small sections, mopping with the grain and rinsing the mop in clean water between each section to avoid redistributing grease across the floor.
- For heavily greasy areas near the stove and cooktop, apply the dish soap solution to a soft cloth rather than a mop and scrub gently in circular motions with slightly more pressure than normal mopping allows. The friction and direct pressure breaks down grease buildup that a mop glides over.
- Rinse each cleaned section with a second mop dampened with plain warm water—no soap. Dish soap residue left on the floor creates a sticky film that attracts more dirt than the original grease did.
- Dry immediately with a clean, dry microfiber cloth or fan-dry with windows open.
Note on frequency: Dish soap is safe for sealed floors when used at the correct dilution and fully rinsed—but it’s not a routine cleaner. Use it specifically for grease buildup two to three times a year rather than as a regular mopping solution.
Best for: Sealed hardwood kitchen floors with grease and food residue buildup.
Method 4: Mineral Spirits for Waxed Wood Floors (Best for Old Wax Buildup)
Waxed wood floors require a completely different approach from sealed floors. Water-based cleaners strip wax, and most commercial wood floor products aren’t formulated for waxed surfaces. The correct deep cleaning agent for a waxed floor is mineral spirits—which dissolves old wax, dirt embedded in wax, and product buildup without damaging the underlying wood.
- Confirm the floor is waxed, not sealed. The water drop test: water soaks in rather than beading on a waxed floor. Waxed floors also have a softer, more matte sheen than the hard gloss of polyurethane.
- Work in a well-ventilated room. Mineral spirits have fumes that concentrate in enclosed spaces—open all windows and doors before starting.
- Pour a small amount of mineral spirits onto a clean white cloth—never directly onto the floor, where it can pool and over-saturate the wood.
- Rub the cloth over a small section (approximately 30cm x 30cm) with firm, circular motions. The cloth will turn dark as it picks up dissolved wax and accumulated dirt. This color change confirms the method is working.
- Switch to a clean section of cloth as each area becomes saturated with dissolved wax. Reusing a wax-saturated cloth redistributes the wax rather than removing it.
- Work across the entire floor in sections, always using a fresh cloth area for each new section.
- Allow the mineral spirits to fully evaporate—usually 20–30 minutes in a ventilated room—before assessing the floor or applying new wax.
- Re-wax the floor after mineral spirits cleaning. Mineral spirits removes all wax from the surface, leaving the wood temporarily unprotected. Apply a thin, even coat of paste wax and buff with a soft cloth or electric floor buffer to restore protection and sheen.
Best for: Waxed hardwood floors with yellowed, dirty, or built-up wax layers. Not suitable for sealed, oiled, or engineered floors.
Method 5: Murphy Oil Soap for Oiled and Older Wood Floors (Best for Traditional Wood)
Murphy Oil Soap has been used on wood floors for over a century for good reason—it cleans effectively while conditioning the wood, making it particularly appropriate for oiled floors, older hardwood, and wood that has become dry and dull-looking rather than just dirty. It’s also the gentlest deep cleaning option for wood floors that have an unknown finish type.
- Dilute Murphy Oil Soap according to the label directions—typically a quarter cup per gallon of warm water for mopping, or a squirt directly into a bucket of warm water for spot cleaning. Don’t increase the concentration; more soap means more residue.
- Wring the mop very thoroughly. Murphy Oil Soap is water-based, and oiled or older floors are more moisture-sensitive than modern sealed ones. The mop should leave the floor barely damp.
- Mop in sections with the grain, using overlapping strokes and rinsing the mop in clean water frequently to keep the cleaning solution from becoming dirt-laden.
- For deep cleaning of ingrained dirt in older wood floors, apply diluted Murphy Oil Soap to a soft-bristle brush and work gently into the grain of particularly dirty areas. The brush gets into the grain lines where a flat mop can’t reach. Work in small sections and wipe with a clean damp cloth immediately after brushing.
- Do not rinse with plain water after Murphy Oil Soap—the soap residue conditions the wood and is designed to remain on the surface in small amounts. Rinsing removes this benefit.
- Buff with a dry cloth as you work through each section.
- For floors that have become very dry and dull, follow the Murphy Oil Soap clean with a thin application of hardwood floor conditioner or a light coat of finishing oil appropriate for your floor type—the deep clean removes grime that was masking the dryness, and conditioning restores the wood’s depth and warmth.
Best for: Oiled floors, older hardwood, floors with an unknown finish type, floors that look dry and dull rather than just dirty.
Method 6: How to Deep Clean Old Wood Floors (Stripping and Refinishing)
Old wood floors—particularly those in homes built before the 1970s—often have multiple layers of wax, old varnish, paint, and decades of product buildup that no surface cleaning method touches. When the floor looks permanently dull despite cleaning, when water doesn’t bead but also doesn’t soak in quickly, or when the surface has a yellowed, cloudy appearance, the issue is buildup that needs stripping rather than cleaning.
This is the most intensive method on the list and requires more time and effort than the others—but for floors that have genuinely stopped responding to cleaning, it produces transformative results.
Stage 1: Chemical Stripping
- Apply a dedicated wood floor stripper (Bona Pro Series Floor Stripper, Basic Coatings Floor Stripper, or similar) following the product instructions exactly. Most strippers are applied undiluted to a small section at a time and allowed to dwell for 5–10 minutes.
- Agitate with a soft-bristle floor brush or a floor machine with a scrub pad to loosen the dissolved finish and buildup. Work in the direction of the grain.
- Remove the dissolved material with a mop or wet vacuum immediately—don’t let the stripper dry on the floor, which causes it to redeposit.
- Rinse with clean water and a well-wrung mop to remove stripper residue.
- Repeat on stubborn sections that didn’t fully strip on the first pass.
- Allow the floor to dry completely—at least 12 hours, ideally 24—before assessing and moving to the next stage.
Stage 2: Fine Abrasion for Remaining Residue
- Inspect in raking light once dry. Remaining dull patches, yellowed areas, or cloudy sections indicate residue that the stripper didn’t fully remove.
- Use 0000-grade fine steel wool (the finest available) moistened with mineral spirits to gently abrade these remaining patches. 0000 steel wool is so fine it polishes rather than scratches—it removes surface residue without damaging the wood beneath. Rub with the grain only.
- Wipe away the abraded residue with a clean cloth and allow to fully dry.
Stage 3: Restoration
- Apply a wood floor restorer or refresher (Bona Hardwood Floor Refresher, Minwax Hardwood Floor Reviver, or similar) following product directions. These products restore a protective layer to the cleaned wood without requiring sanding or full refinishing.
- For floors that have been stripped back to bare or near-bare wood, apply a penetrating hardwood oil or a coat of polyurethane finish appropriate for the wood type. This step protects the stripped wood and restores the finish properly.
Best for: Old wood floors with decades of product buildup, floors with yellowed or cloudy finish that doesn’t respond to surface cleaning, floors in pre-1970s homes with unknown finish history.
Method 7: Spot Deep Cleaning for Stains, Scuffs, and Problem Areas
Sometimes a floor doesn’t need a full deep clean—it has specific problem areas that accumulated faster than the rest of the floor. Targeted spot treatment handles these without subjecting the whole floor to unnecessary moisture and chemical exposure.
Black scuff marks (rubber sole marks):
- Apply a small amount of WD-40 or mineral spirits to a soft cloth and rub the scuff with firm pressure. Rubber residue dissolves in petroleum-based solvents and lifts cleanly.
- Wipe the area with a clean damp cloth to remove the solvent residue.
- Buff dry immediately.
White haze or water rings:
- Rub the affected area gently with 0000-grade steel wool moistened with mineral spirits, moving with the grain. White haze is typically trapped moisture in the finish layer—the fine abrasion breaks through the affected layer.
- Wipe clean and apply a small amount of paste wax or hardwood polish to restore the protective layer.
Sticky residue from tape, labels, or spills:
- Apply a small amount of rubbing alcohol or Goo Gone to a cloth—never directly to the floor—and press onto the sticky area for 30 seconds.
- Rub gently with the grain until the residue lifts.
- Wipe the area clean with a barely damp cloth and buff dry.
Grout or paint spots:
- Allow paint to dry completely—wet paint smears across the grain when wiped.
- Gently scrape dried paint with a plastic scraper (never metal—it scratches the finish) at a very low angle to the floor surface.
- Finish with a cloth dampened with mineral spirits for any remaining residue.
Dark stains (tannin, pet urine, water damage):
- These stains have penetrated the finish into the wood itself—surface cleaning won’t remove them.
- For sealed floors: apply oxalic acid wood bleach (follow product instructions carefully) to lighten deep stains. This is the most effective treatment for tannin and water stains that have penetrated the finish.
- For bare or stripped wood: sand the affected area lightly with fine-grit sandpaper (150 grit), blend into the surrounding surface, and refinish to match.
Method Comparison at a Glance
| Method | Best For | Floor Type | Intensity |
|---|---|---|---|
| Thorough dry cleaning | Pre-clean for all methods | All types | Low |
| pH-neutral cleaner | General traffic buildup | Sealed hardwood | Low–Moderate |
| Dish soap | Grease and kitchen buildup | Sealed hardwood | Moderate |
| Mineral spirits | Old wax buildup | Waxed floors only | Moderate |
| Murphy Oil Soap | Dry, dull, older wood | Oiled and older wood | Low–Moderate |
| Stripping and refinishing | Decades of product buildup | Old wood floors | High |
| Spot treatment | Specific stains and problem areas | All types | Varies |
The Biggest Mistakes People Make Deep Cleaning Wood Floors
Using too much water. Wood expands when it absorbs moisture and contracts as it dries—repeated saturation causes warping, cupping, and gap formation between boards. The mop should be wrung until almost dry before touching the floor. If you can wring more water out of it, wring more water out of it.
Using vinegar. White vinegar is widely recommended for wood floors online and it’s genuinely bad advice. Vinegar is acidic and degrades polyurethane finish over time, leaving the floor dull and unprotected. It works short-term but causes cumulative damage that requires refinishing to fix.
Using steam mops. Steam drives moisture directly into wood through the finish and into the grain—it’s one of the fastest ways to cause warping and finish failure. No wood floor type benefits from steam cleaning.
Using the wrong product for the finish type. A water-based cleaner on a waxed floor strips the wax in a single cleaning session. Oil soap on a sealed floor leaves a residue that dulls the finish. Always confirm the finish type before choosing a cleaning product.
Applying too much cleaning product. More product doesn’t mean cleaner floors—it means more residue. Product buildup is itself one of the primary causes of dull, lifeless-looking wood floors. Less is consistently more with wood floor cleaning.
How to Keep Deep-Cleaned Wood Floors Looking Better Longer
- Use microfiber dust mop daily. Grit tracked in from outside is the primary cause of finish scratching. Daily dry mopping takes two minutes and dramatically extends the time between deep cleans.
- Place mats at all entry points. An exterior mat to knock off debris and an interior mat to catch fine grit removes the majority of floor-damaging particles before they reach the wood.
- Use furniture pads on all legs. Moving furniture without pads gouges finish instantly. Stick-on felt pads on every leg prevent the majority of deep scratches.
- Control indoor humidity. Wood floors expand in high humidity and contract in low humidity—both cause damage over time. Keeping indoor humidity between 35–55% minimizes seasonal movement and the gaps and cupping that result from it.
- Clean spills immediately. Any liquid left on wood longer than a few minutes has time to penetrate the finish. The faster a spill is wiped up, the less likely it is to leave a stain or cause finish damage.
FAQ
How often should wood floors be deep cleaned? For most homes, a thorough deep clean two to four times per year is sufficient—seasonal deep cleaning works well as a rhythm. High-traffic areas like kitchens and hallways may benefit from monthly targeted deep cleaning while the rest of the floor is done seasonally.
Can I use a steam mop for a quick deep clean? No—not on any wood floor type. Steam forces moisture into wood and causes finish failure and warping even on modern sealed floors. A barely damp microfiber mop with the right cleaner for your floor type is always the correct approach.
My floor still looks dull after deep cleaning. What’s wrong? Either the finish itself is worn or damaged and needs refreshing or refinishing (a floor restorer product handles this without sanding), or product buildup is still present and requires stripping. Inspect in raking light—worn finish looks scratched and thin; product buildup looks cloudy and uniform.
Is it safe to deep clean engineered hardwood the same way as solid hardwood? The same principles apply but with more caution around moisture—engineered hardwood’s plywood core is more susceptible to moisture damage than solid wood. Use even less water than you would on solid hardwood and dry immediately after cleaning.
The Bottom Line
Deep cleaning wood floors is less about which product you use and more about using the right method for the right floor type with the right amount of moisture—which is always less than you think you need. Start with a thorough dry clean before any wet treatment, identify your finish type before choosing a cleaning agent, and work in small sections rather than trying to cover the whole floor at once. For most sealed modern floors, a pH-neutral wood floor cleaner used correctly produces excellent results. For old wood floors with decades of buildup, stripping is the only method that truly works—and the transformation it produces in a floor that’s been dull for years is genuinely worth the effort.
Enjoyed this project? Get even more DIY ideas that save (and make) you money.
Join our free newsletter for profitable DIY projects, clever cleaning hacks, home ideas, and creative crafts delivered straight to your inbox.
✓ Free forever • No spam • Unsubscribe anytime