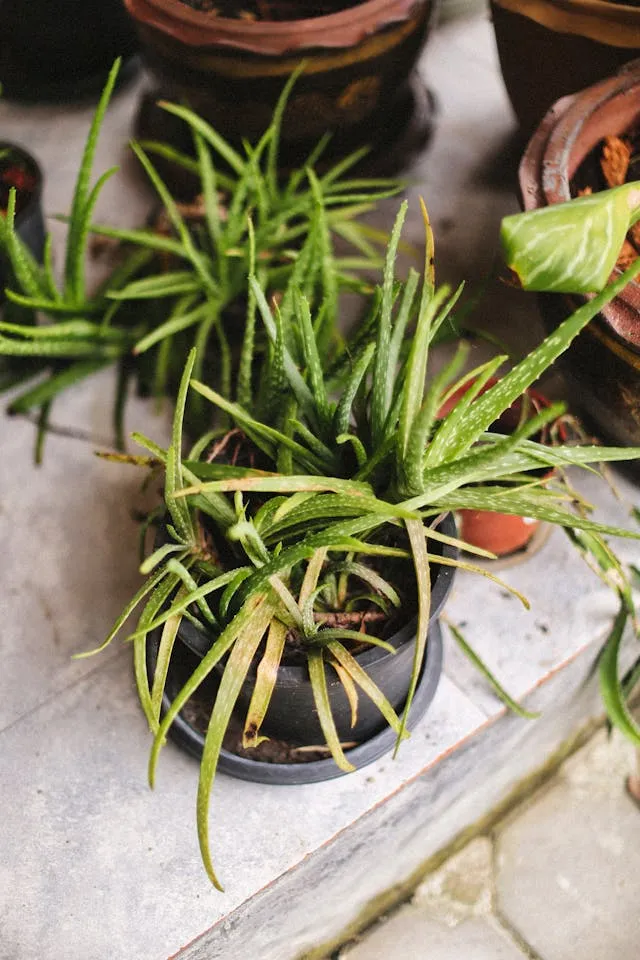
You bought it because everyone said aloe vera was “impossible to kill.” And yet, here you are, staring at a droopy, yellowing, sad-looking plant wondering where it all went wrong.
The frustrating part is that aloe vera is one of the most forgiving plants out there—but it has a few non-negotiable needs. Ignore those, and it will decline fast. Understand them, and you can usually bring it back from the brink even when it looks completely done for.
Here’s how to diagnose what’s wrong and fix it the right way.
Here’s the Real Reason Your Aloe Vera Is Dying
Most people assume they’re underwatering their aloe. In reality, the number one killer of aloe vera plants is the exact opposite—overwatering. Aloe is a succulent. It stores water in its thick leaves, which means it’s built for dry conditions. When it sits in wet soil too long, the roots can’t breathe, they begin to rot, and the plant starts dying from the bottom up.
But overwatering isn’t the only culprit. Other common causes include:
- Wrong soil type. Standard potting mix holds too much moisture for aloe. It needs fast-draining, gritty soil.
- Poor drainage. A pot without drainage holes is essentially a slow death trap for succulents.
- Too much direct harsh sunlight. Yes, this can actually sunburn aloe leaves.
- Too little light. Aloe needs bright, indirect light—deep shade causes weak, floppy growth.
- Compacted, rootbound conditions. If the roots have nowhere to grow, the plant stresses out.
- Cold temperatures or drafts. Aloe is tropical. Anything below 50°F (10°C) for extended periods causes serious damage.
Don’t Ignore These Warning Signs
Your aloe vera will tell you something is wrong well before it reaches the point of no return. Learning to read the signs early makes revival significantly easier.
- Yellow or translucent leaves — Almost always overwatering or root rot.
- Brown, mushy base — Root rot has set in. Needs immediate action.
- Dry, brown leaf tips — Underwatering, low humidity, or too much direct sun.
- Flat or curling leaves — The plant is depleting the water reserves in its own leaves, usually from underwatering or extreme heat.
- Pale, washed-out color — Too much direct sunlight causing bleaching.
- Leggy, floppy growth — Not enough light; the plant is stretching toward a light source it can’t reach.
- White crusty deposits on soil — Mineral buildup from tap water or fertilizer overuse.
Stop Doing This to Your Aloe Vera
If your aloe is struggling, there’s a good chance one of these common mistakes is the reason:
Watering on a fixed schedule. Watering every Sunday regardless of whether the soil is dry is one of the fastest ways to kill a succulent. Aloe doesn’t work on your calendar—it works on soil moisture.
Leaving it in a decorative pot with no drainage. Those pretty ceramic pots with no holes look great on a shelf. They’re terrible for aloe. Water pools at the bottom, roots rot, and you won’t even see it happening until the damage is done.
Misting it. Aloe doesn’t want humidity on its leaves. It absorbs water through its roots, not its surface. Misting just encourages surface mold and rot without actually helping the plant.
Repotting into a pot that’s too large. Bigger isn’t better with succulents. A large pot holds more soil, which holds more moisture, which creates the exact waterlogged conditions aloe hates.
What You’ll Need to Revive It
Depending on how serious the damage is, gather the following:
- Fresh succulent or cactus potting mix (or make your own: 50% regular potting soil, 50% coarse perlite or gritty sand)
- A clean pot with drainage holes (terracotta is ideal—it’s breathable and wicks away excess moisture)
- Clean scissors or pruning shears
- Rubbing alcohol (to sterilize your cutting tools)
- Activated charcoal or cinnamon powder (natural antifungal for treating rot)
- A well-lit spot indoors, away from harsh direct sun
Step-by-Step: How to Revive a Dying Aloe Vera Plant
Step 1: Remove the plant from its pot immediately. Don’t wait to see if it “gets better” on its own. Gently slide the aloe out of its container and shake off as much of the old soil as possible so you can inspect the root system clearly.
Step 2: Examine the roots honestly. Healthy roots are white or light tan and firm to the touch. Rotted roots are dark brown or black, mushy, and may have an unpleasant smell. If you see any of the latter, you need to act—don’t replant without addressing the rot.
Step 3: Cut away all rotted roots. Using sterilized scissors or pruning shears, trim off every dark, mushy root. Cut back to where the tissue is firm and healthy. If the rot has reached the base of the plant (the stem just above the roots), carefully slice away that tissue until you reach clean, firm flesh.
Step 4: Treat the cuts with cinnamon or activated charcoal. Dust the cut surfaces lightly with ground cinnamon or activated charcoal. Both are natural antifungals that help seal the wounds and prevent further infection while the plant heals.
Step 5: Let it dry out before repotting. This step is non-negotiable. Set the bare-rooted plant on a dry surface in a warm spot with good airflow and leave it for 24 to 48 hours. This allows the cut surfaces to callous over, which significantly reduces the risk of rot returning once it’s back in soil.
Step 6: Repot in fresh, well-draining soil. Fill your clean terracotta pot about one-third full with succulent mix. Position the aloe so the base sits just at or slightly above soil level. Fill in around the roots gently—don’t pack the soil down hard. The roots need air circulation.
Step 7: Wait before watering. After repotting, leave the plant alone for five to seven days before giving it any water. This encourages the roots to reach out through the soil in search of moisture, which actually promotes stronger root development.
Step 8: Introduce water gradually. When you do water for the first time post-repotting, water deeply but slowly—let it drain completely through the bottom. Then don’t water again until the top two inches of soil are completely dry. In most indoor environments, this means watering every two to three weeks, not every few days.
Step 9: Place it in bright, indirect light. A spot near a south or east-facing window is ideal. Avoid placing it in direct harsh afternoon sun immediately after repotting—the plant is already stressed and needs time to stabilize before handling intense light exposure.
You’re Probably Doing This Wrong: The Watering Test
The best way to know when to water aloe is the finger test. Push your finger two inches into the soil. If it feels even slightly cool or damp, wait. If it feels completely dry and crumbly at that depth, it’s time to water. No schedule, no guesswork—just soil feedback.
What to Do If There Are No Healthy Roots Left
If the root rot is so severe that almost nothing healthy remains, don’t give up yet. As long as the base of the plant (the central stem) still has firm, green tissue, you can attempt a propagation rescue:
- Trim the plant back to the last healthy tissue.
- Let it dry and callous for 48 to 72 hours.
- Place the calloused base on top of (not buried in) dry succulent soil.
- Mist the soil very lightly every few days—just enough to keep it from being bone dry.
- New roots can develop within three to six weeks in the right conditions.
Quick Reference: Symptoms and Solutions
| Symptom | Likely Cause | Fix |
|---|---|---|
| Yellow, mushy leaves | Overwatering / root rot | Repot in dry soil, trim rotted roots |
| Brown, dry leaf tips | Underwatering or too much sun | Water more consistently, move to indirect light |
| Pale, bleached color | Sunburn | Move to bright but indirect light |
| Floppy, leggy growth | Insufficient light | Relocate to brighter spot |
| White crust on soil | Mineral buildup | Flush with filtered water, repot if severe |
| No growth for months | Rootbound or nutrient-depleted | Repot into fresh soil with slightly larger container |
FAQ
Can a completely brown aloe vera be saved? It depends on the base. If the central stem still has any firm, green tissue, there’s a chance. If the entire plant—leaves and base—is uniformly brown and mushy, it’s past saving.
How long does it take for aloe vera to recover? With the right conditions after repotting, you should see signs of new growth within four to eight weeks. Full recovery for a severely damaged plant can take three to six months.
Should I cut off the damaged leaves? Yes. Remove leaves that are more than 50% damaged—they won’t recover, and leaving them wastes the plant’s energy. Cut cleanly at the base of the leaf with sterilized scissors.
Does aloe need fertilizer to recover? No—and adding fertilizer to a stressed plant can actually burn the roots and make things worse. Hold off on any feeding until the plant has clearly stabilized and is producing new growth.
Conclusion
Reviving a dying aloe vera comes down to one thing: getting the conditions right. That means well-draining soil, a pot with drainage holes, and watering based on soil moisture—not a fixed schedule. Address root rot early, give the plant time to callous and recover between interventions, and resist the urge to overdo it with water or fertilizer while it heals. Aloe is remarkably resilient when you work with its nature rather than against it. Give it the right environment, and it will come back stronger than before.
Enjoyed this project? Get even more DIY ideas that save (and make) you money.
Join our free newsletter for profitable DIY projects, clever cleaning hacks, home ideas, and creative crafts delivered straight to your inbox.
✓ Free forever • No spam • Unsubscribe anytime