
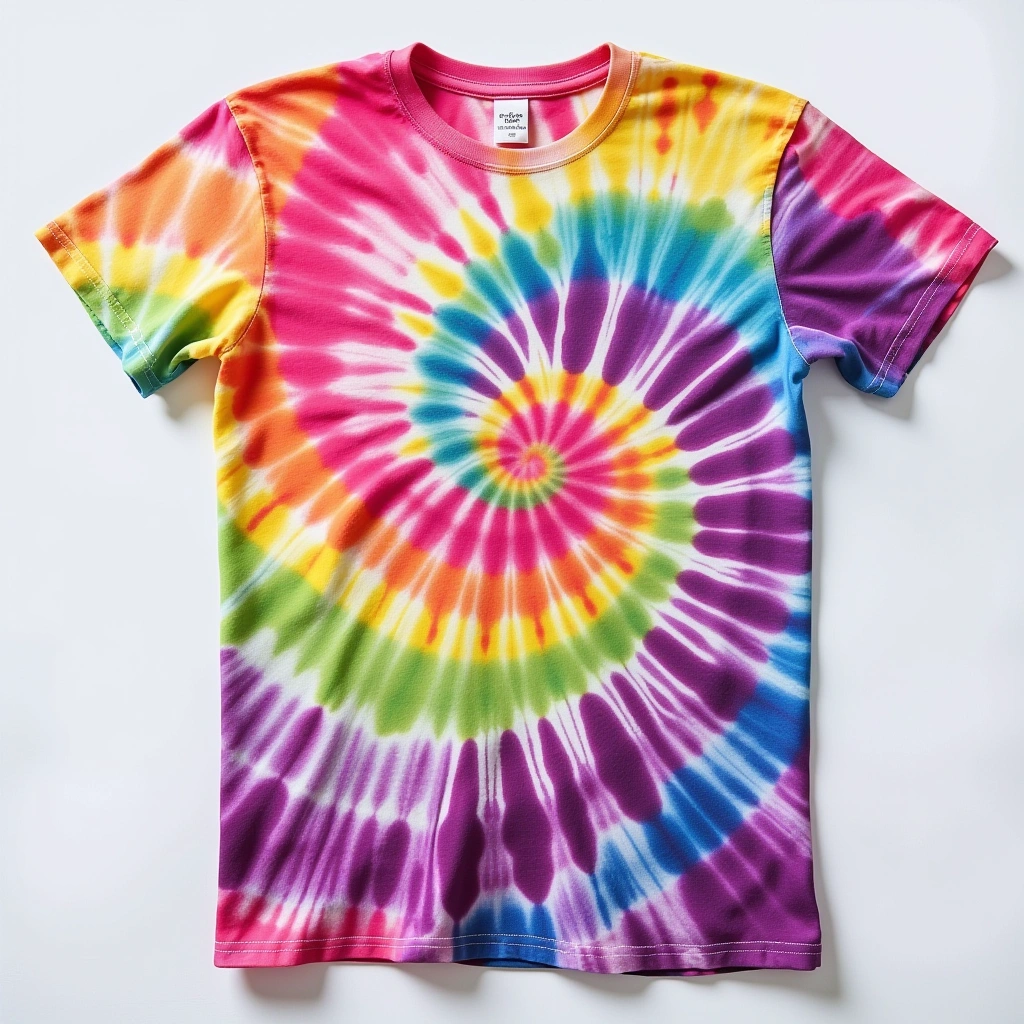
Tie dye is one of those crafts that looks complicated but is actually very forgiving once you understand a few basic principles. And while most tutorials push you toward fiber reactive dyes from a craft store, food coloring is a genuinely viable alternative—especially if you’re doing this with kids, working on a budget, or just want to use what’s already in your kitchen cabinet.
The results won’t be identical to professional dye. Food coloring fades faster on pure cotton without a mordant (a fixative that helps dye bond to fiber), and it works significantly better on protein-based fibers like wool and silk than on plant-based ones like cotton. But with the right preparation—specifically, a vinegar or salt pre-soak—you can get vivid, lasting color on most fabrics that holds up through multiple washes.
Here’s everything you need to know to do it right the first time.
Here’s the Real Reason Food Coloring Behaves Differently Than Store-Bought Dye
Understanding this saves a lot of frustration. Fiber reactive dyes—the kind in standard tie dye kits—are specifically formulated to form a permanent chemical bond with cellulose fibers like cotton. Food coloring is not. It’s designed to color water-based substances like frosting or drinks, not to permanently bond with fabric.
On protein fibers (wool, silk, nylon), food coloring behaves much more like a real dye because protein fibers have a natural affinity for the acid dyes used in food coloring. With heat and an acidic environment (vinegar), the bond is surprisingly strong and long-lasting.
On cotton and other plant-based fibers, the bond is weaker. This doesn’t mean it won’t work—it means you need to maximize every step that encourages dye uptake: the pre-soak, the dye concentration, the heat setting, and the aftercare.
Knowing your fabric type before you start tells you which approach to take and what to realistically expect from the final result.
Don’t Ignore the Fabric Preparation Step
This is where most beginners go wrong. They skip the pre-soak, apply dye to a dry shirt, and end up with faded, patchy results that wash out within a few uses.
The pre-soak does two things: it opens the fabric fibers so dye can penetrate more deeply, and it creates the chemical environment that encourages the dye to bond rather than just sit on the surface.
For cotton shirts: Soak in a solution of one cup of white vinegar and one cup of table salt dissolved in enough warm water to fully submerge the shirt. Let it soak for at least one hour, or up to overnight for better results. Some crafters also use a soda ash soak (sodium carbonate) for cotton, which raises the pH rather than lowering it—either approach helps, though results with food coloring on cotton will always be more variable than on protein fibers.
For wool or silk: Soak in a solution of one part white vinegar to four parts warm water for 30 minutes. The acid environment is the key factor for protein fibers, and it makes a significant difference in color vibrancy and longevity.
Don’t rinse the shirt after the pre-soak. Wring it out gently and proceed directly to the tying and dyeing steps while it’s still damp.
What You’ll Need
Most of this is already in your home:
- White or light-colored shirts — 100% cotton, wool, or silk give the best results; polyester blends resist dye significantly
- Gel food coloring — far more concentrated than liquid food coloring; produces more vivid results with less product
- White distilled vinegar
- Table salt
- Warm water
- Squeeze bottles or zip-lock bags — for applying and concentrating the dye
- Rubber bands — at least 10 to 15 per shirt for most patterns
- Plastic gloves — food coloring stains hands persistently
- Plastic wrap or zip-lock bags — for wrapping dyed shirts during the setting period
- Old towels or a plastic tablecloth — to protect your work surface
- A large pot (if heat-setting on the stovetop) or access to a microwave
Stop Doing This if You Want Vivid Results
Using liquid food coloring instead of gel. Standard liquid food coloring from a grocery store is heavily diluted. You’d need an enormous amount to get vivid color on fabric. Gel food coloring—the kind sold for cake decorating—is highly concentrated and gives dramatically better results. It’s available at most grocery stores in the baking aisle, craft stores, or online.
Applying dye to a dry shirt. Dye spreads more evenly and penetrates more deeply into damp fabric. A dry shirt causes the color to sit on the surface and bleed unevenly when wet during rinsing.
Skipping the heat-setting step. Heat-setting is what locks the dye into the fabric after application. Without it, a significant amount of color will wash out in the first rinse regardless of how well the pre-soak went. Heat-setting is non-negotiable for food coloring on fabric.
Using too much water in your dye mixture. Diluted dye means diluted color. Mix your food coloring with just enough water to make it pourable—a small amount of highly concentrated dye transfers more color than a large amount of weak dye.
Rinsing immediately after dyeing. The dye needs time to sit in the fabric before any water touches it. Rushing the rinsing step washes out color that hasn’t had time to bond.
Tie Dye Patterns: How to Fold and Bind Your Shirt
The folding and binding technique determines your pattern. Here are the most reliable ones for beginners:
Classic spiral: Pinch the shirt at the center (or off-center for an asymmetric look) and twist it into a flat disc shape, like winding up a coil. Secure with three to four rubber bands crossing over each other like the lines on a pie chart, dividing the disc into sections. Apply different colors to each section.
Crumple/scrunch: The easiest pattern and the most forgiving. Lay the shirt flat, then scrunch it randomly into a loose ball. Secure with several rubber bands in different directions. Apply colors randomly over the surface. The result is an organic, marbled look with unpredictable color placement—perfect for first attempts.
Accordion fold (stripes): Fold the shirt back and forth in even accordion pleats either lengthwise or widthwise, then secure with rubber bands spaced evenly along the length. Apply alternating colors between each rubber band section for bold stripes.
Bullseye: Pinch the shirt at a single point and pull upward, letting the fabric hang down. Secure rubber bands at regular intervals along the hanging “tail.” Apply colors between each rubber band section.
The rubber bands should be tight enough to resist the dye—they create the white or light-colored lines between color sections. Loose rubber bands produce blurry, undefined lines between colors.
Step-by-Step: How to Tie Dye a Shirt with Food Coloring
Step 1: Wash the shirt before starting. Run the shirt through a regular wash cycle without fabric softener to remove any sizing, oils, or residue from manufacturing. These coatings repel dye. If the shirt is brand new, washing it first makes a noticeable difference in how evenly the dye takes.
Step 2: Prepare your pre-soak solution and submerge the shirt. Mix one cup of white vinegar, one cup of table salt, and enough warm water to fully submerge the shirt in a large bowl or bucket. Submerge the shirt completely and let it soak for a minimum of one hour. For cotton, longer is better—overnight soaking improves dye uptake.
Step 3: While the shirt soaks, prepare your dye colors. In small squeeze bottles or cups, mix gel food coloring with a small amount of warm water. Start with a concentrated mix—roughly half a teaspoon of gel coloring per quarter cup of water as a starting point, adjusting for the depth of color you want. Darker colors need more concentrated dye. Label or organize your colors so you can work efficiently once the shirt is out of the soak.
Step 4: Wring out the shirt and fold or bind it into your chosen pattern. Don’t rinse—just squeeze out the excess liquid so the shirt is damp but not dripping. Fold, twist, or scrunch according to whichever pattern you’ve chosen, then secure firmly with rubber bands. Work on a protected surface from this point on.
Step 5: Apply the dye. Using squeeze bottles, spoons, or a brush, apply your dye colors to the bound shirt. Work the dye in from different angles to ensure it penetrates through the layers rather than just coating the surface. Flip the shirt over and apply color to the back side as well—what you apply to the front doesn’t automatically mirror through to the back.
Step 6: Wrap the dyed shirt tightly in plastic wrap or seal it in a zip-lock bag. This keeps the shirt moist during the setting period, which is critical for dye bonding. A shirt that dries out before heat-setting loses a significant amount of color.
Step 7: Heat-set the dye. This is the step that separates lasting color from dye that washes straight out. There are two reliable methods:
- Microwave method: Place the wrapped shirt in the microwave and heat on high for one to two minutes. Let it rest for two minutes, then heat for another minute. The internal temperature of the damp fabric is what sets the dye—steam inside the plastic wrap does most of the work. Be careful when unwrapping—the steam will be hot.
- Stovetop method: Fill a large pot with water and a cup of white vinegar. Place the wrapped (or unwrapped) shirt in the pot and simmer—not boil—for 30 minutes. This method is particularly effective for wool and silk.
Step 8: Let the shirt rest before rinsing. After heat-setting, leave the shirt wrapped or bagged for at least two to four hours, or overnight if possible. The longer the dye has contact with the fabric in a warm, moist environment, the more it bonds.
Step 9: Rinse under cold water while still bound. Starting with cold water reduces the amount of dye that bleeds out during rinsing. Rinse until the water running off the shirt runs mostly clear. Gradually increase to lukewarm water as the runoff clears.
Step 10: Remove the rubber bands and reveal the pattern. Cut or slide off the rubber bands carefully—don’t pull too aggressively or you risk distorting the fabric. Open the shirt slowly and rinse any remaining loose dye from the now-exposed white areas.
Step 11: Wash the shirt alone in cold water with a small amount of mild detergent. Keep it separate from other laundry for this first wash—some color will still bleed. Cold water, gentle cycle, no fabric softener. Hang or lay flat to dry rather than putting it in a dryer, which can cause uneven fading in the early washes.
You’re Probably Doing This Wrong: Color Placement Strategy
Most beginners apply colors randomly and end up with muddy brown patches where colors overlap and mix. This happens because food coloring follows standard color mixing rules—red and green make brown, blue and orange make brown, and most complementary color combinations in the middle of a tie dye pattern produce an unappealing muddy center.
A simple fix: keep colors that mix poorly (complementary colors) separated by leaving a small uncolored gap between them on the fabric, or use a neutral color like white space (just leave it uncolored) as a buffer. Yellow and blue make green—intentional and attractive. Red and blue make purple—great. Red and green touching directly? Muddy brown. Plan your color placement with basic color theory in mind before you start squeezing.
Tips for Making the Color Last Longer
Food coloring on cotton will fade faster than fiber reactive dye regardless of technique—that’s just chemistry. But these habits slow the fading significantly:
- Always wash in cold water. Hot water accelerates dye release from the fiber.
- Wash inside out. Reduces friction on the colored surface during the wash cycle.
- Use a gentle, color-safe detergent. Avoid detergents with optical brighteners or bleaching agents.
- Air dry instead of machine drying. Heat from the dryer degrades dye bonds over time.
- Re-dye if needed. Because food coloring is accessible and inexpensive, touching up a faded shirt is much easier than with professional dye—just repeat the process over the existing pattern.
Quick Reference: Fabric Type and Expected Results
| Fabric Type | Food Coloring Performance | Tips |
|---|---|---|
| 100% wool | Excellent | Vinegar soak, stovetop heat-set |
| Silk | Excellent | Vinegar soak, gentle heat, handle carefully |
| Nylon | Very good | Vinegar soak, microwave or stovetop heat-set |
| 100% cotton | Moderate | Long pre-soak, concentrated dye, strong heat-set |
| Cotton/poly blend | Fair | Results vary; more polyester = less color uptake |
| 100% polyester | Poor | Food coloring does not bond well to synthetic fibers |
FAQ
How long does food coloring tie dye last on cotton? With proper pre-soaking, heat-setting, and cold-water washing, expect three to ten washes before noticeable fading begins on cotton. On wool or silk with the vinegar method, color longevity is significantly better—closer to what you’d expect from standard dye.
Can I use food coloring on a colored shirt? The base color of the shirt affects how the food coloring appears. Food coloring on a yellow shirt will shift the colors significantly—blue dye over yellow fabric produces green, for example. For the most predictable and vivid results, always start with white or very light-colored fabric.
Do I need to use gel food coloring, or will liquid work? Liquid food coloring can work, but you’ll need a much larger amount to achieve comparable color intensity. The dye solution ends up very diluted, which means less color bonding with the fabric. Gel food coloring is strongly recommended for noticeably better results with less product.
Can kids do this project safely? Yes—this is one of the safest dye crafts available. Food coloring is non-toxic, vinegar is food-safe, and there are no harsh chemicals involved. Gloves are still recommended to prevent stained hands, and adult supervision is helpful during the heat-setting step when dealing with hot steam or simmering water.
Why did my colors turn brown in the middle? Complementary colors overlapping during application mix into brown tones—this is standard color theory. Keep colors that don’t mix attractively separated on the fabric, and leave small uncolored gaps between color sections as a buffer zone.
Conclusion
Tie dyeing with food coloring works—and works well—when you follow the right steps in the right order. The pre-soak, the dye concentration, the heat-setting, and the aftercare all matter more than which specific pattern you choose or how precisely you fold the shirt. Start with gel food coloring over liquid, give the pre-soak the time it needs, don’t skip the heat-setting step, and wash in cold water going forward. On wool and silk the results are genuinely impressive. On cotton they’re vibrant and fun, even if they need a refresh after several washes. Either way, it’s a low-cost, low-risk project that’s hard not to enjoy—and the results are always a little surprising when you unwrap the rubber bands.
Enjoyed this project? Get even more DIY ideas that save (and make) you money.
Join our free newsletter for profitable DIY projects, clever cleaning hacks, home ideas, and creative crafts delivered straight to your inbox.
✓ Free forever • No spam • Unsubscribe anytime




