
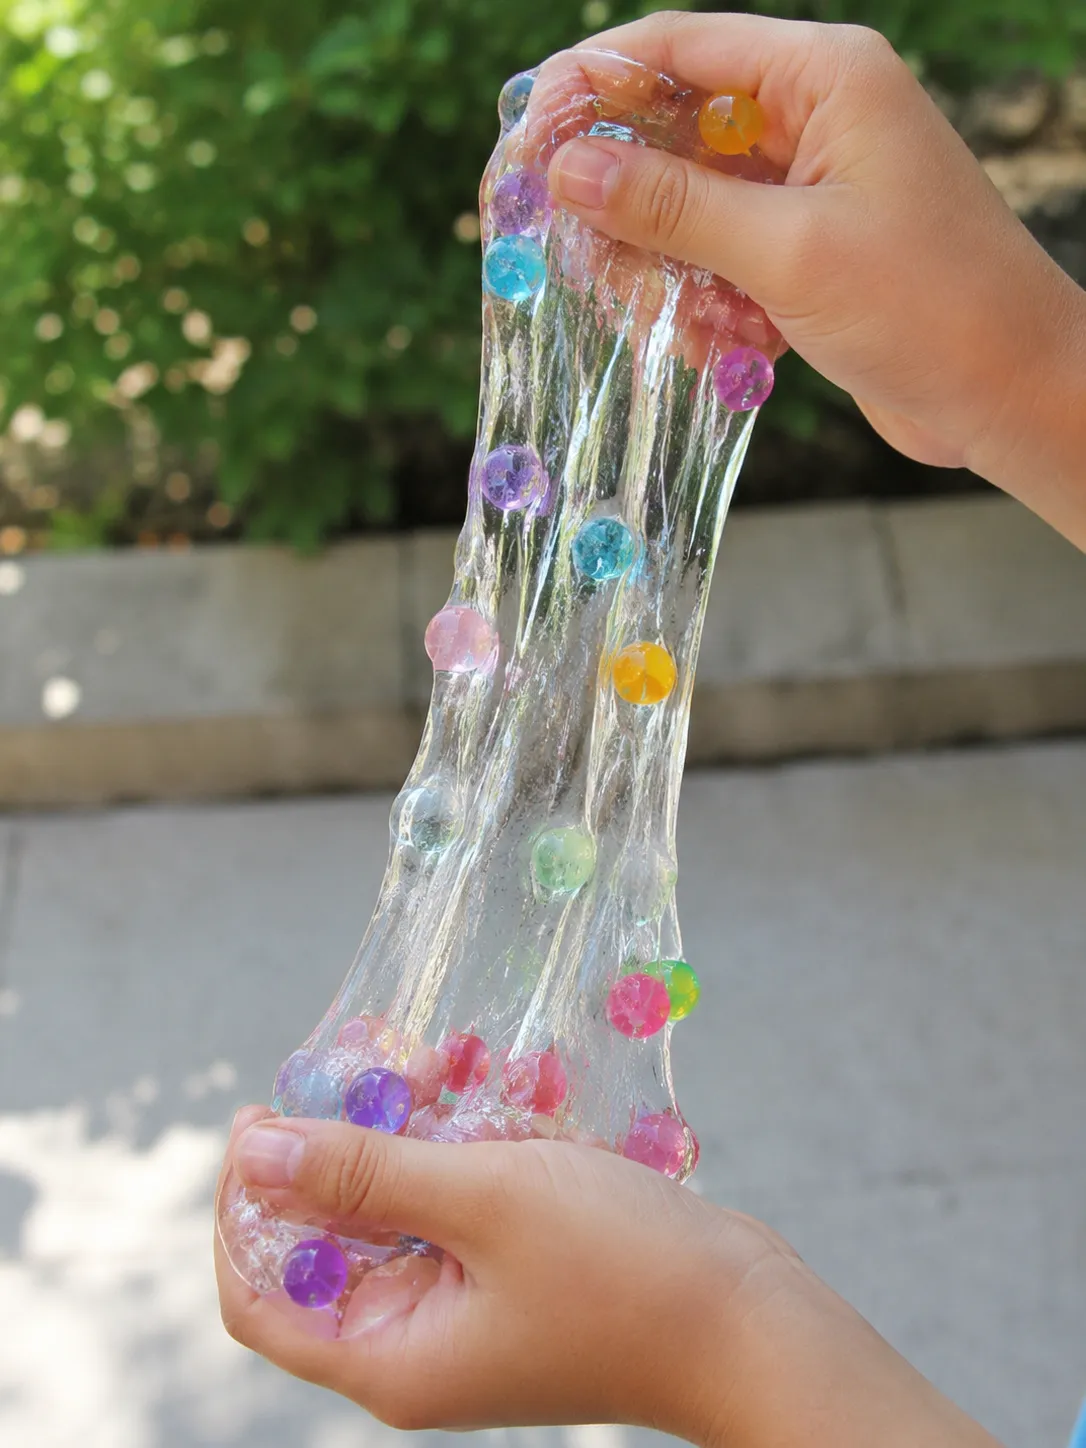
Orbeez slime is one of those textures that genuinely surprises people the first time they touch it. The water beads, soft and squishy on their own, take on a completely different quality when suspended in a stretchy slime base, creating something that feels bouncy, jiggly, and satisfying in a way that neither the slime nor the Orbeez could achieve alone. It’s also one of the most visually striking slime types since the beads are large enough to see clearly through a clear slime base and they catch light beautifully from every angle.
The recipe is straightforward, but a few specific details around water bead preparation and the slime base consistency make the difference between a finished product that looks and feels exactly right and one that ends up either too stiff or too runny to properly hold the beads.
What You’ll Need
- 1 cup of clear PVA school glue
- 1 teaspoon of baking soda
- 1 to 2 tablespoons of contact lens solution containing boric acid
- 1 to 2 cups of fully hydrated Orbeez or water beads in your preferred colors
- Food coloring or liquid watercolors (optional)
- Fine glitter (optional)
- A large mixing bowl and spoon
- Paper towels for draining the water beads
- Airtight container for storage
About Water Beads
Water beads, most commonly known by the brand name Orbeez, start as tiny hard pellets about the size of a sesame seed and expand into soft, squishy spheres roughly the size of a marble when soaked in water. The expansion takes anywhere from four to eight hours depending on the size of the beads and the quantity of water used, so preparation needs to happen well ahead of the actual slime-making session.
A few things worth knowing before starting:
- Fully hydrated beads should feel soft and smooth with no hard center when squeezed between fingers. Any remaining hardness means they need more soaking time.
- Beads soaked in colored water take on that color permanently, which is how you achieve vivid single-color Orbeez. Soaking in plain water produces clear or translucent beads.
- Larger beads create a more dramatically textured slime with individual beads clearly visible and felt. Smaller water beads produce a finer, more uniform texture.
- Drain the beads thoroughly on paper towels before adding to slime. Excess water sitting on the surface of the beads thins the slime base and throws off the activator ratio, making the finished slime stickier and harder to work with than it should be.
Preparing the Water Beads
- Place dry water beads in a large bowl and cover with at least three times their volume in water.
- For colored beads, add food coloring to the water before adding the beads, since the beads absorb the color as they hydrate.
- Let the beads soak for a minimum of four hours, or overnight for the most fully hydrated, evenly sized result.
- Drain the fully hydrated beads through a colander and spread them on a layer of paper towels.
- Pat the surface of the beads gently with additional paper towels to remove surface water without crushing the beads.
- Allow to sit on the paper towels for fifteen to twenty minutes before using, since even brief additional drying time makes a noticeable difference to the final slime consistency.
How to Make the Slime Base
- Pour the clear glue into a large mixing bowl.
- Add food coloring or glitter if using and stir until fully distributed through the glue.
- Add the baking soda and stir thoroughly until no powder is visible.
- Add contact lens solution one teaspoon at a time, stirring continuously after each addition.
- Continue adding gradually until the mixture pulls away from the bowl sides and comes together as a cohesive mass.
- Remove from the bowl and knead for two to three minutes until smooth and non-sticky.
- If stickiness remains, add contact lens solution one drop at a time while kneading until resolved.
- Place the finished base slime in a sealed container and allow it to rest for 24 hours for the clearest result, since clear glue slime needs this rest period to fully clear before adding the beads. If you’re not concerned about maximum clarity and want to proceed immediately, the slime is ready to use as soon as the base feels right.
Adding the Water Beads to the Slime
- Flatten the slime base on a clean surface or in the mixing bowl.
- Add a generous handful of drained water beads to the surface of the slime.
- Fold the slime gently over the beads, taking care not to crush them by pressing too hard.
- Knead slowly and deliberately, working the beads into the slime with a gentle folding motion rather than aggressive pressing.
- Gather any beads that escape during kneading and work them back in.
- Add more beads in small handfuls, kneading gently between each addition.
- Continue until the slime has reached the bead density you want, typically somewhere between one and two cups of beads per cup of original glue.
- Give the slime a final gentle knead to settle everything evenly.
The key word throughout this stage is gentle. Water beads are surprisingly fragile for something that looks robust, and aggressive kneading or squeezing pops them, releasing water into the slime and changing the consistency significantly. Slow, deliberate folding keeps the beads intact and the slime at the right consistency.
What Orbeez Slime Should Feel Like
A properly made batch of Orbeez slime should:
- Feel jiggly and bouncy when held in the palm
- Stretch slowly without snapping
- Have beads that shift and move when the slime is pressed but stay intact rather than popping
- Feel noticeably heavier than regular slime due to the water weight of the beads
- Make a soft, satisfying squelching sound when compressed
Tips for Getting the Best Results
- Drain the beads thoroughly before adding. This is the single most impactful preparation step. Excess water from inadequately drained beads runs into the slime base and creates a sloppy, under-activated consistency that’s very difficult to correct after the beads are already in.
- Use clear glue rather than white. The transparency of clear slime shows off the water beads far better than white glue, which hides the beads’ color and translucency inside an opaque base.
- Make the base slightly firmer than usual. Adding one extra drop of activator beyond what feels right for regular slime gives the base enough structure to hold the water beads without becoming runny from the moisture they release during play.
- Add beads gradually. A slow build-up allows much more even distribution than adding everything at once and trying to work through a large bead mass.
- Work gently. Vigorous kneading pops the beads. Slow, deliberate folding keeps them intact and the slime at the right consistency throughout the process.
- Match the slime color to the bead color for a monochrome look, or use a complementary color for a contrasting effect. A deep blue slime base with teal and clear beads looks particularly striking.
Color Combinations Worth Trying
Ocean Orbeez Slime
Tint the clear slime base with a very small amount of blue food coloring and use a mix of blue, teal, and clear water beads. The translucent base combined with the various blue-toned beads creates a convincing underwater effect, particularly when chunky silver glitter is added to the base to mimic light on water.
Rainbow Orbeez Slime
Use a clear, untinted slime base and a full rainbow mix of water beads in red, orange, yellow, green, blue, and purple. The clear base shows every color of bead in its best possible light and the visual of a rainbow spread of beads through a transparent slime is one of the most striking versions of this recipe.
Pastel Galaxy Orbeez Slime
Tint the base with a very light purple and add iridescent shimmer pigment and fine holographic glitter before activating. Use pastel pink, lavender, and light blue water beads. The shimmer in the base combined with the soft-toned beads creates a dreamy, otherworldly quality that sits somewhere between unicorn slime and galaxy slime aesthetically.
Glow in the Dark Orbeez Slime
Mix glow in the dark pigment powder into the clear glue base before activating and use clear or white water beads. Under normal light it looks like a slightly milky clear slime. Under a UV blacklight or in darkness after charging under a bright light, the slime glows while the clear beads catch and scatter the glow in a genuinely stunning way.
Quick Fixes for Common Problems
| Problem | Potential Solution | Alternative Approach |
|---|---|---|
| Slime became runny after adding beads | Beads weren’t drained thoroughly enough—excess water thinned the base | Add a drop or two of extra contact lens solution while gently kneading to firm the base back up |
| Beads keep popping during kneading | Knead more gently using a slow folding motion rather than pressing and squeezing | Add beads to a slightly firmer base, since a stiffer slime holds beads more securely during kneading |
| Beads sinking to the bottom during play | The slime base is slightly too thin to suspend the beads—add a drop more activator | Make the base slime one step firmer than standard clear slime consistency before adding beads |
| Slime base looks cloudy rather than clear | Clear glue slime needs 24 to 48 hours sealed and undisturbed to fully clear | Ensure the container is fully airtight during the rest period, since any air exposure slows clearing |
| Water beads didn’t fully hydrate | They need more time—return to soaking for an additional two to four hours | Ensure the bowl had enough water, since beads need at least three times their dry volume in water to fully expand |
| Finished slime feels too heavy and dense | Reduce the number of beads in the next batch or use smaller sized water beads | Remove some beads from the current batch by gently picking them out and set them aside |
| Beads losing their color during play | This is normal for color-soaked beads with extended use—the color gradually leeches into the slime | Embrace the color transfer as part of the experience, since it often tints the clear base a beautiful subtle shade |
How to Store Orbeez Slime
Orbeez slime has a shorter usable lifespan than most other slime types because the water beads gradually release moisture into the slime base over time, slowly changing the consistency even during storage.
- Store in a fully airtight container at room temperature.
- Expect the slime to stay at its best for approximately one week, after which the base typically becomes progressively thinner as bead moisture continues to migrate into the slime.
- If the slime becomes runny during storage, add a drop of contact lens solution and knead gently to firm it back up.
- Do not refrigerate, since cold temperatures affect both the slime texture and the integrity of the water beads.
- When the slime can no longer be firmed back up and has become too runny to play with, the water beads can be removed, re-soaked in fresh water, and used in a new slime batch.
FAQ
Can I use any brand of water beads or do I need Orbeez specifically?
Any brand of water beads works for this recipe. Orbeez is simply the most widely known brand name, but generic water beads available at craft stores, dollar stores, and online produce identical results at significantly lower cost. The key variable is bead size, since smaller generic beads produce a finer texture and larger Orbeez-sized beads produce the more pronounced, jiggly individual bead texture.
How long do I need to soak the beads?
A minimum of four hours is needed for partial hydration, but overnight soaking produces the most fully and evenly hydrated beads. Partially hydrated beads that still have a hard center will continue absorbing water from the slime base after being added, which progressively thins the slime over the following hours.
Is Orbeez slime safe for young children?
The water beads present a choking hazard and should not be used with children under five without close supervision. If swallowed, water beads can expand in the digestive tract, which is a serious concern. For very young children, consider making the slime without beads or supervising closely throughout play. Hands should be washed before and after play.
Why does my Orbeez slime get runnier the more it’s played with?
Handling generates warmth, and warmth causes the water beads to release their stored moisture into the surrounding slime base at a faster rate than they would during storage. This is a natural property of water beads in slime and isn’t a sign that anything went wrong. Chilling the slime briefly before play slows this process somewhat.
Can I rehydrate the beads when the slime is no longer usable?
Yes. When the slime has deteriorated to the point of being too runny for play, place the whole batch in a colander and rinse under water. The slime will dissolve away and the beads can be collected, rinsed thoroughly, and resoaked in clean water for use in a new slime batch.
Conclusion
Orbeez slime is worth making specifically because the texture is something genuinely different from every other slime type, and the visual of soft, colorful water beads suspended in a clear stretchy base is one of the most immediately striking things you can produce from a bottle of school glue. Drain the beads properly, make the base slightly firmer than usual, add the beads gently and gradually, and plan for a lifespan of about a week before the moisture migration changes the consistency beyond what a drop of activator can fix. Within that window it’s one of the most satisfying slime textures there is.
Enjoyed this project? Get even more DIY ideas that save (and make) you money.
Join our free newsletter for profitable DIY projects, clever cleaning hacks, home ideas, and creative crafts delivered straight to your inbox.
✓ Free forever • No spam • Unsubscribe anytime




