
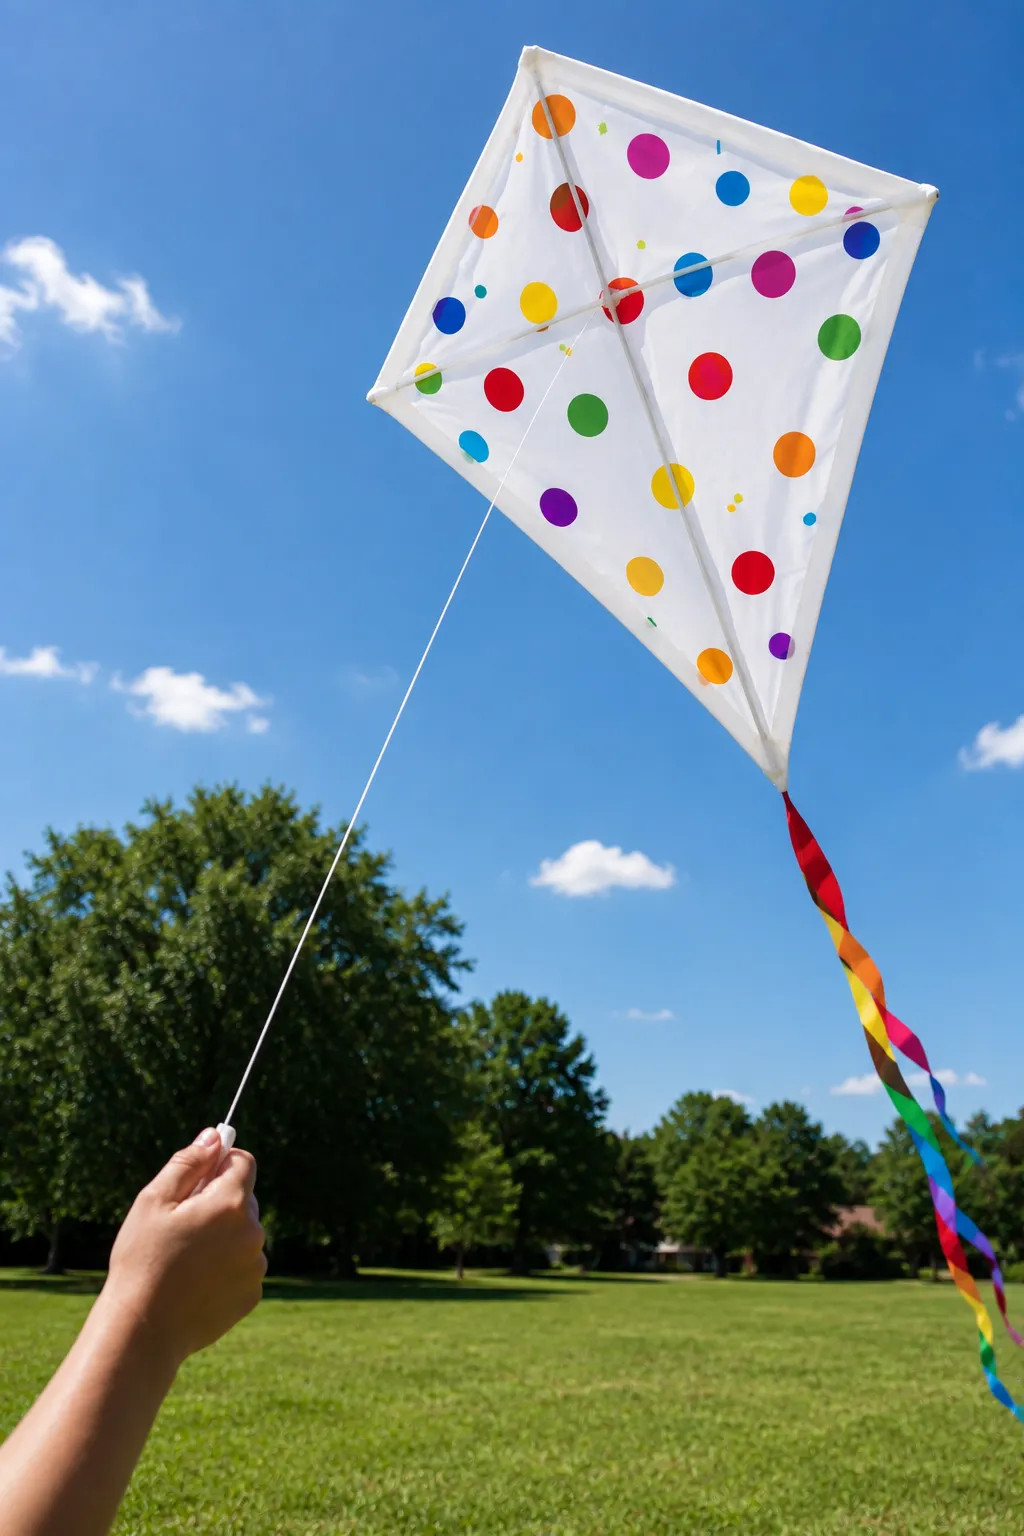
The gap between a homemade kite that looks good and one that actually flies is almost entirely about structure and proportion. Most DIY kite tutorials focus on the making and decoration and gloss over the specific details that determine whether a kite catches wind and climbs or nose-dives immediately and stays on the ground. Those details are not complicated, but they’re specific enough that getting them wrong consistently produces a kite that doesn’t work regardless of how much effort went into making it.
Here are two versions that genuinely fly: a simple diamond kite for younger kids and beginners, and a delta kite for anyone who wants something that handles a wider range of wind conditions and flies at a steeper angle. Both use inexpensive materials available at any craft or hardware store, and both include the structural details that make the difference between a kite that works and one that doesn’t.
Why Most Homemade Kites Don’t Fly
Before getting into the builds, it’s worth understanding the three most common reasons homemade kites fail, since knowing what to avoid is as useful as knowing what to do.
Wrong proportions. A kite’s dimensions need to be within specific ratios for it to generate the right amount of lift relative to drag. A diamond kite that’s too wide and not tall enough, or a frame that’s too heavy for the sail material, won’t fly regardless of wind conditions.
No tail or wrong tail length. The tail stabilizes the kite by adding drag at the bottom, which keeps the nose pointing upward into the wind. A kite with no tail or a tail that’s too short spins and tumbles. A tail that’s too long adds so much drag the kite can’t lift. Getting tail length right is one of the most important adjustments for any kite.
Wrong bridle angle. The bridle is the string attached to the kite that connects it to the flying line. The angle at which the bridle holds the kite determines the angle of attack into the wind. Too flat and the kite doesn’t generate lift. Too steep and it stalls. Adjusting the bridle tow point is the primary way to tune a kite’s flying performance.
What You’ll Need for Both Versions
For the Diamond Kite
- 2 wooden dowels, one 60 cm and one 50 cm (approximately ¼ inch diameter)
- A large plastic bag or lightweight fabric, approximately 60 cm x 60 cm
- Strong string or kite string
- Scissors
- Tape, both regular and packing tape for reinforcement
- A marker
- Ruler
- Ribbon or strips of fabric for the tail, approximately 2 to 3 meters total length
- A ball of kite string or lightweight twine for flying
For the Delta Kite
- 3 wooden dowels, two at 90 cm and one at 60 cm (approximately ¼ inch diameter)
- A large plastic bag, drop cloth, or ripstop nylon, approximately 90 cm x 90 cm
- Strong string or kite string
- Scissors
- Packing tape
- Marker and ruler
- Ribbon for tail, approximately 3 to 4 meters
- Ball of kite string for flying
Version 1: The Diamond Kite
The diamond kite is the most universally recognized kite shape and the easiest to build. It flies best in moderate, consistent wind of about ten to twenty kilometers per hour, which covers most typical outdoor conditions. It’s the right choice for a first build or for making with young children since the construction is straightforward and the materials list is short.
Building the Frame
- Take the 60 cm dowel (the vertical spine) and the 50 cm dowel (the horizontal cross spar) and find the center point of the horizontal spar by measuring and marking 25 cm from each end.
- Mark a point 20 cm from the top end of the vertical spine. This is where the cross spar attaches, positioned above center rather than at the midpoint, which gives the diamond kite its correct proportions with a longer bottom section than top section.
- Place the horizontal spar across the vertical spine at the marked point, forming a cross shape, with the spar centered at its midpoint over the spine mark.
- Lash the two dowels together at the crossing point using strong string. Wrap the string diagonally around the crossing point multiple times, alternating directions, then tie off firmly. This joint needs to be secure since it bears most of the structural stress during flight.
- Add a drop of strong craft glue or a wrapping of electrical tape over the string lashing for extra security.
- Cut a length of string long enough to reach around the entire perimeter of the kite frame with some extra for tying. Starting at the top of the vertical spine, create notches at each tip of the dowels using scissors so the perimeter string has something to grip.
- Tie the string to the top notch and run it to each of the four tips in sequence, pulling it taut so it bows the dowels slightly inward and creates the diamond outline. The slight inward bow from the taut string is correct and gives the kite a very slight curve that improves its flying characteristics.
- Tie off the string securely at the top where you started.
Making the Sail
- Lay the frame flat on the plastic bag or fabric.
- Trace around the outside of the string perimeter with a marker, adding approximately two centimeters around the whole outline for a folding margin.
- Cut along the outer traced line.
- Fold the edge of the sail material over the perimeter string all the way around and tape securely, creating a hemmed edge that encases the string. The sail should be taut but not stretched tight, since overly tight sail material can distort the frame.
- Reinforce each corner where the dowel tips meet the sail with a double layer of packing tape since these points receive the most stress during flight.
Attaching the Bridle
The bridle is the most critical part of making a diamond kite fly correctly and the part most tutorials rush through without enough detail.
- Cut a length of string approximately 90 cm long.
- Pierce or punch a small hole in the sail at the very top of the vertical spine and another at the very bottom of the vertical spine.
- Thread the bridle string through the top hole and tie it securely around the top of the spine dowel, reinforcing with tape so it can’t pull through.
- Thread the other end through the bottom hole and tie it securely to the bottom of the spine dowel, reinforcing with tape.
- The bridle string should now run from the top of the kite, along the front surface of the sail to the bottom of the kite, forming a long loop.
- Find the balance point of this bridle by picking up the loop at its midpoint and adjusting until the kite hangs at approximately a 20 to 25 degree angle from vertical when held by the midpoint of the bridle string. This angle is the correct flying angle for a diamond kite.
- Tie a small loop at this balance point. This is the tow point where the flying line attaches.
Adding the Tail
- Cut ribbon, fabric strips, or plastic bag strips into a tail approximately 2 to 2.5 meters long for a standard-sized diamond kite. A useful rule of thumb is that the tail should be roughly four times the height of the kite for initial flying, adjustable based on actual flight performance.
- Tie the tail securely to the bottom tip of the vertical spine.
- For extra stability and a more traditional look, tie additional short ribbon pieces at intervals along the tail, creating a bumpy tail with extra drag distributed along its length rather than concentrated at the end.
Version 2: The Delta Kite
The delta kite is a triangular design that flies in a wider range of wind conditions than the diamond, handles lighter winds better, and tends to fly at a steeper angle which means it gets higher with the same amount of string out. It requires slightly more material and one more dowel than the diamond version but is still straightforward to build.
Building the Frame
- Lay the two 90 cm dowels (the leading edge spars) side by side.
- Mark the center point of the 60 cm dowel (the spreader bar) by measuring and marking 30 cm from each end.
- Join the top ends of the two leading edge spars together with a hinge connection, either a purchased kite fitting from a craft store or by lashing them together with string and reinforcing with tape. This junction is the nose of the kite and the most structurally important point.
- Spread the bottom ends of the two leading edge spars apart to create the triangular delta shape, measuring until the spread is approximately 80 cm between the two bottom tips.
- Place the 60 cm spreader bar horizontally across both leading edge spars, positioning it approximately 35 cm down from the nose junction, and lash it securely to each leading edge spar at the points where they cross.
- Add a center spine by running a string from the nose junction down to the center of the spreader bar, pulling it taut and tying off. This string spine stabilizes the kite’s shape during flight without adding significant weight.
- Run string around the full perimeter of the triangular frame, tying to each tip and creating notches at each tip to hold the string in place.
Making the Delta Sail
- Lay the delta frame flat on the plastic bag or fabric.
- Trace the triangular outline with a marker, adding two centimeters around the perimeter for a folding margin.
- Cut out the sail shape.
- Fold the edge over the perimeter string and tape down all the way around, as with the diamond kite sail.
- Apply double layers of packing tape at all three corner tips and at the points where the spreader bar meets the leading edges.
- The sail should sit flat and taut across the frame without pulling the dowels out of their intended positions.
Attaching the Delta Bridle
The delta kite uses a different bridle configuration from the diamond since the flying forces are distributed differently across its triangular shape.
- Attach a bridle string from the nose junction down to each bottom tip of the leading edge spars, creating a Y-shaped bridle with three attachment points.
- Use string lengths that, when the bridle is held at its tow point, position the kite at approximately a 15 to 20 degree angle from vertical. A shallower angle than the diamond kite is correct for the delta design.
- Find the tow point by gathering all three bridle strings and holding them at a single point, adjusting the position along the strings until the kite hangs at the correct angle.
- Tie a small loop at this tow point.
Adding the Delta Tail
- Delta kites sometimes fly without a tail in moderate conditions, but adding a tail significantly improves stability in variable or gusty winds.
- Attach a tail of approximately 3 to 4 meters to the center of the bottom edge of the sail.
- Start with this length and adjust based on actual flying performance.
Flying Your Kite
Finding the Right Conditions
The ideal flying condition for either kite is a steady wind of approximately ten to twenty-five kilometers per hour with no gusts. Steady wind produces stable, consistent flight. Gusty wind makes kite control difficult even for experienced flyers and can stress the frame of a homemade kite beyond what the materials can handle.
Open areas without trees, buildings, or other obstructions produce the best results since obstructions create turbulence that makes consistent wind impossible. Open fields, beaches, and large parks are the best flying locations. Never fly a kite near power lines or in stormy weather.
Launching
- Stand with your back to the wind and hold the kite up by the bridle tow point with one hand, letting the flying line pay out in front of you with the other.
- Release the kite and allow the wind to carry it upward. Walk backward as the kite rises to help it gain altitude.
- Let out more flying line as the kite rises, since more line gives the kite more freedom to find its optimal flying angle.
- If the kite dives to one side repeatedly, the bridle tow point may need to be adjusted slightly toward the top of the bridle to steepen the angle of attack.
- If the kite flies but won’t climb and seems to stall, try adjusting the tow point slightly toward the bottom of the bridle to reduce the angle of attack.
Adjusting for Better Flight
Kite tuning is a process of small adjustments based on real flight observation.
If the kite spins or rotates: the tail is too short or needs to be attached more centrally. Add length to the tail or reattach it at the exact center of the bottom edge.
If the kite pulls hard but won’t climb: the wind may be too strong for the kite. Try a longer tail to add more drag, or wait for lighter wind.
If the kite flies but drops frequently: the wind is too light. Try a shorter tail to reduce drag, or wait for stronger conditions.
If the kite tilts consistently to one side: the frame is uneven. Check that the horizontal spar or spreader is centered and that the sail is evenly tensioned on both sides.
Making It More Exciting
Decoration
Decoration is most effective when applied to the sail before the sail is attached to the frame, since working on a flat piece of sail material is easier than decorating it once it’s under tension on the frame.
Permanent markers work well on plastic bags and create designs that survive the wind stress of flight without bleeding or running. Acrylic paints adhere to plastic if a small amount of dish soap is mixed in to improve adhesion, though they add very slight weight. Stickers and adhesive shapes work well but add weight, so use them sparingly and concentrate them toward the center of the kite rather than the edges.
Adding Sound
Thin strips of crinkle paper or mylar tape attached along the perimeter string make a sound in wind that adds to the flying experience. This is purely aesthetic but kids genuinely enjoy the additional sensory element of a kite that makes noise while flying.
A Kite Train
Making multiple identical diamond kites and flying them in a chain, attaching each kite’s bridle to the tail line of the kite above it, creates a kite train that looks spectacular in the sky. Each additional kite adds drag and requires stronger wind and more flying line, but a train of three to five kites is manageable in a moderate breeze.
Quick Fixes for Common Problems
| Problem | Potential Solution | Alternative Approach |
|---|---|---|
| Kite nose-dives immediately on launch | Adjust the bridle tow point upward toward the nose to steepen the angle of attack | Add more tail length which stabilizes the kite and prevents nose-diving |
| Kite flies but spins or tumbles | Tail is too short—add more length until spinning stops | Check that the cross spar or spreader is exactly centered since an off-center spar causes rotation |
| Kite won’t get above head height | Wind is too light for the kite—try different conditions | Reduce tail length to remove excess drag that’s preventing climb |
| Kite pulls so hard the line is difficult to hold | Wind is too strong—land the kite and try another day | Add a longer tail to increase drag and reduce pull |
| Frame broke during flight | Thin dowels are prone to breaking in strong winds—use thicker dowels for the next build | Reinforce the cross joint with extra lashing and tape before the next flight |
| Sail tore at a corner tip | Reinforce all corner tips with extra layers of packing tape before flying | Repair with packing tape over the tear and reinforce the rest of the corners before relaunching |
| Kite consistently tilts to one side | The sail is uneven or the cross spar isn’t centered—recheck all measurements | Add a small piece of tape to the heavier side as a counterweight and adjust until flight is level |
FAQ
What’s the best material for a beginner kite sail?
Lightweight plastic bags are the most accessible and work reliably for both designs in this guide. They’re waterproof, lightweight, and free. Ripstop nylon is the best performing material for a homemade kite sail but costs more and requires either sewing or careful taping at the edges. Tissue paper and newspaper are sometimes suggested but are too fragile for anything beyond very light wind conditions.
How much flying line do I need?
A hundred meters of string gives most beginners enough to get a kite to a satisfying height. More string means the kite can go higher but makes retrieval slower. A basic ball of kite string from a toy or craft store is sufficient and usually comes with enough line for a good flying session.
Why does my kite fly better some days than others?
Wind consistency matters more than wind speed for kite flying, and wind consistency varies significantly day to day and hour to hour. The best flying conditions are consistent breezes on sunny afternoons when convective heating produces steady updrafts. Early mornings and late evenings often have calmer, less consistent wind.
Can I use bamboo skewers instead of wooden dowels?
For small kites, yes. Bamboo skewers work well for kites with a sail area of less than about 40 x 40 cm since they’re lightweight and straight. For larger kites like the versions in this guide, bamboo skewers aren’t stiff or strong enough and will flex and break under the aerodynamic loads of a kite with significant sail area.
How do I safely land the kite?
Walk toward the kite while gathering in the flying line, keeping the line slightly taut rather than letting it go slack which causes the kite to drop suddenly. Once the kite is close enough, grasp it by the frame rather than the sail to avoid tearing the material during landing.
Conclusion
A kite that actually flies comes down to three things done correctly: the right proportions in the frame, a well-adjusted bridle at the correct angle, and a tail that’s long enough to stabilize without being so long it prevents climbing. Get those three elements right on either the diamond or delta design and the kite will fly in any reasonable wind condition. Both builds are straightforward enough to complete in an afternoon and inexpensive enough to rebuild if the first attempt needs refinement. Take it to an open field, keep your back to the wind, and let the line out slowly as it climbs.
Enjoyed this project? Get even more DIY ideas that save (and make) you money.
Join our free newsletter for profitable DIY projects, clever cleaning hacks, home ideas, and creative crafts delivered straight to your inbox.
✓ Free forever • No spam • Unsubscribe anytime




