
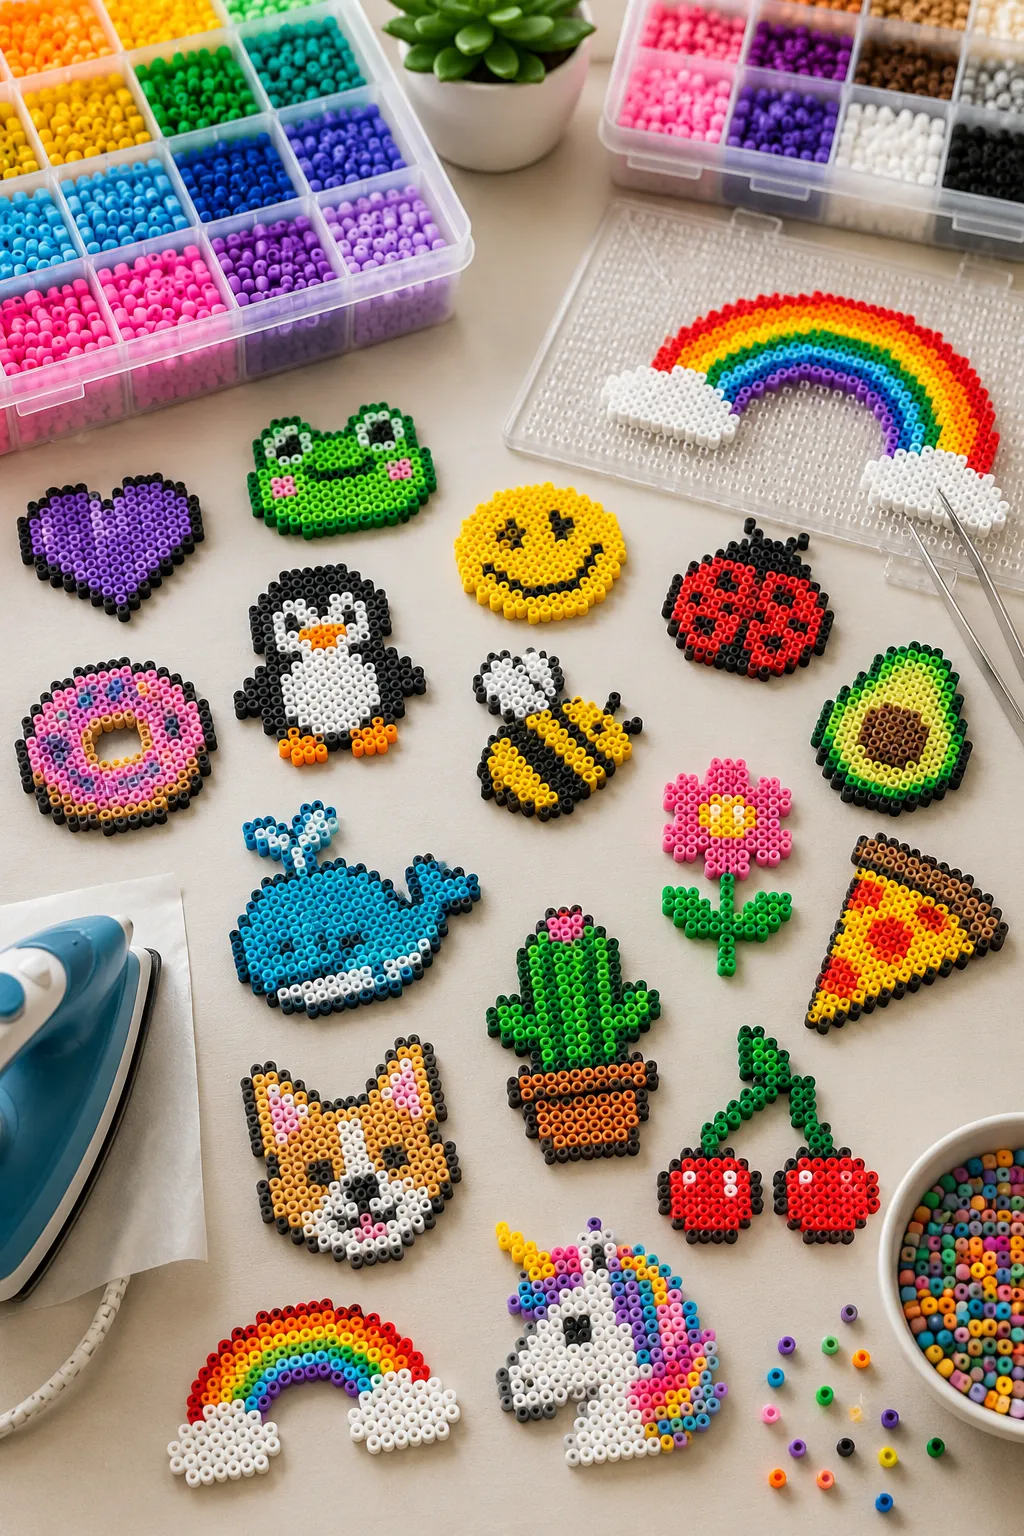
Perler beads have a specific kind of appeal that’s hard to explain until you’ve actually sat down with a pegboard and started placing beads. There’s something genuinely satisfying about building a pixelated image one bead at a time, watching a recognizable shape emerge from what looked like a random pile of colored plastic, and then fusing it into a solid piece you can actually keep or display. It’s part craft, part puzzle, and the finished results look significantly more impressive than the process that created them.
The learning curve is real but short. Once you understand how the beads, pegboard, and iron work together, the technique itself stays the same regardless of how complex the pattern is. A beginner making a simple heart on their first session and an experienced maker producing a detailed video game character are using exactly the same process, just with more beads and more patience.
Here’s everything you need to know to get started, including the specific techniques that make the difference between a finished piece that holds together properly and one that falls apart or melts unevenly.
What Are Perler Beads?
Perler beads (also called Hama beads or fuse beads depending on the brand) are small, hollow plastic cylinders that fit onto a pegboard. Once arranged into a pattern on the board, they’re fused together using an iron and a piece of ironing paper, which melts the beads just enough to bond them to each other at their touching points while keeping their circular shape.
The result is a solid, flat piece of fused plastic that holds its shape permanently. Finished pieces can be used as coasters, keychains, decorations, magnets, ornaments, or just displayed as art.
The beads come in hundreds of colors and are widely available at craft stores and online. A large mixed bag of assorted colors is the most practical starting purchase since it gives variety for multiple projects without needing to select specific colors before knowing what patterns you want to make.
What You’ll Need
- Perler beads or equivalent brand beads in your chosen colors
- A Perler pegboard, available in square, round, and various shaped options
- Ironing paper (comes included with most Perler bead kits, or sold separately as parchment paper which works identically)
- A household iron
- A flat, heat-safe ironing surface
- A pair of tweezers (optional but genuinely useful for precise bead placement)
- A printed or on-screen pattern to follow
Choosing Your First Pattern
The biggest beginner mistake is choosing a pattern that’s too ambitious for a first attempt. A pattern with fifteen colors and two hundred beads sounds manageable until you’re sorting beads by color and placing them one at a time for the first hour with no visible progress.
For a first project, choose something with:
- No more than five colors
- No more than one hundred beads total
- A recognizable, simple shape with defined outlines
Good first patterns include: a simple heart, a star, a small flower, a Minecraft creeper face, a classic Space Invader, a simple emoji face, a small butterfly, or a basic geometric diamond shape.
All of these are available as free printable patterns online by searching “easy Perler bead pattern” and can be found in seconds. Starting from a printed reference rather than trying to design a first pattern from memory produces significantly better results and removes one layer of complexity from an already multi-step process.
Setting Up Your Workspace
A well-organized workspace makes the whole process faster and less frustrating, particularly for patterns with many colors.
Sort beads by color before starting. The most efficient method is pouring a portion of beads onto a flat tray or plate and sorting them into small separate containers, one per color, before beginning placement. Trying to find specific colors in a mixed pile during the pattern-placing stage is the main cause of frustration and errors in Perler bead projects.
Small compartmentalized containers, ice cube trays, or egg cartons all work well as color organizers. The initial sorting takes five to ten minutes but saves significantly more time during the actual pattern work.
Place the pegboard on a flat, stable surface during the placing stage. Pegboards can flex slightly when lifted, which shifts placed beads out of position. Keeping it flat on the table until all beads are placed and the ironing paper is on top prevents this.
Set up good lighting. The color differences between similar shades of bead (light blue versus sky blue, for example) are easier to distinguish under good light than in dim conditions, and misidentifying a color during placement is one of the most common beginner errors.
How to Read a Perler Bead Pattern
Most patterns are presented as a grid where each square in the grid represents one bead. Each color in the pattern is either represented by a color-filled square (in digital patterns) or by a number or letter code (in printed patterns that include a color key).
Reading the pattern works exactly like reading a grid: start at the top left corner and work row by row from left to right, placing one bead per grid square in the corresponding color. When one row is complete, move to the next row below and continue.
Printed patterns are easier to follow than on-screen ones for most beginners since you can mark off completed rows with a pencil as you go, which prevents losing your place in a complex pattern.
For on-screen patterns, zoom in enough that individual grid squares are clearly visible and consider printing the pattern even if it’s from a digital source, since the process of constantly looking from screen to pegboard and back increases the chance of errors compared to working from a printed reference beside the board.
Placing the Beads
With the pegboard flat on the workspace, sorted colors in containers, and pattern at hand, bead placement is straightforward.
- Identify the first bead in the top left corner of the pattern.
- Pick up the corresponding color bead and place it on the top left peg of the pegboard.
- Continue placing beads one at a time, working row by row from left to right and top to bottom, matching each bead color to the corresponding color in the pattern.
- Place each bead so it sits flat on the peg with the hole of the bead sitting over the peg. Beads that are tilted or not fully seated on their pegs don’t fuse correctly.
- Check your work periodically against the pattern, particularly at the end of each row, since catching an error at row five is much easier to fix than catching it at row twenty.
- If a bead is placed incorrectly, simply lift it off and replace it. Beads aren’t committed until they’re fused, so the pattern remains completely editable during the placement stage.
Tweezers make the placement process significantly faster and more precise, particularly for intricate patterns or for people with larger hands who find picking up individual small beads difficult with fingers alone. A good pair of fine-tipped craft tweezers is worth buying for anyone planning to make Perler beads regularly.
Ironing: The Most Important Step
Ironing is where most beginner mistakes happen, and it’s the step that determines whether the finished piece holds together properly or falls apart at the first handling.
Preparing to Iron
Before touching the iron, make sure the pattern is complete and all beads are correctly placed and fully seated on their pegs. Ironing partially placed or incorrectly placed patterns produces results that can’t be fixed since the beads fuse permanently.
Place the ironing paper (or parchment paper) flat over the top of the beads on the pegboard. The paper should fully cover all the beads with no beads exposed at the edges.
Set the iron to a medium heat setting with no steam. Steam during ironing can cause uneven fusing and moisture damage to the finished piece. The specific setting that works best varies slightly between irons, and if the brand of iron is unfamiliar, testing on a small, unimportant practice pattern first is worth doing before committing to a main project.
The Ironing Process
- Place the iron flat on top of the ironing paper covering the beads.
- Move the iron in slow, circular motions across the entire surface of the beads, maintaining consistent pressure and movement rather than leaving the iron stationary in one spot.
- After approximately ten to fifteen seconds of circular ironing, carefully lift the corner of the ironing paper to check whether the beads have fused sufficiently.
- Correctly fused beads should be bonded together at their touching points but still have visible holes in their centers rather than being melted into a solid flat sheet. If the holes are still clearly circular and the beads feel solid when the paper is carefully lifted, the piece is ready.
- If beads are still separating when the paper is lifted, replace the paper and iron for a few more seconds before checking again.
- Over-ironing flattens the beads and closes the holes, producing a completely solid, denser result that some crafters prefer but which looks different from standard Perler bead pieces. Neither is wrong, but if the goal is the classic Perler bead appearance with visible holes, stop ironing before the holes close.
Flipping and Fusing the Other Side
Standard single-sided ironing fuses only the top surface of the beads, leaving the bottom surface unfused. For most decorative pieces this is sufficient, but for anything that will be handled frequently, like a coaster or a keychain, fusing both sides produces a significantly more durable finished piece.
Once the top surface is fused and the ironing paper removed, allow the piece to cool on the pegboard for one to two minutes. The piece will feel firm to the touch once cooled.
Carefully lift the fused piece off the pegboard as a single unit. Flip it over and place it on the ironing surface with the unfused side now facing up. Place fresh ironing paper over the top and repeat the ironing process on this side.
Two-sided fusing produces a piece that’s noticeably more solid and durable than single-sided and is recommended for any piece intended for use rather than just display.
6 Beginner Patterns to Try First
Pattern 1: Classic Heart
The heart is the simplest recognizable shape and the standard first project for most Perler bead beginners. A basic heart in a single color on a contrasting background uses fewer than fifty beads and takes most beginners fifteen to twenty minutes to place.
Use a vivid red or pink for the heart shape and white or a light color for the background, since the contrast makes the shape immediately readable even at small sizes.
Pattern 2: Star
A five-pointed star in yellow on a dark background is another classic beginner pattern that teaches diagonal and curved edge placement without being too demanding. Stars look particularly good when made in yellow or gold on a dark navy or black background.
Pattern 3: Minecraft Creeper Face
The Minecraft creeper face is one of the most popular Perler bead patterns of all time and for good reason. It’s made up of green and black beads in a simple pixel arrangement that looks exactly like the game character and appeals strongly to kids who play Minecraft. The blocky, pixelated nature of the design is perfectly suited to the Perler bead medium.
Pattern 4: Space Invader
Classic arcade Space Invader designs are the original Perler bead subjects since their pixelated design style came from the same era as early pixel art. A simple Space Invader character in a single color on a white background takes fewer than one hundred beads and produces a finished piece that looks genuinely retro-cool as a refrigerator magnet or desktop decoration.
Pattern 5: Butterfly
A simple symmetrical butterfly uses two wing colors plus a body color and demonstrates the satisfying quality of symmetrical patterns that look complex but are easy to execute since the right side mirrors the left. Once the left wing is placed, the right wing is identical in reverse.
Pattern 6: Simple Flower
A flower with a circular center and five or six petals arranged around it uses three colors (center, petals, and background) and teaches the circular arrangement skills that apply to more complex round patterns later. Flowers also look beautiful when made in multiple color combinations and displayed together as a set.
Turning Finished Pieces Into Things
A flat fused Perler bead piece can be turned into multiple functional items with minimal additional materials.
Magnets: Apply a self-adhesive magnet sheet or a small round craft magnet to the back of the finished piece using strong craft glue. Perler bead magnets are one of the most popular finished products and look particularly good as a collection on a refrigerator or magnetic board.
Keychains: Use a metal jump ring and a small keychain ring, both available at craft stores in packs, attached through one of the corner bead holes of the finished piece. A jump ring threaded through the hole and connected to the keychain ring creates a functional, durable keychain.
Coasters: A larger Perler bead piece made on a square pegboard in a suitable size makes a functional coaster. Two-sided fusing is essential for coasters to ensure they’re durable enough for regular use.
Ornaments: Thread a piece of ribbon or string through a corner hole for a hanging ornament that works particularly well for seasonal designs.
Wall art: Arrange multiple finished pieces together in a grid or pattern on a wall for a pixelated art installation effect that looks striking in a bedroom or playroom.
Designing Your Own Patterns
Once the basic technique is comfortable, designing original patterns is a natural next step. There are two main approaches.
Grid paper design: Draw a grid on paper with each square representing one bead, then color in the squares to create the pattern. This works well for simple geometric designs and is completely analog.
Digital pattern tools: Several free online tools and apps allow you to design Perler bead patterns digitally, including Perler’s own pattern creator tool and third-party sites like Bead It! and Hama beads pattern creator. These tools let you place colors on a digital grid and see the finished pattern before committing to physically placing beads.
Photo conversion: Some tools allow you to upload a photo and convert it automatically into a bead pattern, which works particularly well for portrait-style pixel art where you want to recreate a specific image. The automatic conversion always needs some manual cleanup since the algorithm doesn’t always make the best color choices, but it provides a strong starting point faster than drawing from scratch.
Quick Fixes for Common Problems
| Problem | Potential Solution | Alternative Approach |
|---|---|---|
| Beads not fusing together and falling apart | Iron for longer with slow circular motions, checking every five seconds | Make sure the iron has no steam setting active, since steam prevents proper fusing |
| Beads melted flat and holes closed | Iron was too hot or held in one place too long—reduce heat and keep moving next time | Some crafters prefer fully melted flat beads as a deliberate aesthetic choice |
| Piece warped or curved after ironing | While still warm, place under a heavy flat book for one to two minutes until cooled in a flat position | Two-sided ironing produces less warping than single-sided since both sides contract equally |
| Beads shifted while placing ironing paper | Slide the ironing paper onto the beads from the side rather than dropping it from above | Use tape to anchor the ironing paper edges to the pegboard before ironing |
| Colors look different from the pattern | Bead colors vary slightly between brands and the on-screen colors in digital patterns don’t always match physical beads exactly | Sort and label beads by color code number rather than appearance for complex multi-color patterns |
| Piece won’t come off the pegboard cleanly | Allow to cool completely before removing—trying to remove a warm piece causes breakage | Flex the pegboard gently from the back to release the piece rather than pulling it straight off |
| Pattern has errors noticed after ironing | Small errors in an otherwise complete piece are usually less noticeable in the finished product than they seemed on the board | Accept imperfection on early pieces since the technique improves faster with finishing and restarting than with trying to repair |
FAQ
What’s the difference between Perler beads, Hama beads, and Artkal beads?
All three are brands of fuse beads that work on the same principle. Perler is the most common brand in North America. Hama is the most common in Europe. Artkal beads are a newer brand known for producing more colors and a slightly smaller bead size (called mini beads) that allows for finer detail in finished pieces. All standard-size versions are compatible with each other and can be mixed in the same project without any issues.
Can Perler beads be done without an iron?
Not in the traditional sense since fusing requires heat to work. Some crafters use a heat gun as an alternative to an iron for specific effects, but standard ironing produces the most consistent results for beginners. There are no-iron Perler bead kits sold for young children that use water instead of heat, but these produce a different and less durable result.
How do I store unused beads?
The most practical storage is a compartmentalized container with separate sections for each color, clearly labeled. Fishing tackle boxes and craft supply organizers with adjustable dividers both work well. Keeping beads organized by color makes future projects significantly faster since sorting time is already done.
Can Perler beads be washed?
Finished fused pieces are plastic and water-resistant, so light washing is fine for pieces that get dirty. Coasters in particular can be wiped down. Avoid soaking or dishwasher washing since prolonged water exposure can eventually cause pieces to warp.
What’s the smallest detail that can be made with standard Perler beads?
A single bead is approximately five millimeters in diameter, which sets the resolution limit for detail. Very fine details like individual facial features in a portrait need to be represented by at least one or two beads per feature to be visible. For finer detail work, mini beads (approximately 2.5 millimeters) produced by some brands allow significantly more detail in the same physical space.
Closing Thoughts
Perler beads reward patience with a finished result that looks better than the process that made it, which is one of the best qualities a craft can have. Start with a simple pattern in three or four colors, take the time to sort beads before starting, and don’t rush the ironing step since that’s where most beginner pieces go wrong. Once the first piece is done and fused and sitting in front of you looking like actual pixel art, the appeal of moving to the next pattern becomes immediately obvious.
Enjoyed this project? Get even more DIY ideas that save (and make) you money.
Join our free newsletter for profitable DIY projects, clever cleaning hacks, home ideas, and creative crafts delivered straight to your inbox.
✓ Free forever • No spam • Unsubscribe anytime




