
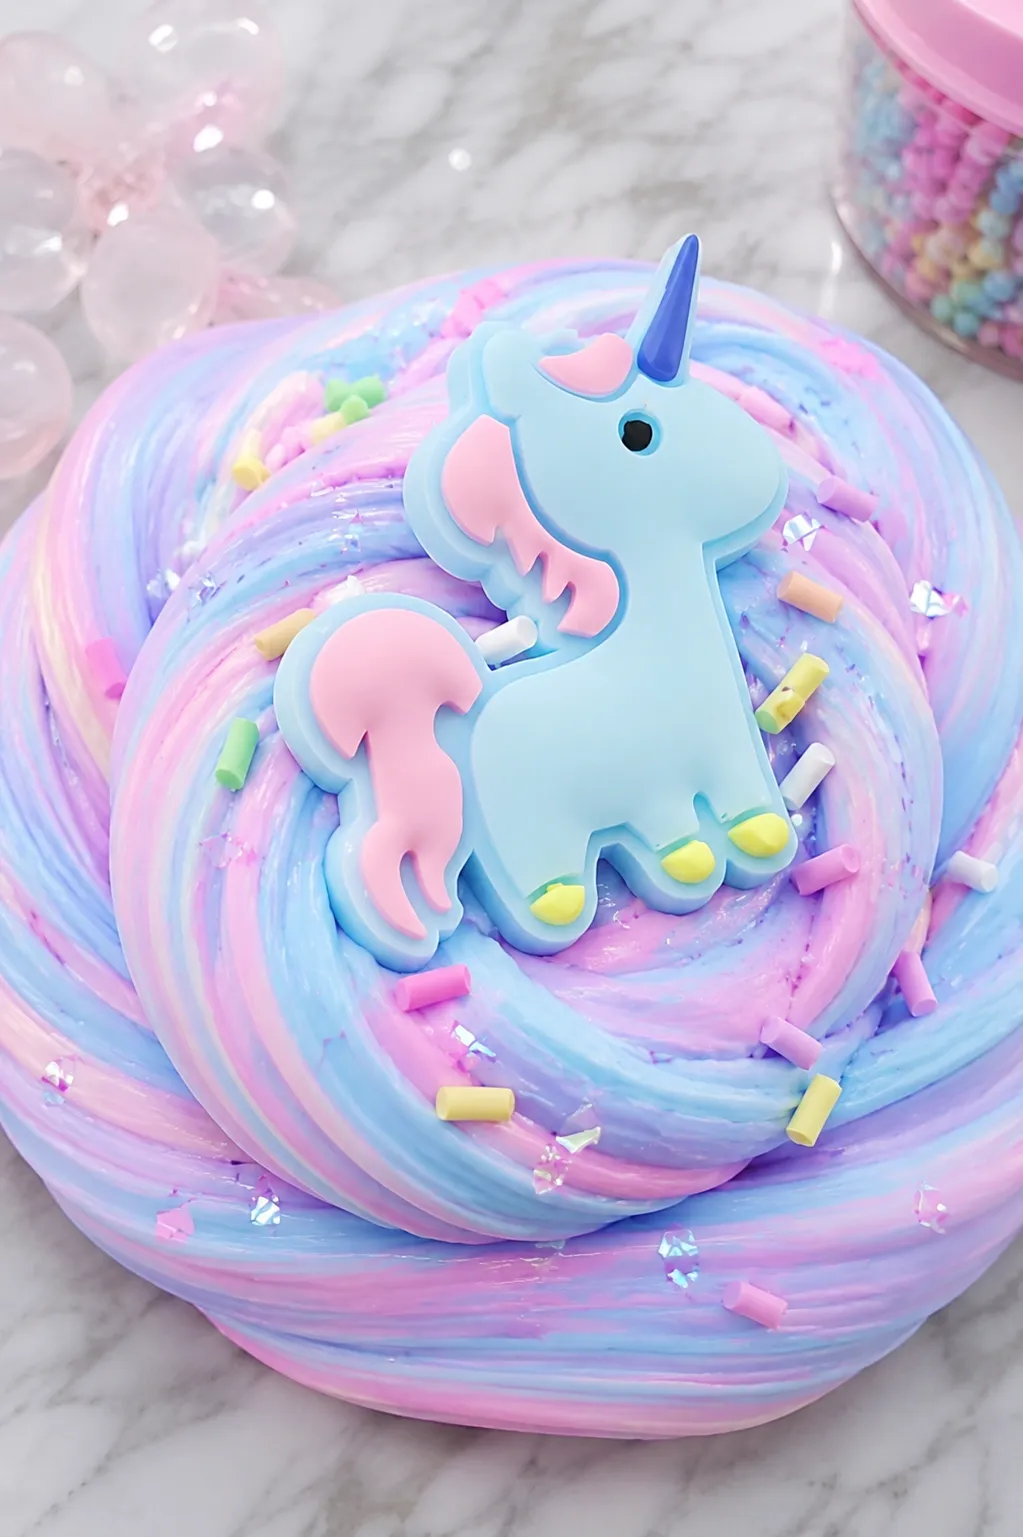
Unicorn slime is what happens when you take everything that makes regular slime satisfying and turn the visual up to maximum. Multiple colors layered and swirled together, glitter catching light from every angle, and that soft pastel palette that somehow manages to look magical without trying too hard. It’s one of those crafts where the finished result looks significantly more impressive than the effort involved, which makes it a genuinely great activity for kids and adults alike.
The recipe itself is straightforward. The technique that keeps the colors vibrant rather than blending into a muddy mess is where most people run into trouble, and that’s what this guide focuses on.
What You’ll Need
- 1 cup of white PVA school glue, divided into portions for each color
- 1 teaspoon of baking soda per color batch
- Contact lens solution containing boric acid
- Pastel food coloring or liquid watercolors in pink, purple, blue, and yellow
- Fine glitter or holographic glitter in multiple colors
- A separate mixing bowl for each color
- A large container or display jar for layering
- Airtight containers for storage
Choosing Your Unicorn Slime Colors
Classic unicorn slime uses soft pastel shades rather than deeply saturated neon colors, since pastels maintain their distinct appearance when layered and look more authentically unicorn-inspired.
Popular color combinations include:
- Pink, purple, blue, and white
- Lavender, mint, peach, and yellow
- Rose gold, purple, and iridescent white
- Baby blue, soft pink, lilac, and gold
Each color needs its own batch of base slime made separately before layering, since trying to color slime after it’s already been activated makes getting an even distribution of color nearly impossible.
How to Make the Base Slime for Each Color
Each color of unicorn slime is its own individual batch made using the same basic method. Work through these steps separately for each color before moving to the layering stage.
- Divide the white glue evenly between your mixing bowls, one bowl per color.
- Add the desired food coloring or liquid watercolor to the glue and stir until the color is fully and evenly distributed.
- Add a teaspoon of baking soda to each bowl and stir thoroughly until no powder remains visible.
- Add glitter to each bowl if using, since adding it at this stage distributes it more evenly through the finished slime than adding it later.
- Add contact lens solution one teaspoon at a time to the first color, stirring continuously after each addition.
- Continue adding solution gradually until the slime pulls away from the bowl sides and comes together as a single mass.
- Knead the slime for two to three minutes until smooth and non-sticky.
- If stickiness remains, add contact lens solution one drop at a time while kneading until it resolves.
- Set the finished color aside in its own container and repeat the entire process for each remaining color.
How to Layer Unicorn Slime Without Colors Mixing
This is the part most instructions skip over, and it’s the whole reason unicorn slime either looks stunning or ends up as a single muddy color within thirty seconds of being handed to a child.
The key is temperature and firmness. Warm, fresh slime is much more likely to blend into neighboring colors than slime that has been allowed to cool and firm up slightly in a sealed container. Giving each color batch fifteen to twenty minutes to rest before layering makes the colors stay distinct significantly longer.
When layering:
- Place each color into an airtight container or display jar, pressing each layer flat before adding the next color on top.
- Add colors in distinct horizontal layers rather than dropping them in randomly, since flat layers maintain their separation better than irregular blobs.
- Resist the urge to swirl immediately after layering if you want the colors to stay distinct for longer.
- For a swirl effect, use a skewer or chopstick to gently drag through the layers two or three times only, since overworking the swirl blends everything into one color.
- A light swirl of three to four drag strokes produces the most visually striking result, with distinct color sections alongside the blended swirl zones.
Adding the Unicorn Details
What separates basic colored slime from genuinely unicorn-inspired slime is the extra detail layer on top of the color.
Glitter: Mix different colors of fine glitter directly into each individual slime batch before activating for the most even distribution. Chunky holographic glitter added on top of the layered slime after assembly creates a different, more textural glitter effect.
Iridescent shimmer: A small amount of pearl or iridescent pigment powder mixed into each slime batch gives the colors a color-shifting quality in different lighting that looks particularly magical when the slime is stretched and folded.
Star and heart confetti: Small holographic confetti shapes pressed onto the surface of the finished layered slime add a finishing touch that’s especially popular with younger kids.
Scent: A few drops of vanilla extract or a sweet-scented fragrance oil added to each batch at the glue stage gives unicorn slime an appropriately fantasy-inspired scent that elevates the whole sensory experience.
How to Keep the Colors From Turning Muddy During Play
Unicorn slime inevitably blends during play, which is part of the fun, but a few habits extend how long the colors stay distinct.
- Let each color batch rest in a sealed container for at least fifteen minutes before layering.
- When playing, pull the slime apart along color boundaries rather than pressing and folding through all layers at once.
- Store each color batch separately after play if you want to rebuild the layers for next time.
- Once the colors have fully blended during a play session, embrace the result since a fully mixed unicorn slime often produces a beautiful lavender or soft lilac rather than a muddy brown, particularly if the original colors were well-chosen pastels.
Quick Fixes for Common Problems
| Problem | Potential Solution | Alternative Approach |
|---|---|---|
| Colors blended immediately during layering | Let each batch rest and cool before layering—warm fresh slime blends much more easily | Make each batch slightly firmer than usual by adding an extra drop or two of activator before layering |
| Slime turned muddy brown instead of a pretty blend | The colors chosen were direct complements that mix to brown—use analogous colors that sit near each other on the color wheel | Stick to pastels of the same color family, such as pink, lavender, and blue, which blend into purple rather than brown |
| One color is much stiffer than the others | Slightly too much activator in that batch—knead in a small amount of lotion to soften it to match the others | Remake that specific batch with slightly less activator and combine with the rest |
| Glitter isn’t evenly distributed through the slime | Mix glitter into the glue before activating rather than adding after the slime is formed | Knead longer after adding glitter, since it needs more working time to distribute through an already-formed slime |
| Colors look dull rather than vibrant | Liquid watercolors produce significantly more vibrant results than standard food coloring for slime | Use gel food coloring which is more concentrated than liquid food coloring and produces brighter results |
| Slime is sticky after layering | Each individual batch needs to be fully activated before layering—return to kneading each color separately | The container may be trapping moisture during storage, preventing the slime from firming up properly |
| Swirl became a blur rather than distinct streaks | Too many drag strokes were made—limit swirling to three or four gentle passes next time | Use a skewer rather than a finger for more controlled, precise swirl lines |
How to Store Unicorn Slime
- Store each color separately in individual airtight containers if you want to preserve the layered effect for next time.
- If stored already layered, the colors will continue slowly blending at the boundaries even without play.
- Properly stored unicorn slime stays in good condition for two to three weeks at room temperature.
- Avoid refrigerating since the cold changes the texture of white glue slime in ways that are difficult to reverse.
FAQs
How many colors should I use for unicorn slime?
Three to five colors is the sweet spot. Fewer than three doesn’t give the full rainbow unicorn effect, and more than five often results in colors that blend too quickly into a single tone during layering. Four colors is the most popular choice and produces the most balanced visual result.
Can I use clear glue instead of white glue?
Clear glue produces a more translucent slime that shows the glitter and shimmer more vividly but makes pastel colors look much paler and less distinct than white glue does. White glue is the better choice for unicorn slime specifically because the opaque base makes the pastel colors pop.
Why do my colors blend even though I followed all the steps?
Some blending during play is completely unavoidable since slime is a fluid material. The goal of the resting and layering technique is to extend how long the colors stay distinct, not to prevent all blending forever. Even well-made unicorn slime blends eventually, which is part of the play experience.
Can I add foam beads to unicorn slime?
Yes, and the result is a unicorn floam that has both the color and glitter of unicorn slime and the squishy, crunchy texture of floam. Add the beads to each individual color batch during the kneading stage before layering.
What makes unicorn slime different from regular rainbow slime?
The distinction is mostly aesthetic. Unicorn slime specifically uses pastel colors and focuses heavily on glitter, shimmer, and iridescent elements to create a softer, more fantasy-inspired look. Rainbow slime typically uses more saturated primary and secondary colors in distinct bands. Both use the same layering technique.
Conclusion
Unicorn slime looks complicated and comes together from a process that’s genuinely simple once you understand that each color is just its own individual batch of basic slime. Make the colors separately, let them rest before layering, swirl gently rather than aggressively, and choose pastels that blend into complementary rather than muddy tones. The finished result is one of the most visually striking things you can make from a bottle of school glue, and it holds up to the expectation the name sets.
Enjoyed this project? Get even more DIY ideas that save (and make) you money.
Join our free newsletter for profitable DIY projects, clever cleaning hacks, home ideas, and creative crafts delivered straight to your inbox.
✓ Free forever • No spam • Unsubscribe anytime




