
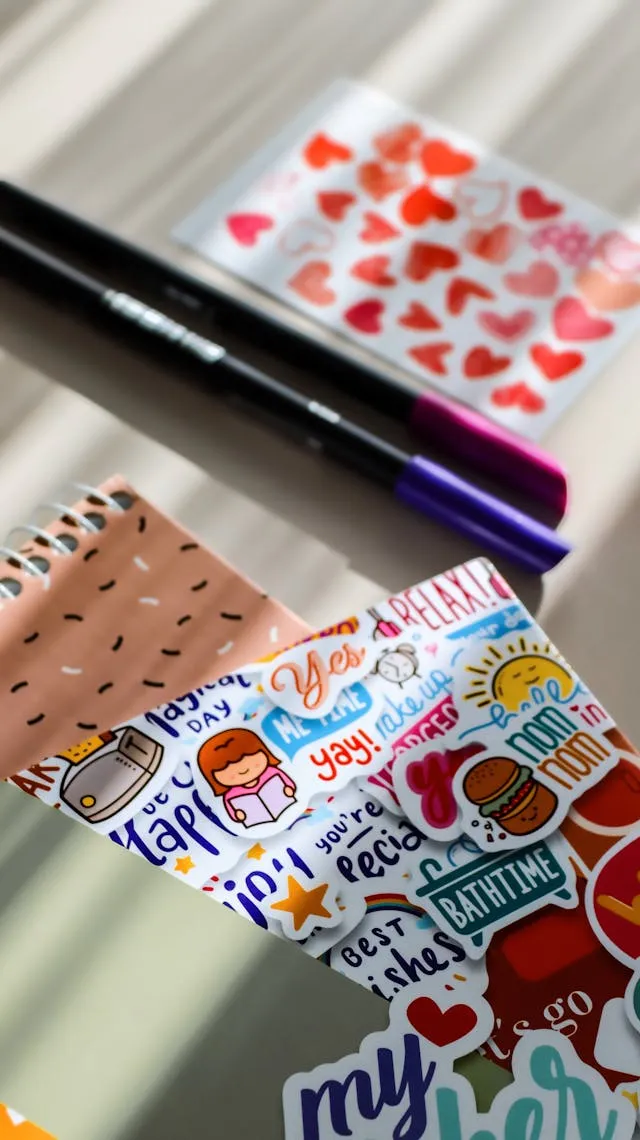
You’ve seen them everywhere—clean, glossy stickers on water bottles, laptop covers, and phone cases that somehow stay perfectly intact through daily use, washing, and general wear. Making your own version with a Cricut machine is entirely doable, and the results can genuinely rival commercially printed stickers.
The problem most people run into isn’t the design or the cutting—it’s the materials. Using the wrong vinyl, skipping the lamination step, or misunderstanding how the Cricut handles printable sticker paper produces stickers that look great for a week and then peel, fade, or dissolve the first time they get wet.
This guide covers exactly what materials to use, how to set up your design correctly, and the cutting and finishing steps that produce stickers that actually stay waterproof—whether you’re using a Cricut Explore, Maker, or Joy.
Here’s the Real Reason Your Stickers Aren’t Waterproof
Most beginner Cricut sticker tutorials skip this explanation entirely, which is why so many people end up frustrated with results that don’t hold up.
There are two fundamentally different ways to make stickers with a Cricut, and they require completely different approaches to waterproofing:
Method 1: Printable sticker paper + Cricut (Print Then Cut) You design in Cricut Design Space, print on your home printer, then use the Cricut to cut around the printed design. The problem is that standard inkjet ink is water-soluble. The moment it gets wet—even from condensation on a cold water bottle—the ink smears, bleeds, or lifts. Making these stickers waterproof requires a lamination step after printing and before cutting.
Method 2: Vinyl + Cricut (cut only) You use colored or patterned adhesive vinyl sheets and cut shapes or designs directly. No printing involved. Vinyl is inherently waterproof—it’s a plastic material—so these stickers don’t need additional waterproofing treatment. The trade-off is that you can’t produce photographic or full-color illustrated designs this way.
Understanding which method you’re using determines every material and step that follows. Most people who want custom illustrated or photographic stickers are using Method 1, which is where the waterproofing question becomes critical.
Don’t Ignore the Material Selection Step
This is where most failed waterproof sticker projects begin. Not all printable sticker paper is the same, and the difference between a sticker that lasts and one that doesn’t comes down almost entirely to what you’re printing and laminating on.
Printable sticker paper options:
- Inkjet printable sticker paper (matte or glossy): The most common and widely available. Works with standard home inkjet printers. Requires lamination for waterproofing—the paper itself is not water-resistant.
- Inkjet printable vinyl: A step up from sticker paper. The vinyl backing is more durable and water-resistant than paper, but the printed surface still needs lamination to protect the ink.
- Laser printable sticker paper: Works with laser printers only. Laser toner is more water-resistant than inkjet ink by nature, but still benefits from lamination for full waterproofing.
- Waterproof printable sticker paper: Specifically designed to resist water without lamination—the paper itself has a water-resistant coating. Brands like Koala and Online Labels make reliable versions. These still benefit from lamination for maximum durability but don’t strictly require it.
Lamination options:
- Self-adhesive laminate sheets: The easiest option. Peel and stick over the printed sheet before cutting. Brands like Scotch, Avery, and Cricut all make compatible versions. Glossy laminate produces a professional finish; matte laminate gives a more subtle look.
- Lamination pouches with a laminator machine: Provides thicker, more durable protection but requires a laminator. Overkill for most sticker applications but excellent for stickers that will see heavy use.
- Clear packing tape: A budget workaround that technically works for waterproofing small areas, but leaves seam lines and looks amateur on anything larger than a small sticker. Not recommended for quality results.
What You’ll Need
For Print Then Cut waterproof stickers:
- Cricut machine — Explore Air 2, Explore 3, Maker, Maker 3, or Joy (note: Cricut Joy has a smaller Print Then Cut size limit)
- Inkjet printer
- Printable sticker paper — matte or glossy, inkjet compatible
- Self-adhesive laminate sheets — glossy or matte finish
- Cricut Design Space (free software, requires account)
- LightGrip or StandardGrip cutting mat
- Scraper tool (for applying laminate smoothly)
- Scissors (for trimming sheets before loading into Cricut)
For vinyl stickers (cut only):
- Cricut machine
- Permanent adhesive vinyl — Oracle 651 is the industry standard for waterproof, outdoor-grade vinyl; Cricut brand permanent vinyl also works well
- Transfer tape
- Weeding tool
- Cutting mat appropriate for your vinyl weight
Stop Doing This When Making Waterproof Stickers
Laminating after cutting instead of before. This is the most common and most damaging mistake in the Print Then Cut workflow. Laminating individual cut stickers is fiddly, produces uneven coverage, and leaves the edges of each sticker exposed and unprotected—exactly where peeling starts. Always laminate the entire printed sheet first, then cut. This encapsulates each sticker completely, including the edges.
Using regular vinyl instead of permanent vinyl. Cricut sells both removable and permanent adhesive vinyl. Removable vinyl is designed to come off surfaces cleanly—it’s not suitable for items that get wet or handled frequently. For waterproof stickers, always use permanent adhesive vinyl (Cricut brand) or Oracle 651, which is an industry-standard outdoor vinyl with a seven-year weather resistance rating.
Skipping the registration mark step for Print Then Cut. Cricut Design Space automatically adds registration marks to Print Then Cut projects. These marks are how the machine’s sensor locates and aligns the cutting path over the printed design. If the marks are cut off during printing, obscured by the laminate seam, or printed incorrectly, the Cricut can’t align the cut and will cut in the wrong place. Never crop or move the registration marks.
Printing at draft quality. Lower print quality settings use less ink and produce less saturated, less defined results that look noticeably worse after lamination. Always print at the highest quality setting your printer offers for sticker projects.
Using a mat that’s too sticky for laminated sheets. A StandardGrip mat can sometimes grip laminated sticker sheets so firmly that removing them afterward damages the stickers. A LightGrip mat is the safer choice for Print Then Cut projects with laminated sheets.
You’re Probably Doing This Wrong: The Bleed Setting
In Cricut Design Space, when you set an image as Print Then Cut, there’s an option to add bleed. Bleed extends the printed design slightly beyond the cut line—typically by about one millimeter. This looks wrong in the preview, which is why most beginners turn it off.
Don’t turn it off. Bleed exists to compensate for minor alignment variations between your printer and the Cricut’s cutting path. Without bleed, even a tiny misalignment produces a thin white border around your sticker where the unprinted sticker paper shows through. With bleed enabled, that same minor misalignment is covered by the slightly extended print. Always leave bleed enabled for Print Then Cut sticker projects.
Step-by-Step: How to Make Waterproof Stickers with Cricut (Print Then Cut Method)
Step 1: Create or import your design in Cricut Design Space. Open Design Space and start a new project. You can create designs from scratch using Design Space’s built-in tools, upload your own artwork (PNG files with transparent backgrounds work best for stickers), or use images from the Cricut image library. For custom illustrated stickers, uploading your own PNG artwork gives you the most control.
Step 2: Set your image as Print Then Cut. Select your design and look for the print type setting in the layers panel or the top toolbar. Change it from Cut to Print Then Cut. This tells Design Space to send the design to your printer first and then use the Cricut to cut around it. The registration marks will appear automatically around your design on the canvas.
Step 3: Size and arrange your stickers on the canvas. Resize your designs to the intended sticker size and arrange multiple designs on the canvas to maximize your sheet usage. Print Then Cut has a maximum print area of approximately 6.75 x 9.25 inches on most Cricut machines—keep all designs within this boundary. Group designs logically but leave reasonable spacing between them for the cutting path.
Step 4: Add offset or contour cuts as needed. If you want a classic sticker look with a clean border around the design rather than a precise cut-out shape, use the Offset tool in Design Space to create an outline shape slightly larger than your design. This offset shape becomes the cut line, giving each sticker a clean colored border. Adjust the offset distance to control how thick the border is.
Step 5: Click Make It and follow the print prompts. Design Space will prompt you to send the design to your printer. Load your printable sticker paper into your printer—face up or face down depending on your printer model; check your printer’s manual if unsure. Print at the highest quality setting. Do not remove the printed sheet from the printer output tray yet.
Step 6: Laminate the entire printed sheet before cutting. Take your self-adhesive laminate sheet and peel back a few inches of the backing. Align the laminate carefully with one edge of the printed sticker sheet, then slowly peel and press the laminate across the full sheet, using a scraper tool or credit card to press out any air bubbles as you go. Work slowly from one end to the other—bubbles trapped under the laminate are permanent once the adhesive sets. Trim any excess laminate from the edges of the sheet.
Step 7: Let the laminate set for a few minutes. Give the adhesive laminate a few minutes to bond fully to the printed surface before loading it into the Cricut. Pressing firmly across the entire surface with a scraper tool one more time after waiting helps ensure complete adhesion, particularly at the edges.
Step 8: Load the laminated sheet onto your cutting mat. Place the laminated sticker sheet face-up on a LightGrip cutting mat, pressing it down smoothly. The laminate surface is slicker than plain paper, which is why LightGrip is preferable to StandardGrip here—it holds the sheet securely without gripping so firmly that removal damages the stickers.
Step 9: Load the mat into the Cricut and follow the on-screen prompts. Design Space will prompt you to load the mat and will instruct the machine to scan for the registration marks before cutting. The scanning step takes about 30 seconds—the Cricut’s sensor reads the printed registration marks to align the cut path precisely over the printed design. Do not move the mat or interrupt this process.
Step 10: Select the correct material setting. In Design Space, choose the material setting that matches your sticker sheet. For standard laminated printable sticker paper, Sticker Paper Glossy or Cardstock settings typically work well. If you’re using inkjet printable vinyl with laminate, use the Vinyl setting. If the first cut doesn’t go all the way through, increase the pressure setting and recut—don’t change the blade depth manually.
Step 11: Unload the mat and remove the sticker sheet carefully. Once cutting is complete, unload the mat and flip it face-down, then peel the mat away from the sheet rather than peeling the sheet off the mat. This approach reduces the risk of the stickers curling or tearing during removal. For individual stickers, flex the mat gently to release them.
Step 12: Test the waterproofing before use. Before applying your stickers to their final destination, run a quick test: hold one sticker under running water or submerge it briefly. The laminate should bead water completely and the ink underneath should show no bleeding or smearing. If water gets under the laminate at the edges, the laminate didn’t adhere fully at that point—press it down more firmly or apply a small piece of clear tape to seal the edge.
Step-by-Step: How to Make Waterproof Vinyl Stickers with Cricut (Cut Only Method)
Step 1: Create a simple design in Design Space. Vinyl cut-only stickers work best with designs that don’t require color gradients or photographic detail—bold shapes, text, silhouettes, and simple illustrations all cut cleanly in vinyl. Upload your design or create one in Design Space. Set the cut type to Cut (not Print Then Cut).
Step 2: Mirror the design if needed. If your design includes text or asymmetric elements that need to face a specific direction when applied, check whether mirroring is required. For standard vinyl applied right-side up, mirroring is not needed. It’s only required for iron-on vinyl transferred to fabric.
Step 3: Load your permanent vinyl onto the cutting mat. Place the vinyl sheet liner-side down on a StandardGrip cutting mat. Smooth it firmly with your hand or scraper tool to ensure it’s fully adhered to the mat with no lifting edges or bubbles.
Step 4: Select Permanent Vinyl as your material and cut. In Design Space, select Permanent Vinyl (or Oracle 651 if you’ve saved a custom material setting) and send the cut to the machine. Permanent vinyl cuts cleanly at this setting without requiring blade depth adjustments in most cases.
Step 5: Weed the excess vinyl. After cutting, use a weeding tool to remove all the vinyl that falls outside your design shapes. Work carefully around fine details. The vinyl remaining on the liner is your sticker design.
Step 6: Apply transfer tape and transfer to the final surface. Cut a piece of transfer tape slightly larger than your design. Peel the backing and press the transfer tape firmly over the weeded vinyl design. Burnish thoroughly with a scraper. Peel the transfer tape away from the vinyl liner at a low angle—the design should lift with the transfer tape. Apply to the final surface, press firmly, and then peel away the transfer tape slowly, leaving the vinyl design adhered to the surface.
Quick Reference: Material Comparison for Waterproof Stickers
| Material Combination | Waterproof? | Best For | Difficulty |
|---|---|---|---|
| Printable sticker paper only | No | Indoor use only | Easy |
| Printable sticker paper + laminate | Yes | Custom illustrated stickers | Easy |
| Waterproof printable paper + laminate | Yes | Heavy use, water bottles | Easy |
| Inkjet printable vinyl + laminate | Yes | Durable custom stickers | Easy–Moderate |
| Permanent adhesive vinyl (cut only) | Yes | Simple shapes, text, silhouettes | Moderate |
| Oracle 651 vinyl | Yes (outdoor grade) | Outdoor, heavy use, vehicles | Moderate |
FAQ
What Cricut machine is best for making stickers? Any current Cricut machine handles sticker-making well. The Explore Air 2 and Explore 3 are the most popular choices for sticker making specifically because of their reliable Print Then Cut performance and wide material compatibility. The Cricut Maker offers the same capability with additional cutting force for thicker materials. The Cricut Joy works for stickers but has a smaller maximum Print Then Cut area, which limits how many stickers you can fit per sheet.
Can I make waterproof stickers without a laminator? Yes—self-adhesive laminate sheets (peel and stick) don’t require a laminator machine and produce excellent results. They’re the standard recommendation for most home sticker makers. A laminator machine with pouches gives thicker, more rigid protection but isn’t necessary for most applications.
Why is my Cricut not finding the registration marks? The most common causes are: the printed registration marks are too light (increase printer ink density or print quality), the marks are partially cut off (check that your design fits within the printable area), the mat is loaded in the wrong orientation, or the mat surface is dirty and reflecting light inconsistently. Clean the mat, ensure the sheet is loaded straight, and reprint if the marks appear faded.
How long do homemade waterproof stickers last? With printable sticker paper and self-adhesive laminate, expect 12 to 24 months of regular use on items like water bottles that go through hand washing. Oracle 651 vinyl stickers are rated for outdoor use for up to seven years. Dishwasher use significantly shortens the lifespan of any sticker regardless of materials—hand washing always extends sticker life.
Can I use any inkjet printer for Print Then Cut stickers? Most standard home inkjet printers work for Print Then Cut. The key requirement is that the printer handles the sticker paper thickness without jamming—most do. Printers with a straight paper path (where the paper doesn’t bend around a roller) handle thicker sticker paper and laminated sheets most reliably. If your printer jams with sticker paper, try feeding sheets one at a time and adjusting the paper weight settings in your printer’s software.
Conclusion
Making waterproof stickers with a Cricut comes down to three things: choosing the right materials, laminating before cutting rather than after, and understanding which method—Print Then Cut or vinyl cut-only—fits the design you’re trying to make. Printable sticker paper with self-adhesive laminate handles virtually any illustrated or photographic design and produces genuinely waterproof results when the laminate fully covers each sticker including its edges. Permanent vinyl produces bold, durable stickers for simpler designs and requires no printing or laminating at all. Get the material combination right, leave bleed enabled in Design Space, and the Cricut handles the precision cutting that makes the finished stickers look store-bought rather than homemade.
Enjoyed this project? Get even more DIY ideas that save (and make) you money.
Join our free newsletter for profitable DIY projects, clever cleaning hacks, home ideas, and creative crafts delivered straight to your inbox.
✓ Free forever • No spam • Unsubscribe anytime




