
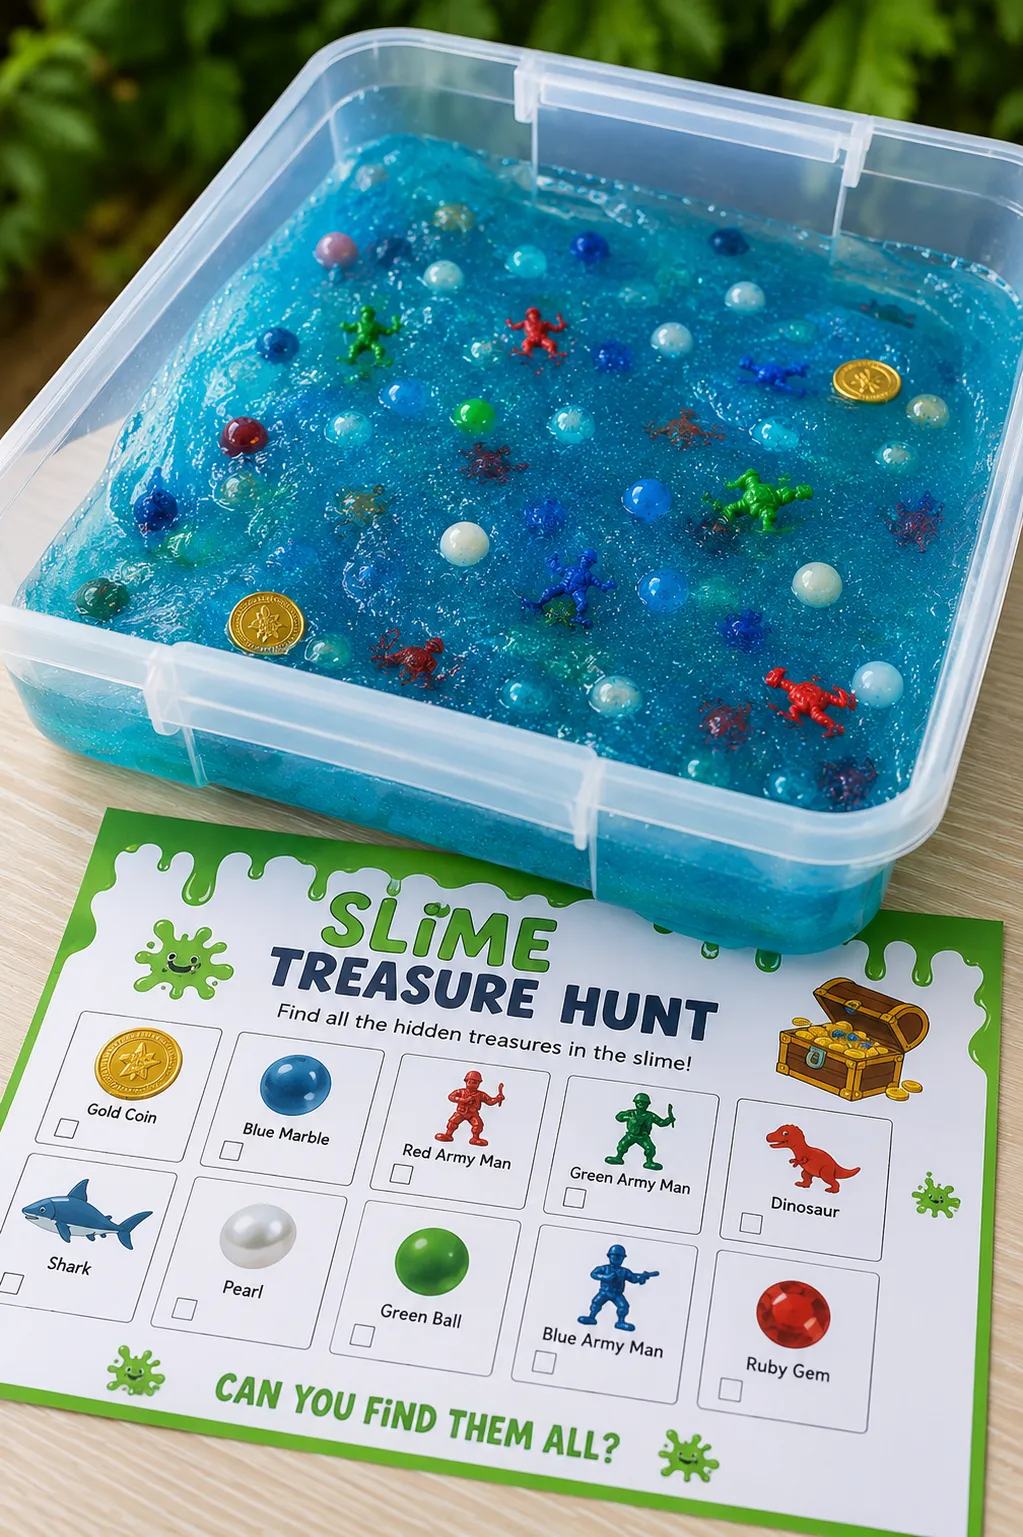
If you’ve ever watched a group of kids at a birthday party lose their minds over a piñata, you already understand the basic psychology behind a slime treasure hunt. There’s something about the combination of anticipation, searching, and discovery that produces a level of excitement that most structured activities just don’t reach. Now add slime to the equation, the sensory experience of digging through a squelchy, squishy, colorful material to find hidden treasures, and you’ve created one of those rare activities that kids genuinely remember.
The concept is exactly what it sounds like. Treasures, gems, toys, or prizes are hidden inside batches of slime, and kids dig through the slime to find them. It sounds simple because it is, and that simplicity is part of what makes it work so reliably across such a wide age range. A two-year-old and an eight-year-old can participate in the same treasure hunt activity and both be completely absorbed in it, just for slightly different reasons.
Here’s how to set one up from scratch, including the slime recipes that work best for treasure hunting, the best things to hide, and how to make the whole experience feel genuinely special rather than just a bowl of green goo with some plastic gems in it.
Why Slime Treasure Hunts Work So Well
Before getting into the setup, it’s worth understanding why this activity hits differently from a regular toy or game, because that understanding helps you design it in a way that maximizes the experience.
The anticipation element is significant. Knowing something is hidden in the slime but not knowing exactly where, not knowing what shape or size or how deep it is, creates a suspense that keeps kids engaged far beyond the point where they’d normally move on. Every handful of slime moved means potentially uncovering a treasure, which makes each moment of searching feel purposeful.
The sensory element adds a layer that visual-only activities don’t have. Digging through slime requires full tactile engagement, hands submerged, feeling shapes before seeing them, experiencing the resistance and texture of the slime as you push through it. That sensory input is intrinsically rewarding for most kids and keeps them present in a way that watching or observing doesn’t.
The discovery moment, that specific second when fingers close around something solid inside the slime and a treasure is pulled free, produces a genuinely disproportionate amount of excitement relative to what the treasure actually is. A two-dollar plastic gem pulled from green slime produces more excitement than the same gem handed directly to a child, because the experience of finding it is the real prize rather than the gem itself.
Planning the Treasure Hunt
A little planning before the day makes the whole experience flow significantly better and prevents the common problem of a rushed setup that doesn’t quite deliver on the premise.
How Many Slime Stations?
For a birthday party or group activity, one station per two to three children works well, since this keeps wait times short and ensures everyone has hands in slime at the same time rather than watching someone else hunt.
For a single child or a sibling pair, one large bin with multiple sections or multiple smaller containers arranged in a sequence creates a progression that extends the activity longer than a single undifferentiated mass would.
How Many Treasures per Station?
More hidden treasures means more discovery moments, which generally means longer engagement. Ten to fifteen small items hidden in a single medium-sized bin is a good starting point. Too few items means the hunt ends quickly. Too many makes finding each one feel less special.
Consider hiding one or two slightly larger or more special items alongside the small ones, a slightly bigger gem, a small toy, or a foil-wrapped chocolate, since kids who find the “special” treasure have an extra peak moment and kids still searching have extra motivation to keep digging.
Treasure Hunt Narrative
The activity works fine without any narrative framing at all, particularly for younger kids who don’t need a story to justify putting hands in slime. But adding a simple narrative layer significantly increases engagement for preschoolers and school-age kids.
A pirate theme works exceptionally well since slime translates convincingly into ocean water, swamp, or buried treasure territory. Print a simple “treasure map” showing the slime stations and hand each child one at the start. Frame the slime as a magical swamp, a witch’s cauldron, a dragon’s hoard, or an alien planet depending on the interests of the group.
What to Use as Treasure
This is where the activity lives or dies. The right treasures create excitement. The wrong ones produce a flat reaction after the effort of finding them.
Best Treasures for Slime Treasure Hunts
Plastic gems and jewels are the absolute classic and with good reason. They look exactly like treasure, they’re cheap to buy in bulk, they come in a range of sizes that provides variation, and their smooth hard surface feels distinctly different from the slime, making them satisfying to find by touch as much as sight.
Small plastic animals or figures that match a theme (dinosaurs for a jungle hunt, sea creatures for an ocean theme, unicorns for a fantasy theme) add narrative coherence to the treasure and extend the play after the hunt since the found creatures become toys.
Foil-wrapped chocolates are controversial only because they make the slime smell different, but kids genuinely love finding food prizes inside slime and the foil wrapping protects the chocolate completely. Hershey’s kisses or similar small foil-wrapped chocolates work perfectly.
Erasers in fun shapes are inexpensive, easy to clean, and feel solid and satisfying to find. Themed erasers matching the hunt theme, dinosaur erasers for a dino hunt or star-shaped ones for a galaxy hunt, make the finds feel intentional rather than random.
Bouncy balls create an additional moment of excitement when found since they can be immediately played with, and their round smooth texture makes them easy to identify by feel inside the slime.
Plastic coins reinforce the treasure hunt theme and are inexpensive to buy in bulk. Gold and silver plastic coins look exactly right for a pirate theme.
Small LEGO figures or minifigures for older kids who will genuinely value these as collectibles rather than just as hunt objects.
Capsule toys (the small plastic capsules containing tiny toys) are a great option specifically because the treasure is still hidden even after it’s been found, since kids have to open the capsule to see what’s inside, which adds a second layer of discovery to each find.
Things to Avoid Hiding in Slime
Very small items that could be choking hazards need to be considered relative to the age of the kids participating. Paper items absorb moisture from the slime and become unusable. Electronic items or anything with batteries obviously don’t mix well with wet slime. Anything with sharp edges that could cut through or scratch at high speed during enthusiastic digging isn’t appropriate.
The Slime Recipes That Work Best for Treasure Hunting
Not every slime type is equally well-suited to treasure hunting, and choosing the right recipe makes the experience significantly better.
Standard White Glue Slime
The most reliable and practical choice for a treasure hunt, particularly for groups or parties. It’s inexpensive to make in bulk, the consistency holds treasures at various depths rather than letting them all sink to the bottom, and it cleans up from hands and surfaces reasonably easily. Make it slightly firmer than standard slime so treasures stay distributed throughout the slime rather than settling.
For a basic batch:
- Pour one cup of white glue into a large mixing bowl.
- Add color and any glitter at this stage and stir until evenly distributed.
- Add one teaspoon of baking soda and stir thoroughly.
- Add contact lens solution one teaspoon at a time, stirring continuously, until the slime comes together.
- Knead for two to three minutes until smooth.
- Make the slime slightly firmer than you normally would by adding one extra drop of activator, since firmer slime holds treasures in place better than soft slime.
- Hide the treasures by pressing them into the slime at various depths before the activity begins, then smooth the surface so the locations aren’t visible.
Fluffy Slime for Treasure Hunting
Fluffy slime works particularly well for younger kids since it’s softer, easier to dig through, and less intimidating to put hands into than standard slime. The lighter color also makes finding brightly colored treasures more visually dramatic.
Add half a cup of shaving cream to the white glue before activating, following the standard recipe otherwise. The resulting fluffy texture parts easily around searching fingers and makes the digging sensation gentler than standard slime.
Cloud Dough Alternative (For Non-Slime Treasure Hunts)
For kids who are reluctant to put their hands in actual slime, cloud dough (eight parts flour to one part baby oil) provides a similar treasure-hiding, digging-through experience without the wet, sticky quality of slime. Treasures hide just as effectively in cloud dough and the finding experience is just as satisfying, with the texture being the main difference.
How to Set Up the Slime Treasure Hunt
Preparation (Do Ahead)
- Make all slime batches the day before or the morning of the activity, since fresh slime needs time to fully activate and reach the right consistency.
- Color each batch according to the theme. Multiple colors for different stations add visual variety and make each station feel distinct.
- Hide the treasures inside each slime batch by pressing them into the slime at various depths after the slime is at the right consistency.
- Smooth the slime surface so no treasure locations are visible.
- Place each batch in its station container and cover with plastic wrap until the activity begins.
- Set out any theme decorations around the stations, since the presentation makes a significant difference to how special the activity feels.
During the Activity
- Give each child a small container or bag for collecting their found treasures, since having somewhere to put what they find is surprisingly important to how satisfying the hunt feels.
- Introduce the narrative if using one, reading a short “message from the pirate captain” or showing the treasure map before uncovering the slime.
- Remove the plastic wrap from each station simultaneously so everyone starts at the same moment.
- Step back and let the hunting begin.
- Avoid directing where kids dig or how they search, since the open-ended discovery is the experience.
- Have paper towels nearby but don’t interrupt the hunt to clean hands mid-activity.
After the Activity
- Let kids compare their finds and count their treasures, since the post-hunt sharing and comparison is almost as engaging as the hunt itself.
- Provide warm water and soap for cleanup, since slime cleans off hands easily with running water.
- Keep the slime in its containers for further play after the treasure hunt is complete, since kids often want to continue playing with the slime itself once all the treasures have been found.
Slime Treasure Hunt Themes
Pirate Treasure Hunt
Green or dark teal slime represents ocean water. Gold and silver plastic coins, plastic gems, and skull-shaped erasers are the treasures. Print a simple treasure map and mark each slime station with an X. Give each child a small felt pouch for collecting their loot. Frame the whole activity as “diving into Davy Jones’s locker to retrieve the lost pirate treasure.”
Dragon’s Hoard
Dark red or orange slime represents the dragon’s fire. The treasures are plastic gems, gold coins, and small plastic dragon figures. Each child is a brave knight sent to steal treasure from a sleeping dragon, and the slime is the dragon’s enchanted fire that guards the hoard.
Under the Sea
Blue and teal slime with white pearl glitter represents the ocean floor. Plastic sea creatures, shells, and pearl-colored beads are the treasures. Set up blue fabric or paper around the stations to extend the underwater atmosphere, and give each child a small net bag for collecting sea treasures.
Space and Galaxy Hunt
Black or deep purple slime with holographic glitter represents deep space. Planet-shaped erasers, star-shaped gems, small rocket toys, and silver coins are the treasures. Frame the activity as a space explorer mission to retrieve lost cargo from a mysterious alien slime planet.
Dinosaur Excavation
Dark green or brown slime represents prehistoric bog or tar. Plastic dinosaur toys, dinosaur eggs (small oval gems), and fossil-shaped items are the treasures. Give each child a popsicle stick as their “excavation tool” and frame it as a real dinosaur dig, challenging them to use the tool rather than just their hands. This adds a fine motor challenge that older kids particularly enjoy.
Unicorn and Magic Hunt
Pastel pink and purple slime with rainbow glitter represents enchanted unicorn territory. Plastic unicorn figures, rainbow gems, star confetti, and small crystal-clear stones are the treasures. Give each child a small velvet pouch for collecting and frame the treasures as “magic unicorn artifacts.”
Quick Fixes for Common Problems
| Problem | Potential Solution | Alternative Approach |
|---|---|---|
| Treasures all sank to the bottom before the activity started | Make the slime slightly firmer next time by adding one extra drop of activator | Place treasures in layers as you fill the container, adding slime over each layer rather than hiding everything in already-made slime |
| Kids found everything too quickly | Hide more items next time, aiming for at least 15 per bin | Include capsule toys that require opening for a second discovery layer after the initial find |
| Slime too firm and difficult for younger kids to dig through | Add a small amount of water and knead through to soften slightly before the activity | Use fluffy slime instead of standard slime for activities involving younger children |
| Slime sticking to treasures and making them hard to examine | Rinse found treasures in a bowl of warm water placed beside each station | Dust treasures with a tiny amount of cornstarch before hiding to reduce surface adhesion |
| Kids upset about unequal number of finds | Pre-sort treasures into individual bags before hiding so each child’s treasures are marked (tie a color-coded ribbon or use different colored gems per child) | Focus the narrative on total team treasure rather than individual count |
| Slime made mess beyond the station area | Set up stations on a large plastic tablecloth or shower curtain liner that contains the mess | Use deeper containers with higher sides so slime stays contained during enthusiastic digging |
Making It Work for Parties
A slime treasure hunt works as a standalone party activity, a party favor activity combined with a take-home element, or as one station in a broader party setup.
For take-home elements, allow each child to take their found treasures in a small bag at the end of the party. If the budget allows, let each child take a small container of slime home as well, since slime is a genuinely valued party favor that kids use and don’t immediately discard.
For very large party groups, set up a production-line style treasure hunt where kids rotate through multiple smaller stations rather than crowding around one large one, since this keeps everyone active simultaneously and eliminates the boredom of waiting.
For different age ranges at the same party, calibrate the difficulty by hiding treasures deeper in one station designated for older kids and shallower in another for younger ones. A “beginner” and “advanced” station framing works without making younger kids feel condescended to.
FAQ
How far ahead can I hide the treasures in the slime?
Hiding treasures the night before or the morning of the activity works fine. Most treasure materials, plastic gems, coins, and toys, aren’t affected by overnight contact with slime. Items left significantly longer than 24 hours in slime may pick up the color from dyed batches, particularly light-colored plastic items in deeply colored slime, so closer to the activity time is better for color-sensitive treasures.
Can I reuse the slime after the treasure hunt?
Yes, and this is worth planning for since kids often want to continue playing with the slime after all treasures have been found. Rinse any treasure residue or contaminants off before storing, and keep in an airtight container as with any slime. The treasure hunt slime typically has a week or two of good play life remaining after the activity.
What’s the ideal age range for this activity?
Two years old through approximately ten years old covers most of the engaged audience for slime treasure hunts. Toddlers need supervision and simpler treasure items. Preschoolers and early elementary age are the sweet spot where every element of the activity lands perfectly. Older elementary kids enjoy it most with added challenge elements like the excavation tool rule or clue-based hunt structures.
How much slime do I need per child?
A batch made from one cup of glue produces enough slime for roughly two to three children for a treasure hunt, since hunt slime doesn’t need to be as voluminous as play slime. Making one batch per child for a party gives everyone adequate space to hunt without crowding, and any leftover slime becomes a take-home element.
Can the activity be done outdoors?
Yes, and outdoor setups have the significant advantage of much easier cleanup. Lay down plastic tablecloths or a tarp under the stations, set up in the shade to prevent the slime from drying out faster in direct sun, and have a garden hose nearby for hand rinsing. Outdoor treasure hunts also allow for a more physically spread-out setup with stations at different locations across a garden, which adds a genuine scavenger hunt travel element to the activity.
In Conclusion
A slime treasure hunt earns its place as one of those genuinely memorable kids’ activities because it takes a concept that’s already exciting, finding hidden treasure, and adds a layer of sensory engagement that makes the searching as fun as the finding. The setup is straightforward, the cost is reasonable even for a party-sized event, and the reactions from kids who pull a gem or a toy out of a handful of bright green slime for the first time are consistently the kind of disproportionate excitement that makes the whole setup effort worthwhile. Plan the theme, make the slime slightly firmer than usual, hide more treasures than you think you need, and step back once it starts.
Enjoyed this project? Get even more DIY ideas that save (and make) you money.
Join our free newsletter for profitable DIY projects, clever cleaning hacks, home ideas, and creative crafts delivered straight to your inbox.
✓ Free forever • No spam • Unsubscribe anytime




