
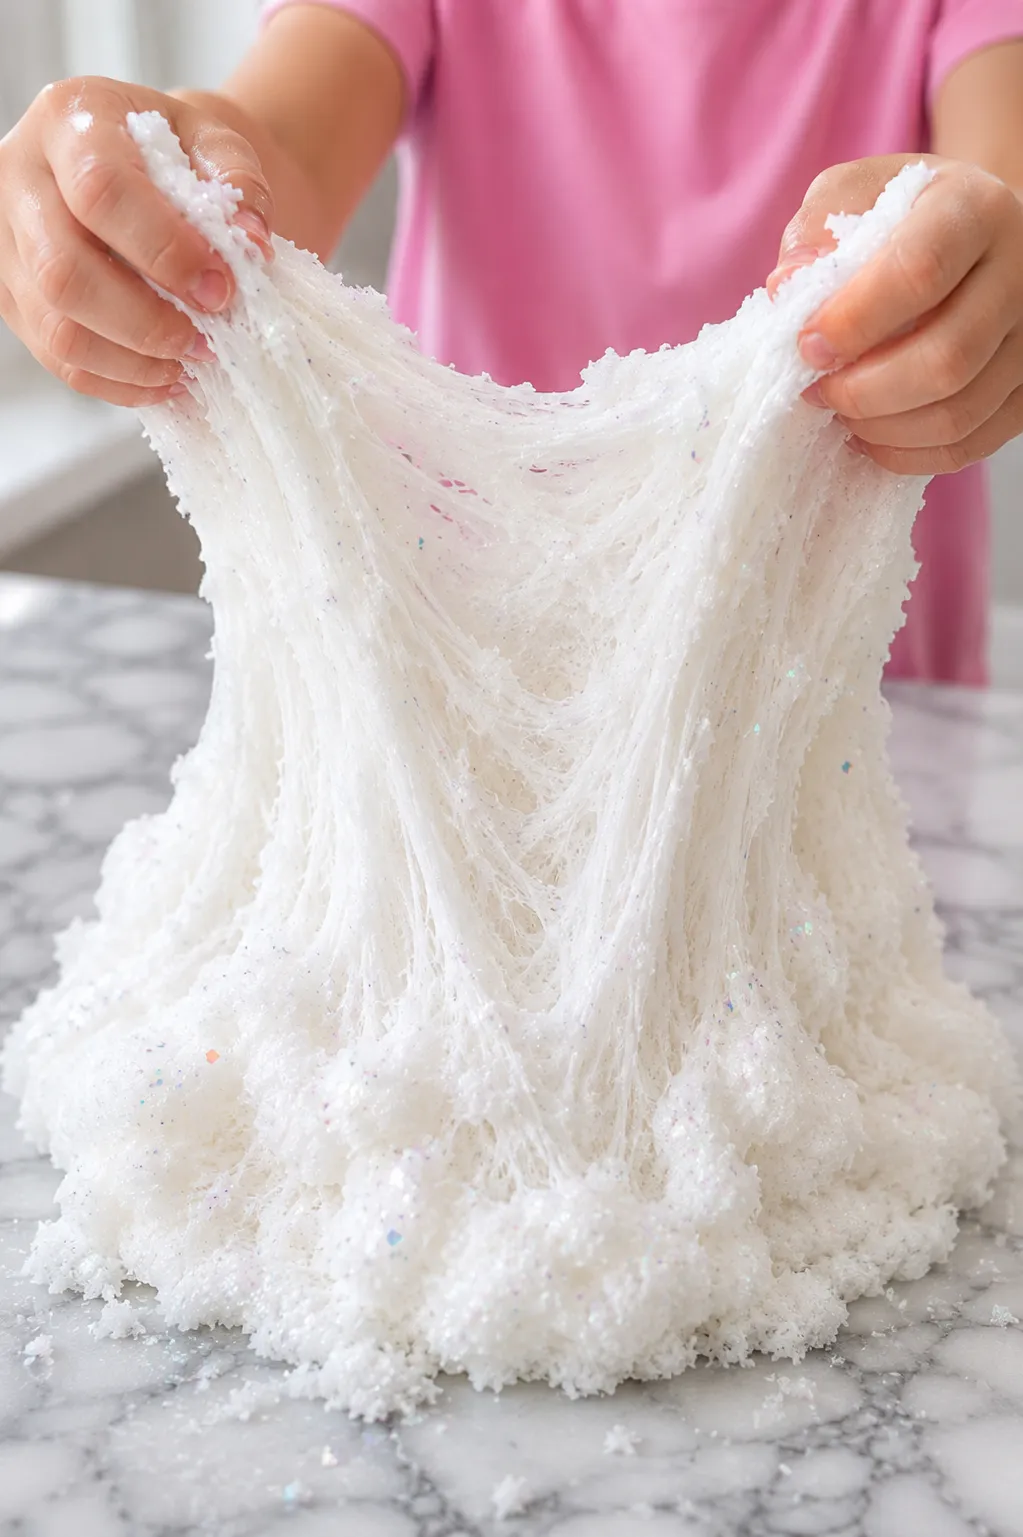
Snow slime is one of those recipes that genuinely delivers on its name. When it’s made correctly, the combination of white fluffy base and instant snow or white foam beads produces something that looks remarkably like compacted fresh snow and has a similarly cool, light feel in the hands. It’s one of the most popular winter slime recipes for good reason, and it works just as well in the middle of summer as a sensory activity for kids who are missing the real thing.
There are a few different ways to make snow slime depending on what you have available and what texture you’re going for. The instant snow powder version produces the most visually authentic result, since instant snow creates a white powder that looks almost exactly like real snow. The foam bead version has a crunchier, more satisfying texture. The fluffy slime version is the simplest and most accessible. All three start from the same base and diverge in what gets added at the end.
Here’s how to make all three versions with the specific ratios and techniques that get each one right.
What You’ll Need
For the base slime:
- 1 cup of white PVA school glue
- 1 teaspoon of baking soda
- 1 to 2 tablespoons of contact lens solution containing boric acid
- White shaving cream (for the fluffy version)
- White or iridescent fine glitter (optional, for a frost sparkle effect)
- Peppermint or fresh linen fragrance oil (optional, for a wintry scent)
For the snow texture additions (choose one or combine):
- Instant snow powder (the expanding powder variety, widely available at craft and science stores)
- White foam micro beads
- White fishbowl beads (for a larger, icier crunch)
Why Snow Slime Uses White Glue
White glue rather than clear is the only logical choice for snow slime since the opaque white base immediately conveys the white, packed quality of real snow. Clear glue produces a translucent slime that, even with white add-ins, doesn’t capture the same visual. White glue gives snow slime that genuinely snowy appearance from the moment color and texture are added.
Version 1: Instant Snow Slime
This is the most visually striking version and the one that most convincingly resembles actual snow. Instant snow powder, the kind sold as a novelty science toy, expands dramatically when water is added and produces a white, fluffy, slightly powdery substance that looks almost identical to real snow. Mixed into a white slime base, the effect is genuinely impressive.
Making the Instant Snow
- Place two tablespoons of instant snow powder in a separate bowl.
- Add water slowly, a tablespoon at a time, watching the powder expand into a fluffy white material.
- Stop adding water when the instant snow has fully expanded and has a light, dry, powder-like texture rather than feeling wet or clumpy.
- Set aside while making the slime base.
Making the Base
- Pour the white glue into a large mixing bowl.
- Add white or iridescent glitter if using and stir through.
- Add fragrance oil if using at this stage, two to three drops folded through gently.
- Add the baking soda and stir until fully dissolved.
- Add contact lens solution one teaspoon at a time, stirring continuously.
- Continue until the slime pulls away from the bowl and comes together as a cohesive mass.
- Knead for two to three minutes until smooth and non-sticky.
- If stickiness remains, add contact lens solution one drop at a time while kneading.
Combining Instant Snow and Slime
- Flatten the finished slime base on a clean surface.
- Spoon a generous amount of instant snow onto the surface of the slime, starting with roughly the same volume as the slime itself.
- Fold the slime over the instant snow and begin kneading gently.
- The instant snow incorporates into the slime, changing the texture to something significantly lighter and more powdery than the base slime alone.
- Continue adding instant snow in increments, kneading between additions, until the slime has the snowy texture you want.
- A higher ratio of instant snow to slime produces a drier, more powder-like texture. A lower ratio produces a slimier base with white texture throughout.
The finished instant snow slime should feel slightly cooler than regular slime, which is a natural property of the instant snow powder and adds to the wintery sensory experience.
Version 2: White Foam Bead Snow Slime (Floam Snow)
This version trades the powdery quality of instant snow for the crunchy, squishy texture of foam beads, producing a snow slime that sounds and feels like compacted snow underfoot rather than fresh powdery snow. The white foam micro beads are the specific add-in here rather than any other bead type, since white is essential for maintaining the snow aesthetic.
Making the Base
Follow the same base recipe as Version 1, steps 1 through 8.
Adding the Foam Beads
- Flatten the finished slime and add a generous handful of white foam micro beads.
- Fold the slime over the beads and knead gently to work them in.
- Continue adding beads in small handfuls, kneading between additions, until the slime has the crunchy, dense snow-like texture you want.
- A high bead ratio produces a floam-like texture that holds shapes briefly and makes a satisfying crunch when compressed.
- A lower bead ratio produces a slime with scattered white texture throughout, more like slush than packed snow.
Version 3: Fluffy Snow Slime
The simplest version and the one that requires no specialty materials beyond the standard slime recipe. By making the base as a fluffy slime using shaving cream, the finished product has a soft, light, cloud-like texture that captures the airy quality of freshly fallen snow without any add-ins at all.
Making the Base
- Pour the white glue into a large mixing bowl.
- Add one cup of white shaving cream and fold gently into the glue using a spatula, preserving the foam structure rather than stirring aggressively.
- Add glitter and fragrance oil if using at this stage.
- Add the baking soda and fold through carefully.
- Add contact lens solution one teaspoon at a time, folding after each addition.
- Continue until the slime just comes together and is barely non-sticky, stopping earlier than you would for standard slime since fluffy slime needs less activator.
- Knead very gently for one to two minutes.
Upgrading Fluffy Snow Slime
The fluffy version can be elevated by adding a small amount of instant snow or white foam beads after the base is made, combining elements from the other versions for a texture that’s simultaneously soft, fluffy, and slightly crunchy.
The Combined Version: Ultimate Snow Slime
For the most complete snow slime experience, combining all three texture elements produces something genuinely impressive.
- Make the fluffy slime base as described in Version 3.
- Add a cup of white foam micro beads and knead gently through the fluffy base.
- Add a generous amount of prepared instant snow and fold through carefully.
- The result combines the airy softness of fluffy slime, the crunch of foam beads, and the powdery lightness of instant snow in a single batch that has more textural depth than any single version alone.
This combined version is the most impressive to play with but also the most work to make, so it’s worth saving for a special occasion or a dedicated slime-making session rather than a quick activity.
Making Snow Slime Look Like the Real Thing
A few specific additions take snow slime from white slime with a name to something that genuinely looks and feels like winter.
White iridescent glitter mixed into the glue base before activating catches light the way ice crystals in real snow do, giving the slime a frost-like sparkle that’s subtle rather than dramatic.
Snowflake-shaped confetti pressed into the surface of the finished slime adds a detail that commits fully to the snow theme and photographs particularly well.
Peppermint fragrance oil added to the base gives snow slime a cool, wintry scent that significantly enhances the seasonal sensory experience. Fresh linen or clean cotton fragrance oils also work well for a less specifically minty version.
Blue food coloring in a single drop added to the white glue before the shaving cream produces a barely-there blue tint that makes the finished slime look like snow in shadow rather than pure white, which is a subtler and more realistic snow color than solid white.
Snow Slime Sensory Play Ideas
Snow slime works particularly well as the base material for a winter sensory bin rather than just as a standalone slime activity.
Place the finished snow slime in a large sensory tray and add small plastic polar animals (polar bears, penguins, and arctic foxes), small plastic pine trees, and tiny plastic snowflakes or fake snowflakes from a craft store. The snow slime becomes the terrain of a miniature arctic world that kids can arrange, rearrange, and play with for significantly longer than the slime alone would sustain.
For a Christmas or holiday version, press small plastic or felt ornaments, miniature wrapped gift toys, and a tiny plastic Christmas tree into the snow slime for a holiday sensory world that works particularly well for the week or two around the holiday.
For younger kids, a simple snow slime sensory tray with a few large plastic snowman pieces to build and press into the slime is enough to produce a lengthy, focused sensory play session.
Quick Fixes for Common Problems
| Problem | Potential Solution | Alternative Approach |
|---|---|---|
| Instant snow clumping rather than mixing evenly | Add instant snow in smaller amounts and knead more thoroughly between additions | Prepare the instant snow with slightly less water so it’s drier and crumblier before adding to the slime |
| Foam beads falling out of the slime | The base is slightly too soft—add one drop of activator and knead before adding more beads | Add beads more gradually in smaller handfuls so each addition has more time to incorporate |
| Fluffy texture collapsed during mixing | The shaving cream foam was deflated by aggressive stirring—fold more gently in the next batch | Knead a small amount of fresh shaving cream into the finished slime to restore some lightness |
| Snow slime yellowed after a few days | White glue can sometimes yellow slightly with age or light exposure—store away from direct sunlight | Add a single drop of bright white gel food coloring to the next batch to keep the white brighter longer |
| Instant snow dissolving into the slime rather than staying textured | The instant snow was made too wet—prepare it with less water so it’s drier and maintains more texture | Add the instant snow to slightly firmer slime, since very soft slime absorbs the instant snow faster |
| Slime stickier than expected when using shaving cream | Fluffy slime needs less activator than standard—the shaving cream added moisture that competes with the activator | Add a small pinch of baking soda before the next contact lens solution addition |
| Snow slime lost its texture after storage | Instant snow texture naturally fades over time in sealed storage—add fresh instant snow and knead through to restore | Store with a small amount of extra dry instant snow in the container so kids can refresh the texture themselves |
Winter Slime Variations Worth Trying
Blizzard Slime
Use the instant snow version with the maximum amount of instant snow the slime will hold, producing a batch that’s more snow than slime and barely holds together as a cohesive mass. The texture is extremely satisfying to compress and watch slowly re-expand, mimicking the behavior of a tightly packed snowball.
Frozen Tundra Slime
Add pale blue and white fishbowl beads to a white clear glue base (making an exception to the white glue rule here, since fishbowl slime specifically benefits from clear glue) for a slime that looks like packed ice rather than snow, with the visible round beads resembling ice bubbles beneath a frozen surface.
Arctic Galaxy Slime
Combine the snow slime base with iridescent holographic glitter and a very faint blue tint for a slime that looks like the aurora borealis captured in slime form. The white base with blue shimmer and holographic sparkle captures the cold, luminous quality of an arctic sky in a way that’s surprisingly effective.
Snowman Slime Kit
Make three separate batches of snow slime in slightly different textures, instant snow for the body, foam bead slime for the middle, and fluffy slime for the head, and present them together with small craft items like mini buttons, orange clay for a nose, and small black beads for eyes. Kids build a snowman from the slime rather than just playing with it, which adds a construction element to the sensory activity.
Peppermint Snow Slime
Add peppermint fragrance oil and a few drops of red food coloring swirled through (not fully mixed) for a candy cane snow slime that smells like peppermint and has thin red swirl lines running through the white base. This is one of the most seasonal and recognizable winter slime variations and works particularly well as a holiday gift or activity.
How to Store Snow Slime
Snow slime follows the same basic storage principles as its base type, with a few additional considerations for the snow texture add-ins.
Store in a fully airtight container at room temperature. The instant snow component loses some of its texture over time in sealed storage as it slowly absorbs moisture from the slime itself, which is the main storage consideration unique to this version. Keeping a small amount of extra dry instant snow powder separate and available to add before each play session maintains the texture better than trying to preserve it entirely within the sealed slime.
Fluffy snow slime has the same limited lifespan as any fluffy slime, typically two to three weeks before the shaving cream component naturally deflates. Foam bead snow slime lasts as long as standard slime, approximately three to four weeks properly stored.
FAQ
Where can I find instant snow powder?
Instant snow powder is sold at most craft stores in the science or novelty section, at toy stores, and widely online. It’s also commonly sold in the sensory play section of educational toy retailers. It’s inexpensive and a single package contains enough for multiple batches of snow slime.
Can I make snow slime without instant snow powder or foam beads if I don’t have them?
Yes. The fluffy slime version uses nothing but standard slime ingredients plus shaving cream, and it genuinely captures a snowy texture without any specialty materials. It’s the simplest version and a completely valid snow slime in its own right.
Does the instant snow powder really feel cool to the touch?
Instant snow powder has a naturally cool feel when first prepared with water, since the hydration reaction absorbs some heat from the environment. This cooling effect is mild and temporary, but it’s a genuine property of the material and is part of what makes instant snow slime feel particularly appropriate for the snow theme.
How much instant snow should I add relative to the slime base?
Start with an equal volume of prepared instant snow to slime and adjust from there. More instant snow produces a drier, more powdery texture. Less produces a white-textured slime rather than something that genuinely resembles snow. The sweet spot for most people is slightly more instant snow than slime by volume.
Can I add fake snow (the kind used for Christmas decorations) instead of instant snow powder?
Some decorative fake snow products work similarly to instant snow powder, but others are made from different materials that don’t integrate into slime the same way. Check the ingredients before trying, since purely decorative fake snow made from plastic fibers doesn’t produce the same effect as the polymer-based instant snow powder designed for sensory play.
In Conclusion
Snow slime works because it commits to the theme at every sensory level. White base, white add-ins, cool light texture, and a wintry scent if you include the fragrance element. The instant snow version is the most impressive visually, the foam bead version is the most satisfying texturally, and the fluffy version is the most accessible with the least specialty materials required. Make any one of them and the snow theme is convincingly captured. Make all three and combine them for an ultimate snow slime that has more textural depth than anything you’ll find in a store.
Enjoyed this project? Get even more DIY ideas that save (and make) you money.
Join our free newsletter for profitable DIY projects, clever cleaning hacks, home ideas, and creative crafts delivered straight to your inbox.
✓ Free forever • No spam • Unsubscribe anytime




