
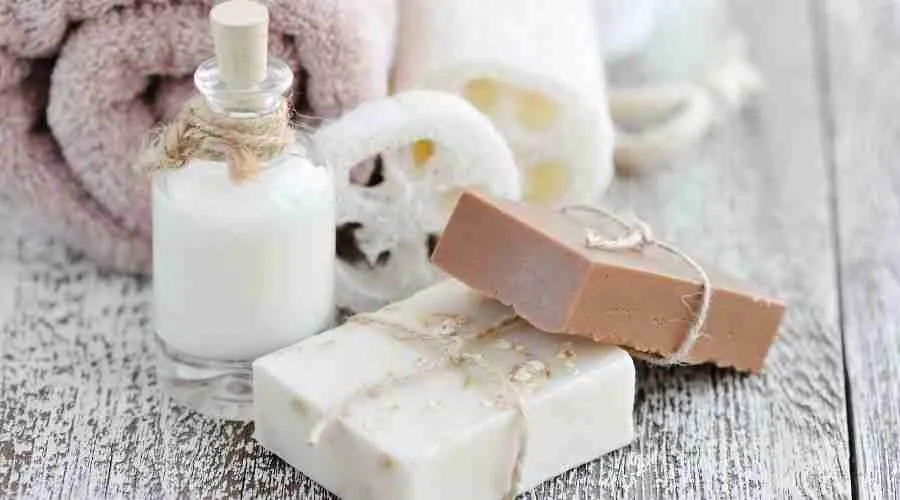
Goats milk soap has been around for centuries, and there’s a good reason it never went out of style. The natural fats, proteins, and lactic acid in goats milk make a bar that’s genuinely gentler on skin than most commercial soaps—especially for people with dry skin, eczema, or sensitivity to synthetic detergents.
The problem is that most tutorials either gloss over the safety details or make the process sound so complicated that beginners give up before they start. This guide covers both approaches—the full cold process method using lye, and the melt-and-pour method using a premade goats milk soap base if you want to skip lye entirely. Both produce real, usable goats milk soap. The method you choose depends on your comfort level and how much control you want over the final product.
Watch this video to learn how to make goat milk soap:
Here’s the Real Reason Goats Milk Makes Better Soap
Before getting into the how, it helps to understand the why—because it changes how you handle the milk during the process.
Goats milk contains:
- Alpha-hydroxy acids (AHAs), particularly lactic acid, which gently exfoliate dead skin cells and support skin renewal.
- Natural fats that contribute to a creamier, more moisturizing lather than water-based soaps.
- Vitamins A, B2, B6, B12, C, D, and E, which support skin health.
- Proteins and minerals including selenium, which has been linked to healthy skin maintenance.
The catch is that milk sugars and proteins are heat-sensitive. When you mix lye (sodium hydroxide) with liquid, it generates significant heat—enough to scorch milk, turn it orange, and create an unpleasant ammonia smell. This is why goats milk soapmaking requires a specific technique that controls temperature carefully throughout the process.
Stop Doing This If You Want Good Goats Milk Soap
These are the mistakes that produce discolored, crumbly, or poorly lathering bars—and they’re more common than you’d think:
Adding lye directly to warm or room-temperature milk. This causes the milk sugars to burn almost instantly, turning the mixture dark orange and producing a harsh smell. Milk must be partially or fully frozen before the lye goes anywhere near it.
Rushing the cure time. Freshly made cold process soap is still actively undergoing saponification—the chemical reaction that turns oils and lye into soap. Cutting into it too early gives you a soft, crumbly bar that may still be caustic. Full cure takes four to six weeks minimum.
Using the wrong lye calculator. Different oils saponify at different rates. Using a standard water-based recipe and simply swapping in milk without recalculating lye amounts throws off the entire formula. Always run your recipe through a lye calculator—SoapCalc and Brambleberry’s calculator are both reliable and free.
Skipping the freeze method for milk. Even if you’ve made regular cold process soap before, goats milk requires an adjusted approach. The freeze method isn’t optional—it’s what keeps the milk from scorching and the soap from turning orange.
Expecting melt-and-pour to behave like cold process. The two methods produce different bars with different textures, cure times, and customization potential. Neither is better—they’re just different tools for different goals.
You’re Probably Doing This Wrong: Lye Safety
Lye—sodium hydroxide—is a necessary ingredient in real cold process soap. Without it, there is no saponification, and without saponification, you don’t have soap. But lye is caustic and needs to be handled seriously.
Always wear safety goggles and gloves when working with lye. Work in a well-ventilated area. Always add lye to liquid—never liquid to lye. Keep a bottle of white vinegar nearby to neutralize any skin contact (though rinsing with large amounts of cool water is actually the primary first response). Store lye in an airtight container away from children and moisture.
This isn’t meant to scare you off—millions of home soapmakers work with lye safely every week. It just requires attention and the right protective equipment.
How to Make Goats Milk Soap Without Lye: The Melt-and-Pour Method
If you want to make goats milk soap without handling lye yourself, a premade goats milk soap base is the right starting point. The lye work has already been done during manufacturing—the base is fully saponified, safe to handle, and ready to melt, customize, and pour.
This method is genuinely beginner-friendly, faster, and still produces a skin-nourishing bar. The trade-off is less control over the exact oils and additives in the base formula.
How to Make Goats Milk Soap Base Into Finished Bars
What you’ll need:
- Premade goats milk melt-and-pour soap base (available from craft stores or online suppliers like Brambleberry, Bulk Apothecary, or Amazon)
- Sharp knife and cutting board
- Microwave-safe glass measuring cup or double boiler
- Soap mold (silicone loaf molds or individual cavity molds both work)
- Fragrance or essential oils (optional—use cosmetic-grade only)
- Colorants (optional—cosmetic-grade micas, clays, or natural colorants)
- Botanicals or additives (optional—oatmeal, dried lavender, honey)
- Rubbing alcohol in a small spray bottle (to eliminate surface bubbles)
- Kitchen thermometer
Step 1: Cut the soap base into small, even cubes. Smaller pieces melt more evenly and reduce the chance of overheating. Aim for roughly one-inch chunks. Work on a clean, dry cutting board—any moisture introduced at this stage can affect the final texture of the soap.
Step 2: Melt the base slowly using a microwave or double boiler. For the microwave, heat in 30-second intervals at 50% power, stirring between each interval. For a double boiler, place the soap chunks in a heat-safe bowl over gently simmering water, stirring occasionally. Do not let the base boil or overheat—temperatures above 160°F (71°C) degrade the base and affect the finished bar’s quality.
Step 3: Check the temperature before adding extras. Let the melted base cool slightly to around 120–130°F (49–54°C) before adding fragrance oils, essential oils, or colorants. Adding these to base that’s too hot causes fragrance to evaporate off before the soap sets, and can affect how colorants behave.
Step 4: Add fragrance or essential oils. The general guideline for melt-and-pour is one ounce of fragrance per pound of soap base (roughly 3% fragrance load). Stir gently but thoroughly to distribute evenly without creating excess air bubbles.
Step 5: Add colorants if using. Mica powders disperse easily in melted base—mix with a few drops of lightweight oil first to create a smooth paste, then stir into the soap. Natural colorants like turmeric (yellow), spirulina (green), or rose clay (pink) also work well in goats milk bases.
Step 6: Pour into molds carefully. Pour in a slow, steady stream from a low height to minimize bubbles. Fill each cavity or the loaf mold to your desired depth.
Step 7: Spritz the surface immediately with rubbing alcohol. This pops any surface bubbles and gives you a smoother, more professional finish. Don’t skip this—it makes a visible difference.
Step 8: Allow to cool and set fully. Melt-and-pour soap sets much faster than cold process—most bars are firm enough to unmold within two to four hours at room temperature, or 30 to 60 minutes in the refrigerator. Don’t freeze melt-and-pour soap; it can cause condensation issues.
Step 9: Unmold, cut if needed, and package promptly. Unlike cold process, melt-and-pour bars don’t need a cure time. They’re ready to use immediately. However, melt-and-pour soap is more prone to “sweating” (glycerin drawing moisture from the air) than cold process, so wrap finished bars in plastic wrap or shrink wrap as soon as they’re fully set to keep them looking clean.
How to Make Goats Milk Soap with Lye: The Cold Process Method
This is traditional soapmaking—full control over every ingredient, a longer process, but a finished bar that’s genuinely yours from start to finish.
A Simple Beginner Goats Milk Cold Process Recipe
This recipe produces approximately eight bars at 3.5 oz each. Run it through a lye calculator before making to verify the numbers for your specific ingredients.
Oils:
- 16 oz (454g) coconut oil — contributes hardness and lather
- 16 oz (454g) olive oil — contributes moisturizing, conditioning properties
- 8 oz (227g) palm oil or lard — contributes hardness and stable lather (skip palm if sourcing is a concern; substitute more lard or cocoa butter)
Lye mixture:
- 5.7 oz (162g) sodium hydroxide (lye) — always verify with a lye calculator
- 12 oz (340g) goats milk — fresh or canned, partially frozen
Optional additions:
- 1–2 oz fragrance or essential oil
- 1 teaspoon kaolin clay (adds slip and creaminess)
- Cosmetic-grade colorant if desired
What you’ll need:
- Digital kitchen scale — measuring by weight, not volume, is non-negotiable in cold process soapmaking
- Safety goggles and gloves
- Two heat-safe containers (stainless steel or heavy-duty plastic — no aluminum, which reacts with lye)
- Stick blender (immersion blender)
- Silicone spatulas
- Kitchen thermometer
- Soap mold — silicone loaf or individual molds
- Old towels or a cardboard box for insulation
Step 1: Freeze or partially freeze your goats milk. Pour the measured goats milk into ice cube trays or a zip-lock bag and freeze until fully solid, or at minimum slushy. This is the most important step in goats milk cold process soapmaking. The frozen milk absorbs the heat generated by the lye without scorching or turning orange.
Step 2: Measure all ingredients by weight. Use a digital scale for everything—oils, lye, and milk. Volume measurements are not accurate enough for soapmaking chemistry. Even small errors in lye amounts affect the final bar’s safety and quality.
Step 3: Slowly add lye to the frozen milk. Working in a well-ventilated area with your goggles and gloves on, sprinkle the lye a little at a time over the frozen milk, stirring constantly between additions. The mixture will heat up—this is normal. Adding the lye slowly keeps the temperature manageable and prevents the milk from scorching. The mixture may turn slightly yellow or pale orange; this is normal for milk soap. Dark orange or brown with a strong ammonia smell means the temperature got too high.
Step 4: Monitor the temperature. After all the lye is incorporated, check the temperature. You want the lye-milk mixture to cool to between 80–100°F (27–38°C) before combining with oils. The lower temperature range used in goats milk soapmaking (compared to standard cold process) helps preserve the milk’s beneficial properties.
Step 5: Melt and cool your oils. Melt any solid oils (coconut, palm) gently, then combine with your liquid oils (olive). Allow the oil blend to cool to a similar temperature as the lye mixture—ideally within 10°F of each other, both in the 80–100°F range.
Step 6: Combine oils and lye mixture. Pour the lye-milk mixture slowly into the oils (not the other way around), stirring gently as you pour. Use a stick blender to mix, alternating between short bursts with the blender and hand stirring with a spatula. You’re watching for “trace”—the point where the soap batter thickens to a consistency similar to thin pudding. A drizzle of batter dropped on the surface leaves a brief trail before sinking back in.
Step 7: Add fragrance, color, and any extras at light trace. Once you reach a light trace, stir in your fragrance or essential oils and any colorants. Work relatively quickly—fragrance can sometimes accelerate trace, causing the batter to thicken fast.
Step 8: Pour into the mold and smooth the top. Pour the soap batter into your prepared mold, tapping gently to release air bubbles. Smooth the top with a spatula. At this point, you can texture the top with a spoon or leave it smooth—either works.
Step 9: Insulate the mold. Unlike standard cold process soap, goats milk soap should not be fully insulated with towels and left in a warm place. The milk sugars already generate extra heat during saponification. Instead, place the mold in a cool area—some soapmakers put it in the refrigerator for the first 24 hours to prevent overheating, which causes a condition called “soap volcano” (where the soap literally overflows the mold) or soda ash.
Step 10: Unmold and cut after 24–48 hours. Check firmness before unmolding—the soap should feel firm but not crumbly. Cut into bars using a sharp knife or soap cutter. If the soap is still soft, leave it another day before cutting.
Step 11: Cure for four to six weeks. Place cut bars on a rack with good airflow, not touching each other, in a cool, dry spot out of direct sunlight. Turn them weekly. This cure time allows remaining water to evaporate, the pH to drop to skin-safe levels, and the bar to harden for longer use. Don’t skip or shorten the cure—the soap is not ready before this point.
Quick Reference: Method Comparison
| Factor | Melt-and-Pour Base | Cold Process with Lye |
|---|---|---|
| Lye handling required | No | Yes |
| Time to finished bar | 2–4 hours | 4–6 weeks (cure time) |
| Customization control | Moderate | Full |
| Beginner-friendly | Yes | Moderate |
| Cure time needed | No | Yes — 4 to 6 weeks |
| Shelf life | 1–2 years | 1–2 years |
| Skin-nourishing potential | Good | Excellent |
FAQ
Is goats milk soap actually better for skin? For most people, yes—particularly those with dry, sensitive, or eczema-prone skin. The lactic acid provides gentle exfoliation, and the natural fat content supports the skin barrier better than heavily processed commercial bars. That said, individual skin responses vary, and no soap is a medical treatment.
Can I use canned goats milk instead of fresh? Yes. Canned evaporated goats milk works well in both cold process and melt-and-pour recipes. It’s actually more consistent in fat content than fresh milk, which can vary. Avoid sweetened condensed milk—the added sugar causes excessive heating and browning during saponification.
Why did my goats milk soap turn orange? The milk sugars scorched during the lye mixing stage, usually because the milk wasn’t cold enough or the lye was added too quickly. Orange soap is still usable—it just doesn’t look as appealing. Preventing it next time means starting with fully frozen milk and adding lye very slowly in small increments.
How long does homemade goats milk soap last? Properly cured and stored cold process goats milk soap typically lasts one to two years. Melt-and-pour bars have a similar shelf life when wrapped to prevent glycerin sweating. Bars containing fresh additives like fruits, vegetables, or dairy beyond the milk itself have shorter shelf lives due to spoilage risk.
Can I add more goats milk to a melt-and-pour base? Yes, with caution. Adding a small amount of liquid goats milk (no more than one tablespoon per pound of base) can boost the milk content. More than that risks the soap not hardening properly or developing mold due to excess moisture. Powdered goats milk (available from craft suppliers) is a more reliable option—it adds the skin benefits without the extra liquid.
Conclusion
Goats milk soap is one of the most rewarding things you can make at home, whether you go the melt-and-pour route for a quick, beginner-friendly batch or commit to cold process for full control over every ingredient. The key differences come down to time, safety considerations, and customization depth. Both methods produce genuinely skin-nourishing bars that outperform most commercial options. Start with melt-and-pour if lye feels intimidating—there’s nothing wrong with that approach, and the results are real goats milk soap. When you’re ready to go deeper, cold process opens up a whole world of formulation. Either way, once you’ve made your first batch, it’s hard to go back to buying soap off a shelf.
Enjoyed this project? Get even more DIY ideas that save (and make) you money.
Join our free newsletter for profitable DIY projects, clever cleaning hacks, home ideas, and creative crafts delivered straight to your inbox.
✓ Free forever • No spam • Unsubscribe anytime




