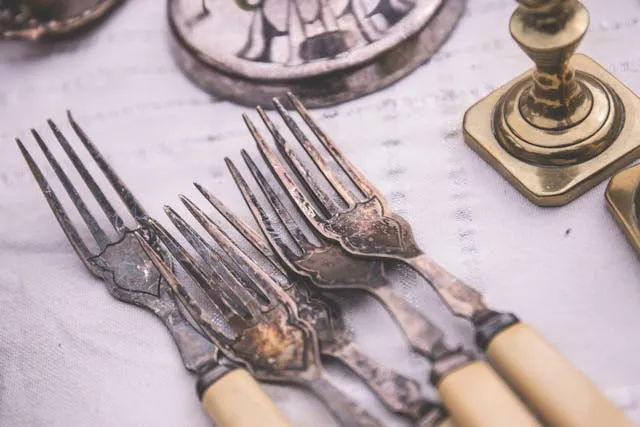
Silver tarnishes. It’s not a sign of neglect or poor quality—it’s chemistry. Silver reacts with sulfur compounds in the air, on skin, and in certain foods to form silver sulfide, the dark grey or black layer that builds up on jewelry, flatware, and decorative pieces over time. Some environments accelerate it dramatically: coastal air, rubber, wool, certain foods like eggs and mustard, and even some skin chemistry causes silver to tarnish within days of cleaning.
The good news is that tarnish is almost always reversible. Unlike rust, which degrades the underlying metal, tarnish sits on the surface of silver and responds well to the right cleaning methods. The key is matching the method to the severity of the tarnish and the type of silver you’re cleaning—because what works perfectly on a sterling silver flatware set can damage an antique piece or destroy an intentional patina.
This guide covers seven methods in order of intensity—starting with the gentlest approach for lightly tarnished pieces and working up to the most powerful treatments for heavily blackened silver that hasn’t been cleaned in years.
Before You Start: Know What You’re Cleaning
Not all silver responds the same way to cleaning:
- Sterling silver (925): 92.5% silver, 7.5% other metals (usually copper). The most common type for jewelry and flatware. Responds well to all methods in this guide.
- Fine silver (999): 99.9% pure silver. Softer than sterling and more prone to scratching. Use gentler methods and avoid abrasives.
- Silver-plated: A thin layer of silver over a base metal. The plating wears with repeated cleaning—use the gentlest effective method and avoid abrasive techniques.
- Antique or oxidized silver: Some silver is intentionally darkened in recessed areas for decorative contrast. Aggressive cleaning removes this patina permanently. Clean only the raised surfaces, not the recesses.
When in doubt, start with the gentlest method and escalate only if needed.
What You’ll Need (Depending on the Method)
- Baking soda
- White vinegar
- Aluminum foil
- Dish soap
- White toothpaste (not gel)
- Cornstarch
- Lemon juice
- Salt
- Commercial silver polish
- Soft microfiber cloths
- A soft-bristle toothbrush
- Warm water
- A glass bowl or baking dish
Method 1: Warm Soapy Water (Best for Lightly Tarnished Silver)
Before reaching for anything more aggressive, start here. For silver that’s just slightly dull—losing its shine but not yet visibly dark—warm water and dish soap is often all that’s needed. It removes surface oils, dirt, and the very early stages of tarnish without any risk to the metal or plating.
- Fill a bowl with warm water and add a few drops of mild dish soap. Use warm rather than hot water—hot water can loosen settings in jewelry and cause thermal stress in pieces with multiple materials.
- Submerge the silver piece and allow to soak for two to three minutes. For lightly tarnished pieces, this brief soak is usually enough to loosen surface deposits.
- Use a soft cloth or your fingers to gently rub the surface of the piece, working in the direction of any brushed grain on flatware or in small circular motions on jewelry.
- For pieces with detailed engraving or intricate links, use a soft-bristle toothbrush to gently work into crevices. Use the lightest possible pressure—you’re removing loose deposits, not scrubbing.
- Rinse thoroughly under warm running water, making sure all soap residue is removed. Soap left on silver can dull the finish over time.
- Dry immediately and completely with a soft microfiber cloth. Never air dry silver—water spots form quickly and sitting moisture accelerates new tarnish.
- Buff with a dry section of the cloth in small circular motions to bring up the shine.
Best for: Light surface dullness, recently cleaned silver that just needs freshening, silver-plated pieces, pieces with gemstone settings that can’t be soaked in more acidic solutions.
Method 2: Baking Soda Paste (Best for Moderate Tarnish)
Baking soda is a mild abrasive that physically lifts tarnish from the silver surface. It’s more aggressive than soap and water but gentle enough for most sterling silver when applied with a soft cloth rather than a scrubbing pad. This is one of the most effective home methods for moderate tarnish—the kind that makes silver look grey and dull rather than just slightly flat.
- Mix two parts baking soda with one part water in a small bowl to form a thick paste. The consistency should be similar to toothpaste—spreadable but not runny. A runny paste is less effective because it doesn’t stay in contact with the surface long enough to work.
- Apply the paste to the tarnished silver using a soft cloth, your fingers, or a soft toothbrush for detailed pieces. Work in small sections rather than trying to coat the entire piece at once.
- Rub gently in small circular motions, applying light pressure. For flat surfaces like the bowls of spoons or the face of a pendant, circular motion works well. For textured or engraved surfaces, use a soft toothbrush to work into the detail without applying pressure to the raised areas.
- Leave the paste in contact with the silver for one to two minutes on moderately tarnished pieces. For heavier tarnish, up to five minutes—though at that point the aluminum foil bath in Method 4 is usually more effective.
- Rinse thoroughly under warm water, removing all paste residue. Baking soda left in crevices can cause a white residue that’s difficult to remove once dried.
- Dry and buff immediately with a soft microfiber cloth.
- Avoid this method on silver-plated pieces used frequently. The mild abrasion is safe for occasional use on plate, but repeated use wears through thin plating over time.
Best for: Moderate tarnish on sterling silver jewelry and flatware, pieces with visible grey discoloration but not yet blackened.
Method 3: White Toothpaste (Best for Spot Treatment and Quick Fixes)
White toothpaste—not gel—contains the same mild abrasives as baking soda in a ready-to-use form, with the added advantage of being easier to control for spot treatment. It’s particularly useful for cleaning small areas of tarnish on a piece that’s mostly clean, or for quick maintenance between deeper cleaning sessions.
- Apply a small amount of white toothpaste directly to the tarnished area using a finger or soft cloth. A pea-sized amount is enough for a ring or small pendant—don’t glob it on.
- Work the toothpaste into the tarnished area using gentle circular motions with a soft cloth or toothbrush. You’ll see the toothpaste picking up grey discoloration as it lifts the tarnish.
- Continue rubbing for one to two minutes, checking progress as you go. The tarnish should be visibly lifting.
- Rinse thoroughly with warm water to remove all toothpaste residue.
- Dry and buff immediately with a soft microfiber cloth.
Important: Only use plain white toothpaste. Gel toothpastes don’t contain the necessary abrasive compounds. Whitening toothpastes are too abrasive and can scratch silver. Colored toothpastes can stain. Plain white is the only safe option.
Best for: Quick spot treatment, small areas of tarnish, a single piece of jewelry that needs a fast clean before wearing.
Method 4: Aluminum Foil and Baking Soda Bath (Best for Heavy Tarnish)
This is the method that genuinely surprises people—it works through electrochemistry rather than physical abrasion. When tarnished silver touches aluminum foil in a hot salt and baking soda solution, the aluminum donates electrons to the silver sulfide, breaking it apart. The sulfur transfers from the silver to the aluminum, and the silver is chemically restored rather than abraded. Tarnish visibly disappears in minutes, and you’ll often smell a brief whiff of sulfur as the reaction works.
This method is the most effective home treatment for heavily tarnished silver—pieces that have gone dark grey or black.
- Line a glass bowl or baking dish with aluminum foil, shiny side up. Press it flat against the bottom with no gaps.
- Place the tarnished silver directly on the foil, ensuring every piece is in direct contact with the aluminum. This contact is essential—pieces not touching the foil won’t clean.
- Sprinkle one tablespoon of baking soda per cup of water you’ll be using directly over the silver.
- Add one teaspoon of table salt per cup of water over the silver—salt acts as an electrolyte and accelerates the reaction noticeably.
- Pour boiling or very hot water over the silver to fully submerge all pieces. You’ll see immediate bubbling and may briefly smell sulfur—both signs the reaction is working.
- Soak for 5–15 minutes depending on the severity of tarnish. Watch the pieces—tarnish will visibly fade. Check at five minutes and return for longer if needed.
- Remove with tongs (the water will be hot), rinse each piece thoroughly under warm water, and wash briefly with dish soap to remove any reaction byproducts.
- Dry and buff immediately with a soft microfiber cloth.
What not to use this method on: Antique silver with intentional oxidized patina (it removes all tarnish indiscriminately), jewelry with pearls or glued stones (hot water damages them), and hollow-handled flatware (limit soak time to three to five minutes for these).
Best for: Heavily tarnished sterling silver, full flatware sets, multiple pieces that need cleaning at once.
Method 5: White Vinegar and Baking Soda (Best for Intricate Pieces)
This method combines the mild acid of white vinegar with baking soda to create a fizzing reaction that lifts tarnish from detailed, intricate pieces—chains, engraved jewelry, pieces with recessed detail—where paste methods can’t easily reach and the foil bath may be overkill.
- Mix half a cup of white vinegar with two tablespoons of baking soda in a bowl. It will fizz significantly—wait for the initial reaction to subside before adding silver.
- Submerge the silver piece in the solution once the fizzing has calmed to a gentle bubble.
- Allow to soak for two to three hours for moderate tarnish, or up to overnight for heavy tarnish. The mild acid in the vinegar works slowly but penetrates into detailed areas that paste methods miss.
- Remove and rinse thoroughly under warm running water. Vinegar smell dissipates completely as the piece dries.
- Use a soft toothbrush to gently work any remaining tarnish out of crevices after soaking, if needed.
- Dry and buff immediately with a soft microfiber cloth.
Best for: Chains, intricate link bracelets, engraved pieces, pieces where paste can’t reach into the detail.
Method 6: Lemon Juice and Salt (Best for Silverware and Flatware)
Lemon juice is a mild acid that dissolves silver sulfide, and salt provides gentle abrasion and acts as an electrolyte. Together they create a simple, effective soak for flatware and silverware that works well on moderate to heavy tarnish and leaves a bright, clean finish.
- Mix the juice of one lemon with one teaspoon of table salt in a bowl large enough to submerge the flatware.
- Add warm water to fully cover the pieces—about one to two cups depending on the bowl size.
- Submerge the flatware and allow to soak for five to ten minutes. The acid works quickly on moderate tarnish—check at five minutes and extend if the tarnish hasn’t fully lifted.
- For stubborn spots, dip a soft cloth in the lemon-salt solution and rub the specific area gently.
- Rinse very thoroughly under warm running water—lemon juice residue left on silver can continue to react with the metal and cause pitting over time if not fully rinsed.
- Dry and buff immediately and completely—lemon juice accelerates new tarnish formation if any moisture is left on the surface.
Caution: Don’t use this method on silver-plated flatware with frequent repetition—the acid can gradually affect thin plating. For solid sterling flatware, occasional use is fine.
Best for: Sterling silver flatware and silverware, moderate to heavy tarnish on solid silver pieces.
Method 7: Commercial Silver Polish (Best for Valuable or Frequently Polished Pieces)
For genuinely valuable silver—heirloom pieces, antique flatware, high-quality jewelry—a commercial silver polish formulated specifically for silver gives the most controlled, predictable results. Products like Wright’s Silver Cream, Goddard’s Silver Polish, and similar dedicated silver polishes contain calibrated levels of abrasive and chemical tarnish removers that are gentler than household abrasives while being more consistently effective.
- Apply a small amount of silver polish to a soft cloth—not directly to the silver. Direct application concentrates the product unevenly.
- Work the polish into the silver using gentle circular motions on flat surfaces, or a soft toothbrush for detailed areas. The cloth will turn dark grey or black as it picks up tarnish—this is normal and shows the polish is working.
- Work in small sections and use a fresh section of cloth as each area becomes saturated with tarnish.
- For heavily tarnished pieces, allow the polish to sit on the surface for one to two minutes before buffing—the chemical tarnish removers need contact time to work on deep tarnish.
- Buff with a clean dry section of cloth in circular motions until the silver surface is bright and shiny.
- Rinse the piece under warm water if the polish manufacturer recommends it (check the label—some polishes are designed to be buffed off rather than rinsed).
- Dry and buff with a clean microfiber cloth to bring up the final shine.
- Store in anti-tarnish cloth or bags immediately after polishing—freshly polished silver tarnishes faster than silver that’s been left alone, because polishing removes the micro-thin protective layer that forms naturally on the surface.
Best for: Valuable or antique sterling silver, pieces polished regularly, silver that needs a perfectly consistent finish.
Method Comparison at a Glance
| Method | Tarnish Level | Safe for Silver Plate | Time Required |
|---|---|---|---|
| Warm soapy water | Light | Yes | 5–10 minutes |
| Baking soda paste | Moderate | Use sparingly | 5–10 minutes |
| White toothpaste | Light–Moderate | Use sparingly | 3–5 minutes |
| Aluminum foil bath | Heavy | Use sparingly | 10–20 minutes |
| Vinegar and baking soda | Moderate–Heavy | No | 2–12 hours |
| Lemon juice and salt | Moderate–Heavy | No | 10–20 minutes |
| Commercial polish | All levels | Yes (use gently) | 10–20 minutes |
What Makes Silver Tarnish Faster
Understanding what accelerates tarnish helps you slow it down between cleanings:
- Rubber and latex. Rubber contains sulfur compounds that cause rapid tarnishing on contact. Never store silver in rubber-lined drawers or wrap with rubber bands.
- Wool. Like rubber, wool contains sulfur compounds. Don’t store silver wrapped in wool felt.
- Eggs, mustard, and onions. These foods are high in sulfur—silverware used with them tarnishes noticeably faster than pieces used with other foods. Rinse and dry flatware promptly after use.
- Humid environments. Moisture accelerates the tarnish reaction. Bathrooms are the worst place to store silver jewelry.
- Direct sunlight. UV exposure combined with moisture accelerates oxidation. Store silver in a cool, dark place.
- Skin chemistry. Some people’s skin accelerates silver tarnish significantly due to higher sulfur content in perspiration. If your jewelry tarnishes within days of cleaning, this is likely why.
How to Keep Silver from Tarnishing
- Store silver in anti-tarnish bags or cloth. These contain activated charcoal or silver-impregnated fibers that absorb sulfur compounds before they reach the silver. Inexpensive and genuinely effective.
- Add chalk or silica gel packets to your jewelry box or silver storage area. Both absorb moisture and slow tarnish formation.
- Store pieces separately. Silver pieces rubbing together scratch each other. Separate storage prevents this and makes it easier to see which pieces need cleaning.
- Wear silver regularly. The natural friction and oils from skin contact keep jewelry polished and slow tarnish buildup—silver that’s worn frequently tarnishes more slowly than pieces left sitting in a drawer.
- Dry thoroughly before storing. Even trace moisture left on silver accelerates tarnish formation. After washing hands while wearing silver rings, dry them specifically rather than assuming they’ll air dry.
- Apply a thin coat of Renaissance Wax to decorative silver pieces you don’t wear or use. This microcrystalline wax creates a barrier against sulfur exposure and is reversible—it can be removed with mineral spirits when you want to clean or re-polish.
FAQ
Can I clean silver with toothpaste every week? The mild abrasives in toothpaste remove a tiny amount of silver with each use. For solid sterling, occasional use is fine—every few weeks won’t cause visible damage over a normal lifetime. For silver-plated pieces or fine silver, stick to soap and water or the foil bath for regular cleaning.
Why does my silver turn black so quickly after cleaning? Freshly polished silver tarnishes faster because polishing removes the micro-thin protective oxide layer that forms naturally on the surface. Store cleaned silver in anti-tarnish bags immediately, and consider applying Renaissance Wax to decorative pieces. If the tarnish returns within days regardless, check whether the storage environment contains rubber, wool, or high humidity.
Is it safe to clean silver with gemstones using these methods? It depends on the stone. Hard stones set in metal (diamonds, sapphires, rubies, emeralds) generally tolerate the soap and water and toothpaste methods. Avoid soaking pieces with pearls, opals, turquoise, coral, or any stone that might be glued rather than set—hot water, acid, and prolonged soaking can damage or loosen these. When in doubt, clean around the stone with a damp cloth rather than submerging the piece.
Can I use these methods on silver-filled or silver-tone jewelry? Silver-filled (a thicker layer of silver than silver-plated) can handle gentle methods—soap and water, light toothpaste use. Silver-tone (no actual silver, just a silver-colored coating) should only be cleaned with soap and water—any abrasive or chemical method risks removing the coating entirely.
How do professional silversmiths clean heavily tarnished silver? For most pieces, ultrasonic cleaning combined with a commercial silver dip produces the most thorough results. For heavily tarnished antique pieces, electrochemical reduction in a professional electrolytic bath—the same principle as the foil method but with controlled current—is used. For pieces where abrasion is acceptable, a rotary tool with a silver polishing wheel produces the most consistent mirror finish.
The Bottom Line
Start with the gentlest method that matches the level of tarnish—soap and water for light dullness, baking soda paste for moderate grey tarnish, and the aluminum foil bath for anything heavily blackened. For intricate pieces, the vinegar soak gets into places paste can’t reach. For valuable pieces, a dedicated commercial polish gives the most controlled result. Whatever method you use, dry immediately and completely afterward, store in anti-tarnish bags, and keep silver away from rubber and humidity. Those three habits alone will dramatically reduce how often you need to clean in the first place.
Enjoyed this project? Get even more DIY ideas that save (and make) you money.
Join our free newsletter for profitable DIY projects, clever cleaning hacks, home ideas, and creative crafts delivered straight to your inbox.
✓ Free forever • No spam • Unsubscribe anytime