
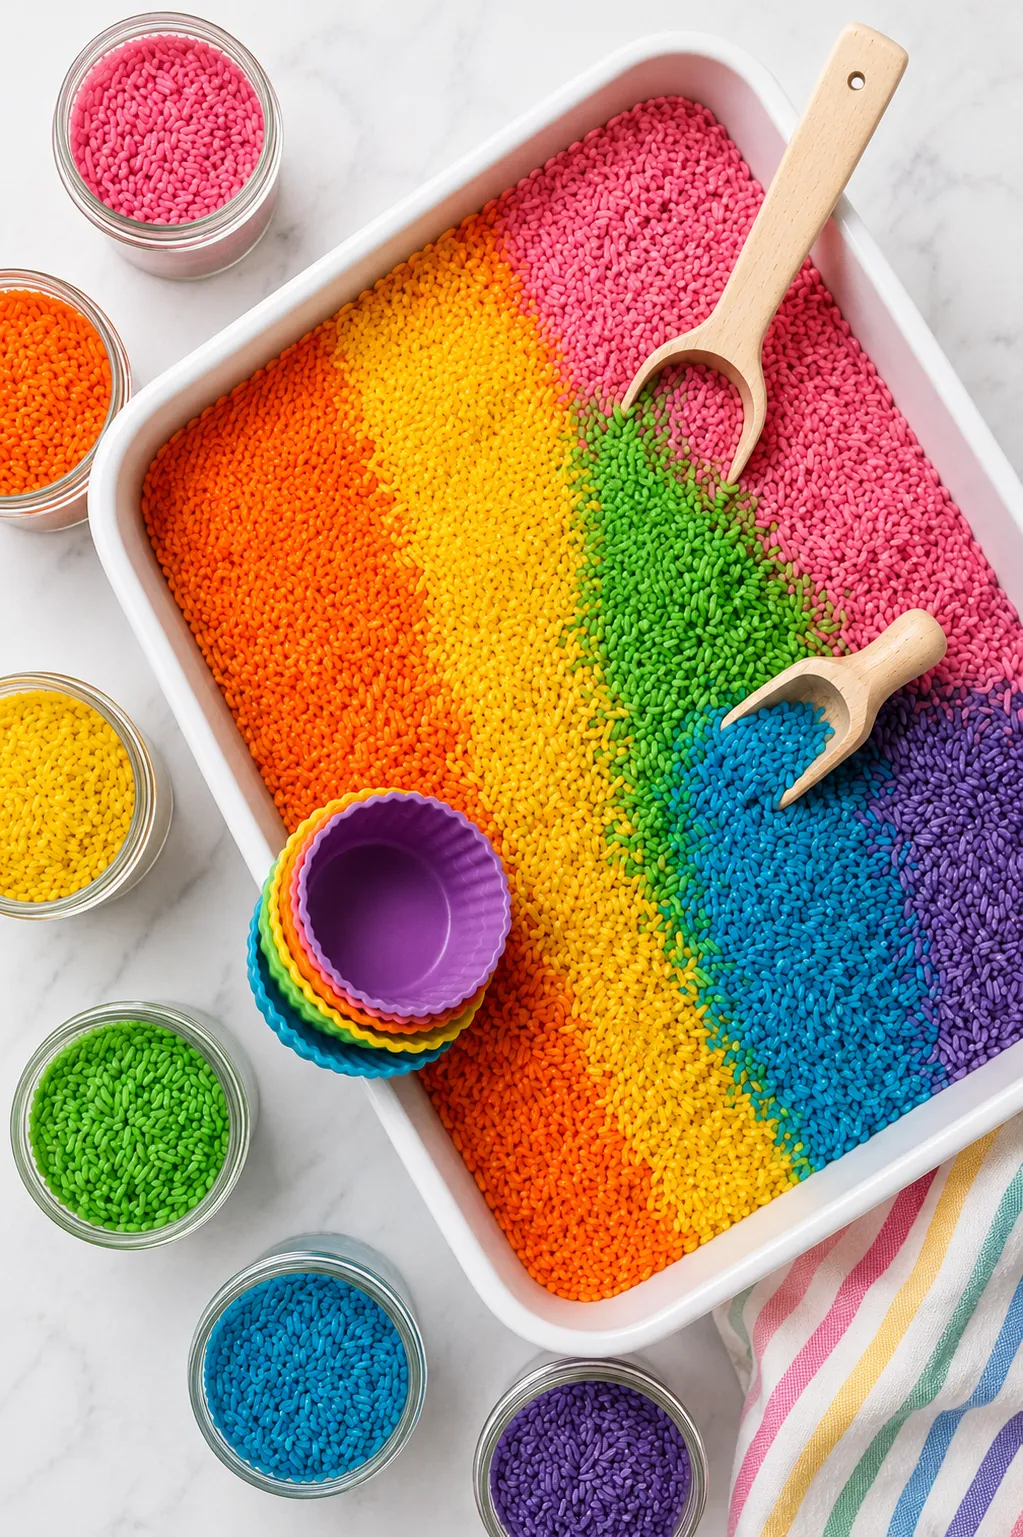
Sensory bins are one of those activities that keep toddlers and preschoolers genuinely occupied for stretches of time that feel almost miraculous compared to most activities. And rainbow rice is the most popular sensory bin filler for good reason—it’s colorful, satisfying to run through fingers, cheap to make in large quantities, and easy to scoop, pour, and dig through with small tools.
The catch is that not all rainbow rice is made the same way, and the method you use affects how vibrant the colors are, how long they last, how quickly the rice dries, and whether it’s safe for young children who might put it in their mouths. Some methods produce vivid, saturated colors that last for years. Others are gentler and safer for babies but produce softer tones.
This guide covers six different methods for making rainbow rice—from the standard vinegar and food coloring technique to completely natural, dye-free options—so you can match the method to your child’s age, your available ingredients, and how much color vibrancy you want.
Before You Start: Which Rice to Use
Not all rice produces the same results:
- Long-grain white rice is the most popular choice. It’s inexpensive, has a neutral color that lets dye show true, and dries quickly. It’s the best starting point for any method.
- Short-grain white rice works but clumps more than long-grain during the dyeing process. It produces a similar finished result but requires more attention during drying.
- Brown rice produces more muted colors because the bran layer is darker and absorbs dye differently. Use only if white rice isn’t available.
- Uncooked rice only. Never use cooked rice—it molds within hours.
For most sensory bin purposes, a 5–10 pound bag of the cheapest long-grain white rice you can find is perfect. Sensory rice gets played with hard, spilled frequently, and eventually needs replacing—there’s no reason to use expensive rice.
How Much Rice to Make
A standard under-bed storage bin (roughly 40 liters) needs approximately 8–10 cups of finished rainbow rice to be deep enough for satisfying scooping and digging. A smaller shoebox-size bin needs 3–4 cups. Make more than you think you need—running out of a color mid-project because you made a small test batch is frustrating.
What You’ll Need (Depending on the Method)
- Long-grain white rice (uncooked)
- White vinegar or hand sanitizer
- Food coloring (liquid or gel)
- Natural colorants (turmeric, beet juice, spinach, blueberry)
- Hair conditioner
- Shaving cream
- Zip-lock bags (gallon size)
- Baking sheets or trays lined with parchment
- Measuring cups and spoons
- Rubber gloves (food coloring stains hands)
Method 1: Vinegar and Food Coloring (Most Vibrant, Longest Lasting)
This is the gold standard method for rainbow rice—the one that produces the most saturated, vivid colors that hold up through months of play without fading. The vinegar acts as a mordant, helping the food coloring bond to the rice rather than just coating the surface. Rice made this way keeps its color even after vigorous play and multiple rounds of use.
What you’ll need:
- 2 cups white long-grain rice per color
- 1 tablespoon white vinegar per color
- Food coloring (gel food coloring produces more vivid results than liquid)
- Gallon zip-lock bags
- Baking sheets lined with parchment paper
Instructions:
- Measure two cups of uncooked white rice into a gallon zip-lock bag. Use a separate bag for each color—don’t try to do multiple colors in one bag.
- Add one tablespoon of white vinegar to the bag. The vinegar smell is strong initially but completely dissipates as the rice dries—finished rainbow rice made with vinegar has no smell at all.
- Add food coloring. For gel food coloring, start with half a teaspoon and assess color saturation after mixing. For liquid food coloring, start with 15–20 drops. More colorant produces deeper, more saturated hues; less produces pastel tones. Both are beautiful—decide which palette you prefer before starting.
- Seal the bag completely, pressing out as much air as possible before sealing.
- Massage the bag thoroughly with both hands, working the vinegar and food coloring evenly through all the rice. Squeeze, press, and turn the bag for at least two to three minutes—every grain should be coated. Open the bag and check for any white grains that haven’t been reached, then reseal and continue massaging.
- Open the bag slightly to allow airflow and spread the rice in a single layer on a parchment-lined baking sheet. Don’t pour it in a pile—a single layer dries much faster and more evenly.
- Allow to dry completely at room temperature. Depending on humidity and the amount of vinegar used, drying takes two to four hours. Stir the rice every 30–45 minutes to prevent clumping and to expose all surfaces to air.
- Test for dryness by running a handful through your fingers—it should feel completely dry with no sticky grains. Damp rice stored in a container will mold.
- Once fully dry, the rice from each color can be combined in a single bin for a rainbow effect or stored separately by color.
Color mixing tip: You’re not limited to straight primary colors. Mixing food coloring shades produces beautiful custom tones—a few drops of red mixed with yellow gives orange; blue and red give purple. Plan your color palette before starting and mix the food coloring in a small bowl before adding to the bag so you can assess the color before committing.
Method 2: Hand Sanitizer Method (Fastest Drying Time)
Hand sanitizer replaces vinegar in this method and has one significant advantage: the alcohol base evaporates almost instantly, dramatically cutting drying time. Rice made with hand sanitizer can be dry enough to play with in 15–30 minutes rather than the two to four hours needed for vinegar-based rice. The trade-off is slightly less color intensity than the vinegar method—but for parents who need rainbow rice now rather than after a half-day drying session, this method is a genuine lifesaver.
What you’ll need:
- 2 cups white rice per color
- 1 teaspoon hand sanitizer per color (clear, unscented hand sanitizer works best)
- Food coloring
- Zip-lock bags
- Baking sheets
Instructions:
- Add two cups of rice to a zip-lock bag, followed by one teaspoon of clear hand sanitizer.
- Add food coloring—same amounts as Method 1, though expect slightly softer tones due to the lower liquid volume.
- Seal and massage thoroughly for two to three minutes until all rice is evenly coated.
- Spread in a single layer on a parchment-lined baking sheet.
- Allow to dry—with hand sanitizer, this takes as little as 15 minutes in a warm, dry environment. The alcohol evaporates quickly and takes the moisture with it.
- Stir once or twice during drying to prevent clumping, then check for complete dryness before storing.
Note: Use unscented, clear hand sanitizer for the cleanest results. Tinted or scented hand sanitizers affect color accuracy and add fragrance to the rice that some children find overwhelming during sensory play.
Method 3: Hair Conditioner Rainbow Rice (Softest Texture, Best for Younger Toddlers)
Hair conditioner produces rainbow rice with the softest, silkiest texture of any method on this list—individual grains feel smooth rather than rough, and the finished rice has a very slight pleasant fragrance from the conditioner. It’s less vibrant than the vinegar method but has a luxurious texture that younger toddlers in particular respond very positively to.
What you’ll need:
- 2 cups white rice per color
- 1 tablespoon hair conditioner per color (inexpensive, thick conditioner works best)
- Food coloring
- Zip-lock bags
- Baking sheets
Instructions:
- Add two cups of rice to a zip-lock bag.
- Mix the food coloring into the conditioner in a small bowl before adding to the bag. Conditioner’s thick, opaque base makes it harder to distribute color evenly if added separately—pre-mixing ensures uniform color throughout.
- Add the colored conditioner mixture to the bag with the rice.
- Seal and massage thoroughly for three to four minutes—conditioner is thicker than vinegar or hand sanitizer and needs more working to coat every grain evenly.
- Spread in a thin, single layer on a parchment-lined baking sheet. Conditioner-coated rice clumps more than other methods during drying—break up any clumps as you spread.
- Dry at room temperature for four to six hours, stirring every 45 minutes to break up clumps and expose all surfaces. Conditioner takes longer to dry than vinegar or hand sanitizer.
- Test thoroughly for dryness before storing—conditioner retains moisture more than other liquids and needs to be genuinely dry before storage to prevent mold.
Texture note: Even fully dried conditioner rice retains a slightly silky feel compared to vinegar or hand sanitizer rice. This is normal and is actually the feature that makes this method appealing for young children.
Method 4: Natural Dye Rainbow Rice (Best for Babies and Dye-Free Households)
For families who prefer to avoid synthetic food coloring—particularly for sensory bins used by babies who put everything in their mouths—natural dyes from kitchen ingredients produce beautiful, soft, earthy tones. The colors are less vivid than synthetic food coloring but genuinely lovely, with a natural, organic palette that looks beautiful in a bin.
What you’ll need:
- 2 cups white rice per color
- White vinegar (1 tablespoon per color, as mordant)
- Natural colorants:
- Yellow: 1 teaspoon turmeric powder
- Pink/Red: 3 tablespoons reduced beet juice (simmer beet juice until concentrated)
- Green: 2 tablespoons spinach juice or matcha powder
- Purple: 3 tablespoons purple cabbage juice (simmer purple cabbage in water, then strain)
- Orange: 1 teaspoon paprika or 2 tablespoons carrot juice
- Blue: 3 tablespoons blueberry juice (reduced slightly for deeper color)
Instructions:
- Prepare liquid natural colorants by simmering juices (beet, carrot, blueberry, cabbage) in a small saucepan until reduced by half. Reduction concentrates the pigment and produces significantly deeper colors than using the juice at full dilution. Allow to cool before using.
- Add two cups of rice to a zip-lock bag with one tablespoon of white vinegar.
- Add the natural colorant—powder colorants like turmeric and matcha can be added directly; liquid colorants should be added in the amounts above.
- Seal and massage thoroughly for three to four minutes. Natural colorants often need more working than synthetic food coloring to achieve even coverage.
- Spread in a single layer on a parchment-lined baking sheet.
- Dry for four to six hours, stirring every 45 minutes. Natural colorants sometimes require longer drying times than synthetic versions due to higher liquid content.
- Expect softer tones. Natural dyes produce a muted, earthy palette rather than vivid primaries—this is the nature of natural pigments. The finished colors are genuinely beautiful in a different way from synthetic food coloring.
Color deepening tip: For deeper natural colors, do a second coat after the first has dried. Repeat the dyeing and drying process on already-colored rice to build up pigment intensity.
Method 5: Shaving Cream Rainbow Rice (Best Marbled Effect)
Shaving cream produces rice with a marbled, slightly mottled color effect—individual grains aren’t uniformly colored but have variations and depth that look more artisan than flat-dyed rice. It’s a fun variation when you want something that looks different from standard rainbow rice, and the shaving cream gives the finished product an interesting slightly matte surface.
What you’ll need:
- 2 cups white rice per color
- 2 tablespoons shaving cream per color (standard foam shaving cream, not gel)
- Food coloring
- Zip-lock bags or a shallow tray
- Baking sheets
Instructions:
- Squirt shaving cream onto a shallow tray or into a zip-lock bag.
- Add food coloring to the shaving cream and mix roughly—don’t fully combine. Partial mixing is what creates the marbled effect in the finished rice. If you mix the color completely into the shaving cream before adding rice, the result is uniform color rather than marble.
- Add two cups of rice to the shaving cream mixture.
- Fold and press rather than vigorous massaging—gentle folding preserves the marbled variation in the shaving cream that translates to the rice. Over-mixing produces uniform color and loses the marble effect.
- Spread on a parchment-lined baking sheet in a single layer. The shaving cream will be visible on the rice at this point—it dries clear and disappears.
- Dry for three to five hours, stirring gently every hour. Shaving cream takes longer to fully evaporate than vinegar or hand sanitizer.
- The finished rice will have a slightly mottled, varied color rather than uniform saturation—some grains deeper, some lighter—which creates a visually interesting texture in the sensory bin.
Important: Shaving cream contains chemicals that make this method less suitable for babies who mouth objects. Use for toddlers three and up who are past the mouthing stage.
Method 6: Oven-Drying Method (Fastest Overall Process for Large Batches)
This isn’t a separate coloring method—it uses the same vinegar and food coloring formula as Method 1—but the drying approach is fundamentally different. Instead of air-drying at room temperature for two to four hours, the oven dramatically cuts drying time to 15–20 minutes. For large batches (making 10+ cups of rainbow rice at once), the oven method saves significant time and produces beautifully dry, separated grains.
What you’ll need:
- White rice (any quantity)
- White vinegar (1 tablespoon per 2 cups rice)
- Food coloring
- Zip-lock bags
- Baking sheets lined with parchment paper
- An oven
Instructions:
- Color the rice using the Method 1 technique—vinegar, food coloring, sealed bag, thorough massaging until all grains are evenly coated.
- Preheat the oven to 170°F (the lowest setting on most ovens). Higher temperatures can pop the rice, cause scorching, and intensify the vinegar smell into something unpleasant. Low and slow is the right approach.
- Spread the colored rice in a single layer on a parchment-lined baking sheet—no more than one cup of rice per baking sheet for best drying results. Multiple thin layers on separate sheets dry faster than one thick layer on one sheet.
- Place in the oven for 15–20 minutes, checking at the 10-minute mark. Stir the rice once during drying to ensure even heat exposure.
- Check for dryness by running through your fingers—it should feel completely dry and the grains should separate easily.
- Allow to cool completely on the baking sheet before storing. Hot rice placed directly into a sealed container creates steam that reintroduces moisture—always cool fully first.
- Do all colors in sequence if your oven space is limited—each batch takes only 15–20 minutes, making the total time for a full rainbow much faster than air-drying.
Note: The oven method produces a very slight vinegar smell during drying that dissipates completely once the rice is cool. Ensure good kitchen ventilation during the drying process.
Method Comparison at a Glance
| Method | Color Vibrancy | Drying Time | Best For | Safe for Mouthing |
|---|---|---|---|---|
| Vinegar + food coloring | Excellent | 2–4 hours | Most situations | Yes (once dry) |
| Hand sanitizer | Good | 15–30 minutes | Quick batches | Yes (once dry) |
| Hair conditioner | Moderate | 4–6 hours | Soft texture, toddlers | Yes (once dry) |
| Natural dye | Soft/earthy | 4–6 hours | Babies, dye-free | Yes |
| Shaving cream | Moderate/marbled | 3–5 hours | Visual variety, 3+ years | No |
| Oven-drying | Excellent | 15–20 min (oven) | Large batches | Yes (once dry) |
Setting Up the Perfect Rainbow Rice Sensory Bin
The rice itself is only part of the experience—the bin setup determines how engaging and long-lasting the activity is.
Choosing a bin:
- Under-bed storage bins (clear plastic, roughly 40L) are the most popular size—deep enough for digging, wide enough for two children to play side by side.
- Shoe box size works well for babies and one-child setups.
- A large baking tray with raised edges is a good option for quick setups and easy cleanup.
Tools that extend play:
- Measuring cups and spoons for scooping and pouring
- Funnels of different sizes
- Small plastic bottles and containers for filling and emptying
- Spoons, ladles, and tongs
- Small figurines, animals, or vehicles buried in the rice for discovery play
- Egg cups and muffin tins for sorting by color
Theming the bin: Rainbow rice works as the base for dozens of themed setups that extend the concept beyond just scooping and pouring:
- Garden bin: Green and brown rice with plastic flowers, insects, and small shovels
- Ocean bin: Blue rice with plastic sea creatures and shells
- Farm bin: Yellow and green rice with farm animal figurines
- Rainbow bin: All six colors in separate sections with color-matching objects
How to Store Rainbow Rice
Proper storage extends the life of rainbow rice significantly:
- Store in airtight containers at room temperature. Large zip-lock bags, lidded plastic storage containers, or glass jars all work well.
- Store by color separately if you want to be able to create themed bins with specific colors, or mix all colors together for a full rainbow effect.
- Never store damp rice. Fully dry is the only standard for storage—even slightly damp rice molds within days in a sealed container.
- Well-made rainbow rice lasts 12–18 months or longer when stored properly. The vinegar method produces the most colorfast rice; natural dyes fade somewhat over time.
- If rice develops a smell during storage, discard it—this indicates moisture got in and mold may be present even if not visible.
Refreshing Faded Rainbow Rice
Rice that sees heavy play fades and gets dusty over time. Before making an entirely new batch:
- Sort out any broken or discolored grains by hand or by spreading on a baking sheet and picking out the worst offenders.
- Lightly re-dye by adding a few drops of food coloring mixed with a tiny amount of vinegar to a zip-lock bag with the faded rice. Massage briefly and re-dry. This refreshes the color without making a full new batch.
- If the rice feels dusty from play, spread on a baking sheet and place in the oven at 170°F for five minutes—the gentle heat refreshes the texture without re-dyeing.
Safety and Supervision Notes
- Supervise babies and young toddlers with rice sensory bins. Small children can chew on dry rice, which is a choking hazard when swallowed whole. For babies under 18 months, use natural-dye rice (safer if mouthed) and ensure close supervision.
- Rice is not safe for children with rice allergies. Consider alternative sensory bin fillers like dried lentils, oats, or sand for allergic children.
- Clean up spilled rice promptly. Dry rice on a hard floor is surprisingly slippery—a rolled-over piece creates a genuine slip hazard.
- The shaving cream method produces rice that’s not appropriate for children who mouth objects. Use only for children three and older who are past the mouthing stage.
FAQ
Can I use instant rice to make rainbow rice? Technically yes, but it’s not recommended. Instant rice has a different starch composition that makes it more prone to clumping during dyeing and more fragile during play—it breaks into small pieces faster than regular long-grain rice. Standard long-grain uncooked rice gives significantly better results.
How do I prevent the colors from bleeding into each other in the bin? You can’t fully prevent it with heavy play—that’s part of the nature of rainbow rice. To slow it down, make sure all rice is completely dry before mixing colors in the bin, and allow children to mix the colors naturally during play rather than trying to maintain perfect color separation.
My rice is clumping during drying—what went wrong? Too much liquid in the bag. Use no more than one tablespoon of vinegar or hand sanitizer per two cups of rice, and stir the rice on the drying sheet every 30–45 minutes during air drying to break up clumps before they set.
Can I add glitter to rainbow rice? Yes—fine craft glitter can be mixed into the dry finished rice for a sparkly effect. Use cosmetic-grade glitter for bins used by very young children to avoid irritation if it contacts eyes.
The Bottom Line
The vinegar and food coloring method (Method 1) produces the best results in terms of color vibrancy and longevity—it’s the right starting point for most people. Use the hand sanitizer method or oven-drying when you need rice quickly. Switch to the natural dye method for babies or dye-free households. Whichever method you use, the most important steps are the same: coat every grain evenly, dry completely before storing, and make more than you think you need. A well-stocked rainbow rice sensory bin is one of the most reliable independent play activities you’ll have in your toolkit—worth the hour it takes to make a good batch.
Enjoyed this project? Get even more DIY ideas that save (and make) you money.
Join our free newsletter for profitable DIY projects, clever cleaning hacks, home ideas, and creative crafts delivered straight to your inbox.
✓ Free forever • No spam • Unsubscribe anytime




