
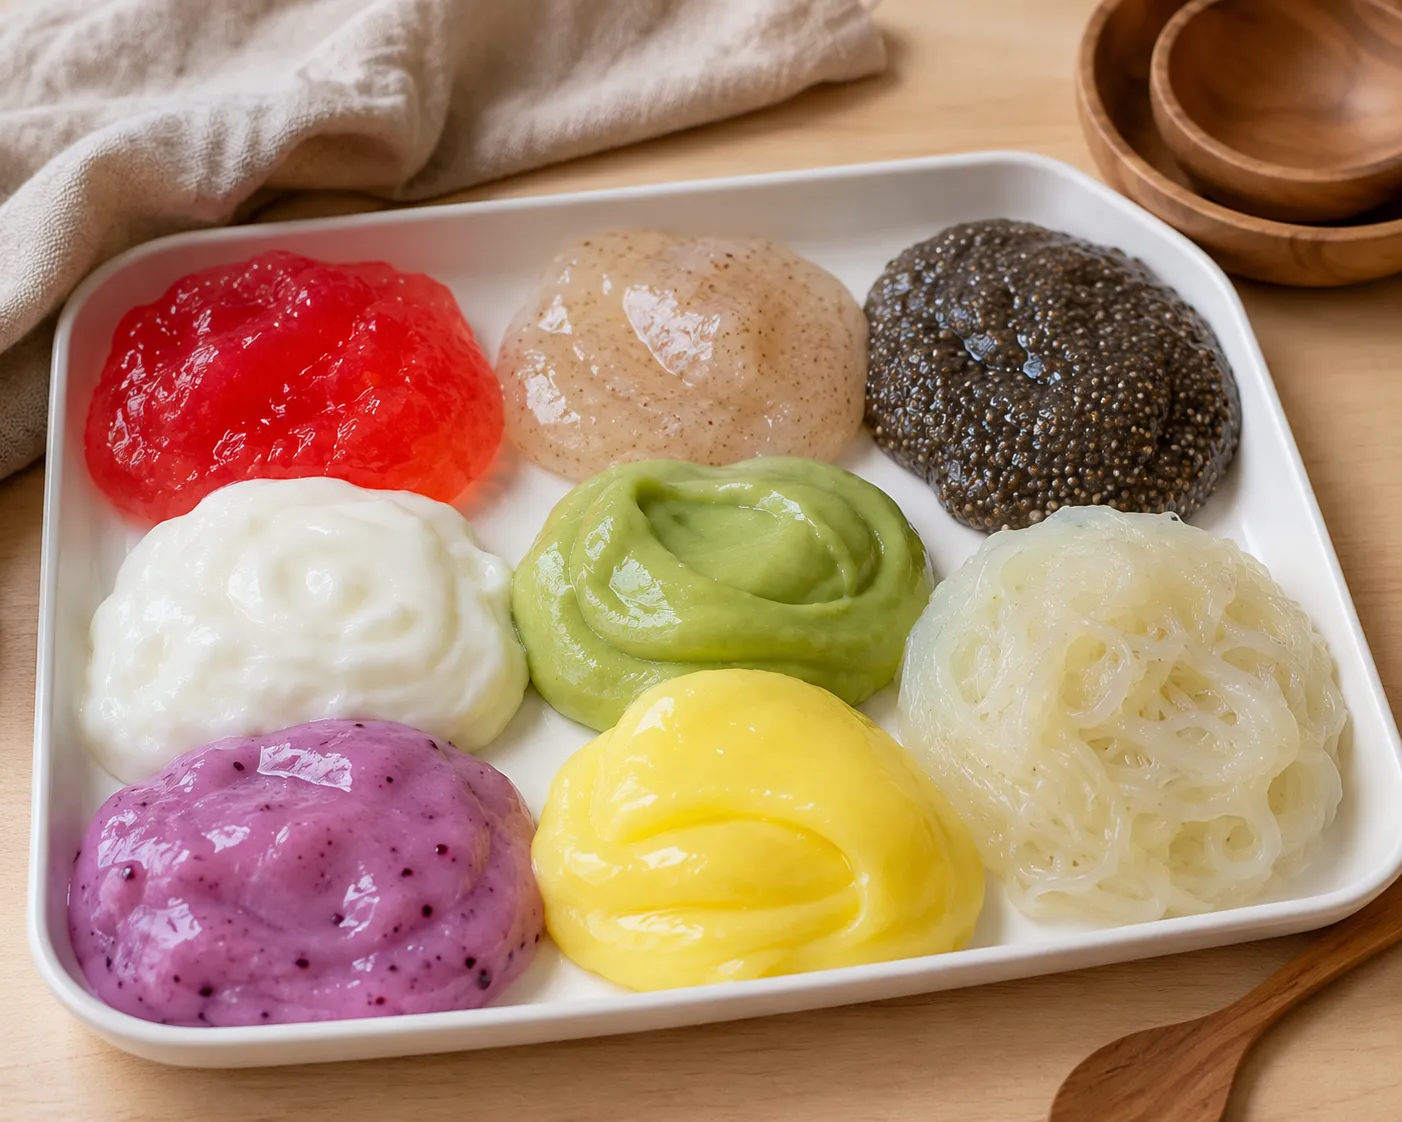
Regular slime is a sensory activity nightmare for parents of babies and toddlers. Most slime recipes contain borax, contact lens solution, or PVA glue—none of which should go anywhere near a child’s mouth, and all of which will, because that’s what babies do. You end up spending the entire activity saying “don’t eat that” to a child who is absolutely going to eat that.
Taste-safe slime solves the problem. Made entirely from food-grade ingredients, these recipes produce stretchy, squishy, satisfying textures that are safe to mouth, taste, and accidentally swallow in small amounts. Some of them taste genuinely good. Some taste neutral. None of them will cause a poison control call.
The trade-off is that food-based slimes don’t behave exactly like traditional borax slime. They’re generally softer, less stretchy, and have a shorter shelf life. But for babies and toddlers who are going to put it in their mouths regardless, a slime that tastes like Jello or pudding is significantly better than one that tastes like glue.
This guide covers seven taste-safe slime recipes using different base ingredients—from Jello and psyllium husk to chia seeds and yogurt—each with different textures, consistencies, and sensory qualities.
What “Taste-Safe” Actually Means
Taste-safe means the ingredients are food-grade and safe for consumption in reasonable quantities. It doesn’t mean the slime is designed to be eaten as a meal—it means that when a toddler inevitably shoves a handful in their mouth, nothing harmful happens.
A few things to keep in mind:
- Taste-safe is not the same as allergy-safe. Several recipes use dairy, eggs, or gluten. Always check ingredients against your child’s known allergies before choosing a recipe.
- Taste-safe slime has a short shelf life. Because these recipes use real food ingredients without preservatives, they spoil faster than traditional slime. Most last one to three days refrigerated. Make small batches and expect to discard rather than store long-term.
- Supervision is still important. Taste-safe means safe if mouthed—not safe if a child eats the entire batch in one sitting. Large quantities of any of these ingredients can cause digestive upset, particularly the psyllium husk and chia seed recipes.
Natural Color Options
All of these recipes can be colored with food coloring or natural alternatives:
- Red/pink: Beet juice, strawberry puree, raspberry juice
- Yellow: Turmeric powder, mango puree
- Orange: Carrot juice, paprika
- Green: Spinach juice, matcha powder
- Purple: Blueberry juice, purple cabbage juice
- Blue: Butterfly pea flower tea (produces vivid natural blue—one of the few genuinely blue natural dyes)
What You’ll Need (Depending on the Recipe)
- Jello or gelatin powder
- Psyllium husk powder
- Chia seeds
- Cornstarch
- Yogurt
- Sweetened condensed milk
- Avocado
- Food coloring or natural colorants
- Water
- A saucepan
- Mixing bowls
- Measuring cups and spoons
Recipe 1: Jello Slime (Most Fun Texture, Best Smell)
Jello slime is the most popular taste-safe slime recipe—and once you make it, you’ll understand why. It has a genuinely satisfying stretchy, jiggly texture that’s closer to traditional slime than almost any other food-based recipe. It smells amazing, comes in vivid colors naturally (because Jello comes in vivid colors), and toddlers go absolutely wild for it. It’s also one of the easiest recipes on this list.
What you’ll need:
- 1 packet (85g) Jello powder in any flavor
- ½ cup boiling water
- ½ cup cold water
- 1 tablespoon cornstarch (optional—increases sliminess)
Instructions:
- Dissolve the Jello powder in boiling water in a heatproof bowl, stirring continuously until completely dissolved. No dry lumps should remain—undissolved powder creates grainy spots in the finished slime.
- Add the cold water and stir to combine. The mixture will be thin and liquid at this point—this is correct.
- Add cornstarch if using and whisk until fully incorporated. The cornstarch adds a slightly slimier, more elastic quality to the finished product.
- Refrigerate for one to two hours until the mixture has set to a soft, jiggly, semi-solid consistency. It should be firm enough to hold together but soft enough to stretch and pull.
- Once set, remove from the refrigerator and work the Jello with your hands to warm it slightly and develop the stretchy, slime-like texture. The warmth of hands transforms set Jello from a firm gel into a stretchy, pulling slime consistency.
- Add food coloring if you want a different color from the Jello’s natural hue—knead it in as you work the slime with your hands.
- Present to the child on a clean tray or silicone mat. Jello slime is best played with at slightly cool room temperature—too warm and it becomes liquid; too cold and it’s too firm to stretch.
Texture tip: Different Jello flavors produce slightly different textures due to variations in sugar and gelatin content. Strawberry and raspberry tend to produce the best slime texture. Lemon and lime tend to be softer and more liquid. Experiment with flavors to find your preferred consistency.
Storage: Keep refrigerated between play sessions. Lasts two to three days before the texture deteriorates.
Best for: Toddlers 12 months and up, first slime experience, children who respond well to scented sensory materials.
Recipe 2: Psyllium Husk Slime (Best Stretchy Texture)
Psyllium husk is a soluble fiber—the active ingredient in Metamucil—that forms an incredibly stretchy, mucilaginous gel when heated with water. The texture is genuinely bizarre in the best possible way: it stretches further than almost any food-based slime, has a satisfying resistant pull, and feels unlike anything else. It’s completely tasteless and odorless, which makes it the best base for adding custom colors and flavors.
What you’ll need:
- 1 cup water
- 2 tablespoons psyllium husk powder (not whole husks—powder gives a smoother texture)
- Food coloring
- A small saucepan
Instructions:
- Whisk the psyllium husk powder into the cold water in a small saucepan until fully combined with no dry clumps. Work quickly—psyllium husk begins absorbing water immediately and can clump if not whisked promptly.
- Add food coloring to the mixture at this stage—the color distributes more evenly before heating than after.
- Heat over medium heat, stirring continuously. The mixture will initially look thin and slightly opaque.
- Watch carefully as it heats. At around 160–170°F the mixture will suddenly transform—thickening rapidly from a thin liquid into a thick, glossy, translucent gel. This transformation happens fast. Remove from heat immediately when it reaches a thick, uniform gel consistency.
- Pour the hot gel into a silicone mold, a bowl, or directly onto a silicone mat and allow to cool completely. Hot psyllium gel is too sticky and loose to play with—it needs to cool and firm before it develops slime properties.
- Once cool (approximately 30 minutes at room temperature, or 15 minutes in the refrigerator), peel the gel from the surface and begin stretching and folding with your hands.
- The more you work it, the better the texture becomes—stretching and folding develops the elastic properties and transforms a stiff gel into a genuinely stretchy, satisfying slime.
Texture note: Psyllium husk slime has a unique texture that some children love and some find slightly unsettling—it’s slippery, cool, and very stretchy in a way that feels almost alive. Introduce it slowly for children who are sensory-sensitive.
Storage: Refrigerate in an airtight container for up to three days. Bring to room temperature and knead briefly before each play session.
Best for: Toddlers 18 months and up, children who love stretchy textures, parents who want a completely tasteless and odorless slime base.
Recipe 3: Cornstarch Slime (Oobleck—Best for Scientific Play)
Cornstarch and water creates oobleck—a non-Newtonian fluid that behaves as a solid when pressure is applied and a liquid when left alone. It’s not stretchy like traditional slime, but the sensory experience is completely unique and endlessly fascinating for children and adults alike. It’s also the simplest recipe on this list: two ingredients, no cooking, immediate play.
What you’ll need:
- 2 cups cornstarch
- 1 cup water
- Food coloring (optional)
Instructions:
- Add food coloring to the water if using and stir to combine. Adding color to the water before mixing with cornstarch distributes it more evenly than adding it after.
- Pour the cornstarch into a large bowl.
- Add the colored water gradually, stirring as you add. The mixture will seem far too thick initially and then suddenly transform as you add the last of the water.
- Mix until fully combined. The correct consistency: when you press a finger in quickly, the surface resists and feels solid. When you rest a finger on the surface gently, it sinks in slowly. When you scoop it up and hold it in your fist, it feels solid—then melts and drips between your fingers when you open your hand.
- Adjust as needed. Too thick and crumbly—add water a tablespoon at a time. Too thin and runny—add cornstarch a tablespoon at a time.
- Play immediately. Oobleck doesn’t need any setting or resting time—it’s ready as soon as it’s mixed.
The science: Oobleck is a shear-thickening fluid. The cornstarch particles lock together under pressure (making it feel solid) but flow freely when pressure is released (making it feel liquid). This property makes it one of the most fascinating sensory materials available and a genuine introduction to non-Newtonian physics for older children.
Storage: Store covered at room temperature for two to three days. The water evaporates and the mixture gradually stiffens—add a few drops of water and remix if it becomes too stiff.
Best for: All ages including babies (completely safe to mouth), science exploration with older children, quick setup with no cooking required.
Recipe 4: Sweetened Condensed Milk Slime (Smoothest Texture)
Condensed milk slime has the smoothest, creamiest texture of any recipe in this guide—it feels luxurious between fingers and has a sweet, milky smell that most young children find appealing. The cornstarch binds the condensed milk into a cohesive, malleable slime that can be stretched, rolled, and squeezed. It’s the closest food-based equivalent to commercial cloud slime in terms of texture.
What you’ll need:
- ½ cup sweetened condensed milk
- 2–3 tablespoons cornstarch
- Food coloring (optional)
Instructions:
- Pour the sweetened condensed milk into a saucepan and heat over low heat, stirring continuously. Do not allow to boil—you’re warming it to make it more receptive to the cornstarch, not cooking it.
- Add cornstarch one tablespoon at a time, stirring thoroughly between each addition. The mixture will thicken with each addition of cornstarch.
- Continue adding cornstarch until the mixture pulls away from the sides of the saucepan and forms a cohesive mass that can be picked up without sticking excessively to the pan.
- Add food coloring during cooking if using and stir to distribute evenly.
- Remove from heat and allow to cool until comfortable to handle—usually five to ten minutes.
- Knead the warm slime on a clean surface until smooth and elastic. The kneading develops the texture and removes any lumps from the cooking process.
- Adjust texture if needed. Too sticky—add a tiny amount of additional cornstarch and knead in. Too stiff—add a drop of water and knead.
- Allow to cool completely before giving to young children.
Storage: Store in an airtight container in the refrigerator for up to two days. Condensed milk slime spoils relatively quickly due to the dairy content—discard if it develops any off smell.
Best for: Toddlers 12 months and up (no added sugar concerns—the condensed milk already contains sugar), children who enjoy smooth, creamy textures, parents who want a slime that smells pleasant.
Recipe 5: Yogurt Slime (Best for Babies, Most Versatile)
Yogurt slime is the most baby-friendly recipe on this list—made from an ingredient babies already eat daily, requiring no cooking, and fully safe in any quantity a baby is likely to consume. The cornstarch transforms plain yogurt from a food into a stretchy, slime-like material that holds together for play without requiring heat or chemical reactions.
What you’ll need:
- ½ cup plain full-fat Greek yogurt (full-fat and Greek specifically—thin or low-fat yogurt doesn’t have the protein content needed to form a cohesive slime)
- 2–3 tablespoons cornstarch
- Food coloring or natural colorants
Instructions:
- Scoop Greek yogurt into a bowl and add food coloring if using. Stir to combine—colored yogurt is easier to work with than trying to add color after the cornstarch.
- Add cornstarch one tablespoon at a time, stirring and folding after each addition.
- The mixture will transform from a smooth yogurt consistency to a thicker, more elastic texture as you add cornstarch. Stop adding when the mixture holds together as a ball and can be stretched slightly without immediately falling apart.
- Knead briefly on a clean surface to develop the texture—the warmth of hands and the physical kneading improves the elastic quality.
- Play immediately or refrigerate for up to 30 minutes before playing for a slightly firmer texture.
Texture note: Yogurt slime is softer and less dramatically stretchy than Jello or psyllium husk slime—it’s more of a soft, malleable putty than a traditional stretchy slime. This softer, squishier texture is actually ideal for babies and young toddlers who don’t have the hand strength for more resistant textures.
Storage: Refrigerate for up to one day. Yogurt slime has the shortest shelf life of any recipe in this guide—the dairy spoils quickly at room temperature. Discard after the play session or after one day maximum.
Best for: Babies 6 months and up, children with the shortest list of introduced foods, first slime experience for very young babies.
Recipe 6: Chia Seed Slime (Best Unique Texture)
Chia seeds absorb water and form a thick, gel-like coating that produces slime with an unusual, speckled texture—each seed remains visible and adds a slightly bumpy, tactile quality that most other slime recipes don’t have. It’s particularly good for sensory play focused on tactile exploration rather than stretching and pulling.
What you’ll need:
- 3 tablespoons chia seeds
- 1 cup water
- Food coloring (optional)
- 1 teaspoon honey (optional—adds slight elasticity and pleasant taste)
Instructions:
- Add food coloring to the water if using and stir to combine.
- Pour chia seeds into a jar or bowl and add the colored water.
- Stir thoroughly to ensure all seeds are in contact with the water rather than clumped together.
- Refrigerate for a minimum of two hours—ideally overnight. Chia seeds need time to fully absorb water and develop their gel coating. Rushing this step produces seeds that are partially dry in the center with an uneven texture.
- Check the consistency after two hours. The mixture should be thick, spoonable, and cohesive—each seed should be coated in a thick gel that holds the mixture together. If the mixture is still too liquid, refrigerate for another hour.
- Add honey if using and stir gently to incorporate without breaking down the chia gel structure.
- Serve in a bowl or on a tray rather than trying to handle it like traditional slime—chia slime is more of a gel that can be scooped, pressed, and spread than a slime that can be stretched and pulled.
Texture tip: For a smoother chia slime, blend one third of the finished chia gel until smooth, then fold it back into the remaining whole-seed gel. This creates a mixture of smooth gel and textured seeds that has better cohesion while retaining the tactile interest of the whole seeds.
Storage: Refrigerate in an airtight container for up to four days—chia seed slime has the longest shelf life of any recipe in this guide because the seeds act as a natural preservative. Stir before each use.
Best for: Toddlers 18 months and up (whole chia seeds are a choking hazard for younger babies—see note below), children who enjoy unusual tactile textures, sensory exploration focused on touch rather than stretching.
Choking note: Whole chia seeds are small but can be a choking hazard for babies under 12 months. For younger babies, blend the finished chia gel completely smooth before use.
Recipe 7: Avocado Slime (Best Natural, Dye-Free Option)
Avocado combined with cornstarch creates a naturally green, completely dye-free slime with a smooth, creamy texture and a mild, neutral flavor. It’s the most naturally colored slime on this list—no dye required—and one of the safest in terms of ingredients. The texture is softer than some recipes but genuinely satisfying for babies and young toddlers.
What you’ll need:
- 1 ripe avocado (very ripe produces the smoothest texture)
- 2–3 tablespoons cornstarch
- 1 tablespoon water (if needed)
- A pinch of salt (optional—mild preservative)
Instructions:
- Scoop the avocado flesh into a bowl and mash thoroughly with a fork, or blend with an immersion blender for the smoothest possible base. Any lumps in the avocado base translate to lumps in the finished slime.
- Add cornstarch one tablespoon at a time, working it into the avocado with a spoon or your hands after each addition.
- The avocado will transform from a smooth puree into a more cohesive, slightly elastic mass as the cornstarch is incorporated.
- Add water a few drops at a time if the mixture becomes too stiff—avocado fat content varies between fruits, so exact liquid amounts vary slightly.
- Add salt if using and knead briefly to incorporate.
- Use immediately. Avocado oxidizes and browns rapidly—even with lemon juice added, this slime changes color and deteriorates in texture within a few hours. Have the play surface ready before you start.
- For a color variation, add a pinch of turmeric for golden-green, a few drops of beet juice for a pink-green, or matcha powder for a deeper green.
Storage: Best used immediately. Can be stored in an airtight container with plastic wrap pressed directly against the surface for up to two hours before it begins to brown and deteriorate noticeably.
Best for: Babies 6 months and up, families avoiding all synthetic dyes, children being introduced to avocado as a food, the shortest possible ingredient list.
Recipe Comparison at a Glance
| Recipe | Best Age | Texture | Shelf Life | Allergens |
|---|---|---|---|---|
| Jello slime | 12 months+ | Stretchy, jiggly | 2–3 days | Gelatin |
| Psyllium husk | 18 months+ | Very stretchy | 3 days | None |
| Cornstarch (oobleck) | All ages | Liquid/solid | 2–3 days | None |
| Condensed milk | 12 months+ | Smooth, creamy | 2 days | Dairy |
| Yogurt slime | 6 months+ | Soft, putty-like | 1 day | Dairy |
| Chia seed | 18 months+ | Speckled, gel | 4 days | None |
| Avocado | 6 months+ | Smooth, soft | Same day | None |
Tips for the Best Taste-Safe Slime Experience
Temperature matters. Most taste-safe slimes have an ideal play temperature. Jello and psyllium husk slimes are best slightly cool—too warm and they become liquid. Condensed milk and yogurt slimes are best at room temperature—too cold and they stiffen. Take slime out of the refrigerator 10–15 minutes before playing.
Work surface matters. Silicone mats are the best surface for slime play—nothing sticks to silicone and cleanup is a matter of seconds. Parchment paper is a good alternative. Avoid fabric-covered surfaces and carpet—food-based slimes stain.
Expect eating. Design the session around the assumption that significant eating will occur, especially with babies. Keep portions small, watch for filling up on slime at the expense of actual meals, and don’t stress about it—that’s what taste-safe means.
Small amounts go far. A quarter cup of finished slime is plenty for a baby play session. Scale up for older toddlers or group activities, but there’s no need to make large batches for a single child’s sensory play.
Extending Play
A few simple additions transform slime play from a five-minute activity into a 30-minute one:
- Small cups and spoons for scooping and pouring
- Cookie cutters pressed into firmer slimes like oobleck
- Craft sticks for spreading and swirling colors
- Mixing two colors together and watching them blend
- Small plastic toys hidden in the slime for discovery play
Cleanup Tips
- Most taste-safe slimes rinse off skin easily with warm water. Cornstarch oobleck in particular dissolves completely in water.
- Food coloring stains clothing. Dress children in something expendable or use a smock—even taste-safe food coloring is enthusiastic about fabric.
- Act before it dries. Cornstarch-based slimes are dramatically easier to clean up while still wet—dried cornstarch requires soaking. Wipe surfaces while the slime is still fresh.
- Natural colorants (beet, turmeric) stain more than synthetic. A dab of cooking oil on turmeric or beet stains before washing helps lift them from skin and surfaces.
FAQ
Is taste-safe slime the same as edible slime? Taste-safe means safe if mouthed—the ingredients are food-grade and non-toxic. Edible implies it’s meant to be eaten as a food. These recipes are taste-safe rather than truly edible—they’re safe if eaten in small amounts but aren’t nutritionally balanced meals. The distinction matters mostly in how you frame it to children: it’s okay to taste, not okay to sit down and eat the whole bowl.
How do I make taste-safe slime more stretchy? The psyllium husk and Jello recipes produce the most stretch of any food-based slime. For other recipes, adding a small amount of unflavored gelatin powder (one teaspoon dissolved in hot water, cooled slightly) to the mixture before the final kneading step increases elasticity across most bases.
Can I make taste-safe slime ahead of time? Most recipes (except avocado) can be made a day ahead and stored refrigerated. Make the slime, let it fully cool and set, then store in an airtight container. Bring to room temperature and knead briefly before playing to restore texture.
My slime is too sticky—how do I fix it? Add more of the binding agent (cornstarch for yogurt and avocado slimes, or allow more refrigerator time for Jello and chia slimes). For cornstarch-based slimes, knead in a small amount of additional cornstarch a quarter teaspoon at a time until the stickiness resolves.
The Bottom Line
The best taste-safe slime recipe depends on your child’s age, available ingredients, and which texture they respond to best. Start with cornstarch oobleck for babies—it requires no cooking, uses two ingredients, and is safe for any age. Move to Jello slime for the most satisfying stretchy texture. Use yogurt slime when you want the absolute safest ingredient list for very young babies. And keep the psyllium husk recipe in your back pocket for the day your toddler is ready for the most dramatically stretchy slime experience food can produce—because the look on their face when they first pull it apart is genuinely worth the effort.
Enjoyed this project? Get even more DIY ideas that save (and make) you money.
Join our free newsletter for profitable DIY projects, clever cleaning hacks, home ideas, and creative crafts delivered straight to your inbox.
✓ Free forever • No spam • Unsubscribe anytime




