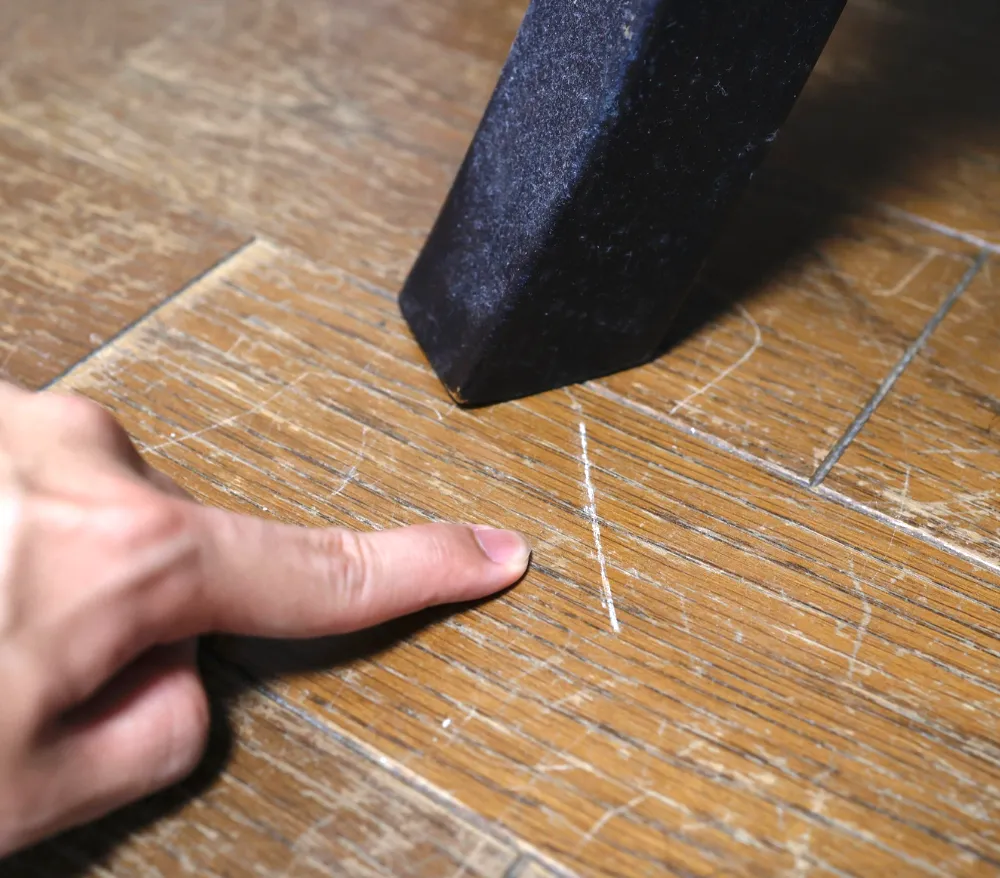
Scratches on wood floors are inevitable. Every piece of furniture, every pet, every piece of grit tracked in from outside is a potential scratch waiting to happen. The question isn’t whether your wood floors will get scratched—it’s what to do about it when they do.
The good news is that most scratches on wood floors are far more fixable than they look. A scratch that seems devastating under direct light often responds to a simple touch-up product and disappears in minutes. Even deeper gouges that have penetrated the wood itself can be repaired without replacing boards or refinishing the entire floor.
The key is matching the repair method to the type and depth of scratch—because what fixes a surface scuff will do nothing for a deep gouge, and what’s appropriate for a sealed floor will damage a waxed one. Getting this right is what separates a repair that disappears from one that draws more attention to the damage than the original scratch did.
Understanding Scratch Depth Before Choosing a Method
Scratches in wood floors fall into three categories, and identifying which category you’re dealing with determines everything about how to fix it:
Surface scratches (finish-only): The scratch has only affected the protective finish layer—polyurethane, wax, or oil—and hasn’t touched the wood itself. These appear as light, often whitish marks that catch the light. Run a fingernail across the scratch: if it doesn’t catch, it’s finish-only. These are the easiest to fix and respond to the gentlest methods.
Mid-depth scratches: The scratch has cut through the finish and into the surface layer of the wood, but hasn’t penetrated deeply into the grain. The wood fiber is damaged but not gouged. These appear as visible lines with color change—the exposed wood is a different tone from the finished surrounding surface.
Deep scratches and gouges: The scratch has penetrated deeply into the wood, sometimes removing wood fiber entirely and leaving a visible depression or groove. These require filling rather than just cosmetic treatment.
Identifying which type you have before reaching for any product saves time and prevents making the damage worse.
What You’ll Need (Depending on the Method)
- Hardwood floor cleaner or dish soap
- Wood touch-up markers or wax sticks in matching colors
- Clear nail polish
- Paste wax or floor wax
- Fine steel wool (0000 grade)
- Wood filler or wood putty
- Sandpaper (120, 150, and 220 grit)
- Polyurethane finish (oil-based or water-based to match existing)
- Stain marker or wood stain
- A soft cloth or microfiber cloth
- Painter’s tape
- Rubber gloves
Method 1: Clean the Area First (Non-Negotiable First Step)
Before attempting any scratch repair, the affected area needs to be thoroughly clean. Attempting to repair a scratch over dirt, wax residue, or cleaning product buildup produces a repair that won’t adhere properly, won’t color-match accurately, and will look worse than the original scratch once the repair material dries or sets.
- Vacuum or sweep the area thoroughly to remove all loose debris, grit, and dust around the scratched section. Grit dragged across the area during cleaning will extend the existing scratch or add new ones.
- Clean the scratched area with a hardwood-appropriate cleaner applied to a soft cloth—not directly to the floor. Wipe in the direction of the grain and remove any product residue, wax buildup, or surface grime from the scratch and the surrounding wood.
- For waxed floors, use a cloth dampened with mineral spirits to clean the area. Mineral spirits removes wax without damaging the underlying wood, leaving a clean surface for repair products to adhere to.
- Allow the area to dry completely before proceeding—at least 15–20 minutes. Attempting repair over a damp surface causes adhesion failure and color inconsistency.
- Inspect the scratch in raking light by angling a lamp low across the floor surface. Raking light reveals the true depth and extent of scratches that aren’t visible under normal overhead lighting—and frequently reveals that scratches are shallower or narrower than they appeared, meaning a simpler repair method will work.
- Determine the scratch depth using the fingernail test: run a fingernail across the scratch perpendicular to its direction. No catch means finish-only. A slight catch means mid-depth. A definite catch with visible wood fiber or a depression means deep.
Method 2: Paste Wax and Fine Steel Wool (Best for Surface Finish Scratches)
For light scratches that have only affected the finish layer—the most common type of everyday scratch from furniture, shoes, and pet nails—paste wax combined with 0000-grade steel wool is the most effective and least invasive repair. The steel wool buffs out the scratch in the finish; the wax fills the micro-abrasions and restores the sheen. This method works on both waxed and sealed floors.
- Apply a small amount of paste wax (Johnson Paste Wax, Minwax Paste Finishing Wax, or a dedicated hardwood floor wax) to a clean soft cloth. Use a pea-sized amount for a small scratch—more than this leaves excess that requires additional buffing to remove.
- Rub the wax gently into the scratch and the surrounding area (roughly 5–10cm in each direction from the scratch) using circular motions. The wax fills the micro-damage in the finish layer.
- Allow the wax to haze—about five minutes at room temperature—before buffing. Wax that’s buffed immediately before hazing doesn’t develop full adhesion.
- Buff the area with a clean, dry section of cloth in circular motions until the wax is fully absorbed and the surface has a uniform sheen.
- Assess the scratch in raking light. Surface scratches often disappear entirely at this stage. If the scratch is still faintly visible, move to the steel wool step.
- For scratches that remain, dampen a small piece of 0000-grade steel wool with a drop of mineral spirits or paste wax and rub very gently along the direction of the grain over the scratch—never across it. The 0000 grade is so fine that it polishes the finish rather than abrading it. Use the lightest possible pressure and work in short strokes.
- Wipe away the fine steel wool dust with a tack cloth or barely damp microfiber cloth.
- Apply a final thin coat of paste wax over the repaired area and buff to a uniform finish.
Best for: Surface-level finish scratches, light scuff marks, pet nail scratches that haven’t penetrated the wood.
Method 3: Touch-Up Markers and Wax Sticks (Best for Mid-Depth Scratches with Color Change)
When a scratch has cut through the finish and into the wood surface, revealing the lighter raw wood beneath, the repair needs to address the color difference as well as the physical damage. Touch-up markers and wax sticks—available in dozens of wood tones at hardware stores and online—are the most accessible and immediate fix for mid-depth scratches.
- Select the right color. Take a photo of the scratched area in natural light and compare it to the product range in store, or order several tones and test on a hidden area of the floor. Color-matching is the most critical step—a slightly wrong color draws more attention than the original scratch. When in doubt, choose slightly darker rather than lighter—darker tones blend better in the grain.
- Test the marker or wax stick on a hidden area first—under a piece of furniture, in a closet, or at the edge of the room near the baseboard. Allow the test to dry fully and assess in raking light before applying to the visible scratch.
- Apply the touch-up marker directly to the scratch, following the scratch direction rather than coloring across it. A single pass is usually sufficient—multiple passes darken the repair progressively, which is useful if one pass isn’t dark enough but hard to reverse if you go too dark.
- For wax sticks, rub the stick along the length of the scratch until the groove is filled. Wax sticks both color and fill simultaneously, making them more effective than markers for scratches with a slightly depressed channel.
- Wipe excess immediately with a soft cloth—touch-up color on the surrounding finished surface will dry and look obvious if left. Wipe along the grain direction rather than across it.
- Allow to dry completely—markers usually dry in five to ten minutes; wax sticks are ready immediately.
- Seal the repair on sealed floors by applying a small amount of clear paste wax or floor finish over the repaired area and buffing gently. This protects the color from foot traffic and blends the sheen of the repair with the surrounding floor.
Best for: Mid-depth scratches with visible color change, single scratches in prominent areas, quick repairs before guests arrive.
Method 4: Clear Nail Polish (Best Quick Fix for Fine Scratches on Sealed Floors)
Clear nail polish is an underrated quick fix for fine, shallow scratches on polyurethane-sealed floors—particularly for scratches that have broken the surface of the finish but are too fine for a wax stick to address effectively. It’s not a permanent solution but it fills and seals fine scratches quickly and is virtually invisible on the right type of scratch.
- Clean and dry the scratch thoroughly as in Method 1.
- Apply a single, very thin coat of clear nail polish directly into the scratch using the brush from the bottle. Apply only enough to fill the scratch—excess nail polish on the surrounding finish dries with a slightly different sheen that’s visible on close inspection.
- Work on one scratch at a time rather than trying to cover multiple scratches in one application pass.
- Allow to dry completely—at least 15–20 minutes—before touching.
- If the repair has a slightly raised or uneven surface once dry, buff very gently with 0000 steel wool to level it with the surrounding finish, then apply a small amount of paste wax and buff.
- Assess in raking light once fully dry. Fine surface scratches treated this way often become completely invisible.
Important limitation: Clear nail polish is acrylic-based and doesn’t chemically bond with polyurethane or other professional floor finishes. It’s a cosmetic fix rather than a structural repair—it will eventually wear away in high-traffic areas. For permanent repair of scratches in high-traffic zones, use Method 5 or 6.
Best for: Fine surface scratches on sealed floors, quick cosmetic fixes, scratches in low-traffic areas.
Method 5: Wood Filler for Deep Scratches and Gouges (Best for Significant Damage)
When a scratch or gouge is deep enough to leave a visible depression—a gap in the wood surface rather than just a color change—it needs to be filled rather than just colored. Wood filler gives a solid, sandable repair that matches the level of the surrounding floor surface before color and finish are applied.
- Choose the right wood filler. Stainable wood filler (Minwax Wood Filler, Famowood, or similar) accepts stain after application, allowing a better color match than pre-colored filler. For deep repairs on previously stained floors, stainable filler is significantly better than pre-tinted products.
- Apply painter’s tape on either side of the gouge, leaving only the damaged area exposed. This keeps the repair precise and prevents filler from spreading onto the undamaged floor surface.
- Press the wood filler firmly into the gouge using a putty knife or your finger, working it into the full depth of the damage. Overfill slightly—wood filler shrinks as it dries, and a repair that’s level when wet will be slightly below floor level when dry.
- Smooth the surface of the filler level with the surrounding floor using the putty knife held at a low angle, pulling excess away from the center of the repair.
- Allow to dry completely according to the product instructions—usually two to four hours for full hardness, though surface-dry happens faster. Don’t rush this step—sanding incompletely dried filler crumbles rather than sands cleanly.
- Sand the repair flush with the floor surface using 120-grit sandpaper to remove the overfill, then 150-grit to smooth, then 220-grit to prepare for finishing. Sand in the direction of the grain only. The repair should be perfectly level with the surrounding surface—run a finger across it to check.
- Wipe away all sanding dust with a tack cloth before staining or finishing.
- Apply wood stain to the repair if needed to match the surrounding floor color. Test the stain color on a hidden area first—wood filler absorbs stain differently from real wood and may need a slightly different tone to match.
- Apply finish (polyurethane, wax, or oil as appropriate to your floor type) over the stained repair and the surrounding area to blend the sheen.
Best for: Deep gouges, dents from heavy impacts, scratches with visible wood fiber removal, damage that has a definite depression.
Method 6: Sanding and Spot Refinishing (Best for Multiple or Widespread Scratches)
When scratches are numerous, widespread, or have been repaired previously with products that no longer match the floor’s current finish, spot sanding and refinishing produces a result that blends more seamlessly than individual scratch repairs. This method removes the damaged finish layer from the affected area and applies new finish that integrates with the surrounding floor.
- Define the area to sand. For spot refinishing to blend effectively, the sanded area should be large enough to extend beyond all visible scratches and natural wood grain breaks—irregular shapes blend better than precise rectangles. Use painter’s tape to mark the area.
- Sand the defined area by hand using 120-grit sandpaper, working with the grain in long, even strokes. The goal is to remove the existing finish layer entirely down to bare wood across the entire defined area—not just over the scratches.
- Progress through grits: 120 to remove the finish, 150 to smooth the sanded surface, 220 to prepare for finishing. Each grit removes the scratches left by the previous one—don’t skip grits or the sanding scratches from the coarser paper will show through the finish.
- Feather the edges of the sanded area by sanding with progressively lighter pressure as you approach the boundary. Hard edges between sanded and unsanded areas are visible in the finished repair—feathering blends the transition.
- Vacuum and wipe all sanding dust with a tack cloth—finish applied over dust creates a gritty, uneven surface.
- Apply stain if the floor is stained, using the same stain or a close match. Test on the hidden area first—different sanding depths absorb stain differently, and the repaired area may need a slightly different concentration to match.
- Apply finish in thin coats, feathering each coat into the surrounding floor surface at the edges of the repair area. Two to three thin coats produce better adhesion and a more even sheen than one thick coat.
- Allow each coat to dry fully before applying the next—check the product instructions for dry time, which varies significantly between oil-based and water-based finishes.
- Lightly sand between coats with 220-grit sandpaper to promote adhesion and remove any dust particles that settled in the wet finish.
- Buff the final coat with a soft cloth once fully cured to blend the sheen of the repaired area with the surrounding floor.
Best for: Multiple scratches in a concentrated area, widespread surface damage, previously repaired areas with mismatched finishes.
Method 7: Full Floor Sanding and Refinishing (For Heavily Scratched Floors)
When scratches are widespread across the entire floor, when multiple spot repairs have created a patchwork of mismatched finishes, or when the floor has been refinished several times and previous repairs are no longer blending, full floor sanding and refinishing is the definitive solution. It removes all existing finish, scratches, and surface damage down to bare wood and applies a fresh, uniform finish across the entire floor.
This is the most intensive and disruptive method—it requires clearing and vacating the room for several days, renting or hiring floor sanding equipment, and a significant time investment—but the result is a floor that looks completely new.
When full refinishing is the right choice:
- Scratches cover more than 30–40% of the floor surface
- The floor has been refinished multiple times and spot repairs no longer blend
- The floor has deep structural scratches that spot sanding can’t address
- The existing finish is peeling, flaking, or delaminating in addition to being scratched
The basic process:
- Clear the room entirely and seal doorways with plastic sheeting to contain sanding dust—it’s extremely fine and travels throughout the house.
- Sand the entire floor with a drum sander or orbital floor sander, starting with 36 or 60-grit sandpaper (depending on the severity of existing damage) and progressing through 80, 100, and 120 grit. Use an edge sander for areas the floor sander can’t reach along walls and in corners.
- Sand with the grain at all times. Cross-grain sanding leaves visible scratches that show through the finish regardless of how much finishing you apply afterward.
- Vacuum thoroughly between each grit change and before applying any finish—sanding dust in the finish causes a rough, gritty surface that requires additional sanding to remove.
- Apply stain if desired at 120-grit stage, before the final 120-grit pass (this opens the grain slightly and helps stain penetrate evenly).
- Apply finish in three to four thin coats, sanding lightly with 220-grit between each coat. Allow full drying time between coats according to the finish manufacturer’s instructions.
- Allow the final coat to cure fully before replacing furniture and rugs—water-based polyurethane typically needs 24–48 hours; oil-based needs 72 hours minimum, though full hardness takes up to 30 days.
Professional vs. DIY: Full floor sanding is achievable as a DIY project with rented equipment, but drum sanders are aggressive—an inexperienced pass at the wrong angle leaves deep drum marks that require additional sanding to correct. If the floor is valuable, large, or has an unusual wood species, professional refinishing is worth the investment.
Best for: Heavily scratched floors where individual repair methods have been exhausted, complete floor restoration, preparing a floor for a new finish color or sheen level.
Method Comparison at a Glance
| Method | Scratch Type | Skill Level | Time Required |
|---|---|---|---|
| Clean first | All | Easy | 15–30 minutes |
| Paste wax + steel wool | Surface finish scratches | Easy | 20–30 minutes |
| Touch-up markers/wax sticks | Mid-depth color change | Easy | 10–20 minutes |
| Clear nail polish | Fine surface scratches | Easy | 20 minutes |
| Wood filler | Deep gouges and depressions | Moderate | 4–6 hours |
| Spot sanding and refinishing | Multiple scratches, small area | Moderate–Advanced | 1–2 days |
| Full floor sanding | Widespread severe damage | Advanced | 3–5 days |
Natural Remedies That Actually Work (And Ones That Don’t)
The internet is full of natural scratch remedies for wood floors—some genuinely work, some don’t, and a few cause additional damage.
Walnut rubbing (actually works for surface scratches): The natural oils in a walnut kernel are close enough in composition to wood conditioning oils that rubbing a shelled walnut along a light scratch can soften and partially fill the surface damage. Break a walnut in half, rub the flesh along the scratch direction, then buff with a soft cloth. It works on finish-only scratches and takes about two minutes—worth trying before reaching for any product.
Coconut oil (works temporarily, not a lasting fix): Rubbing coconut oil into surface scratches temporarily darkens and disguises them—but as the oil wears off with foot traffic, the scratch reappears. It’s useful as a very temporary fix but not a repair.
Tea bags (doesn’t work): Rubbing a damp tea bag on wood scratches is frequently recommended online. The tannins in tea do temporarily darken raw wood, but the effect washes away immediately and provides no protection. Skip it.
Vinegar and oil (causes long-term damage): The DIY mixture of equal parts vinegar and olive oil for wood floor scratches is persistently recommended and persistently damaging. Vinegar degrades polyurethane finish over time; olive oil goes rancid in the wood grain. Neither addresses the scratch structurally. Avoid.
Shoe polish (works in an emergency): Matching-color shoe polish rubbed into a scratch and buffed can disguise mid-depth scratches effectively as a temporary measure. It’s not a lasting repair but works well when you need a quick fix before guests arrive.
How to Prevent Wood Floor Scratches
Prevention is dramatically easier than repair—and the right habits reduce scratch accumulation to a fraction of what most floors experience:
- Felt pads on every furniture leg, every time. A chair moved across an unpadded leg creates a deep scratch in seconds. Check and replace felt pads every six to twelve months—worn-down pads are worse than no pads because the worn edge concentrates pressure.
- Entry mats on both sides of every door. An exterior mat removes large debris; an interior mat captures the fine grit that causes most scratching. Grit is the primary cause of widespread fine scratching across the entire floor surface.
- Trim pet nails regularly. Long pet nails are extremely effective at scratching hardwood finish. Regular trimming—every three to four weeks for dogs—dramatically reduces pet-related scratch accumulation.
- Never drag furniture. Lift furniture to move it rather than sliding it, even short distances, even on felt pads. Felt pads lift off when dragged across grit and the furniture leg contacts the floor directly.
- Use area rugs in high-traffic zones. Hallways, in front of sofas, under dining tables—these are the highest-scratch areas. Area rugs take the wear instead of the floor.
- Avoid walking on hardwood in hard-soled shoes and particularly in high heels. A stiletto heel concentrates more pressure per square centimeter than an elephant’s foot and penetrates floor finish immediately.
FAQ
Can I repair scratches in engineered hardwood the same way as solid hardwood? For surface and mid-depth scratches, yes—touch-up markers, wax sticks, and paste wax work the same way. For deep scratches requiring sanding, engineered hardwood has a limited veneer thickness (typically 2–6mm) that can only be sanded a finite number of times—usually one to three full sandings before the veneer is too thin to sand again. Check your floor’s veneer thickness before attempting any sanding repair.
Why does my scratch look worse after I tried to fix it? Usually because the repair product was the wrong color, was applied over uncleaned residue that prevented adhesion, or dried with a different sheen than the surrounding floor. Clean the area thoroughly with mineral spirits to remove the failed repair, allow to fully dry, and start again with the correct product and color.
My floor has hundreds of small scratches all over it. Can they all be fixed? Widespread fine scratching across the whole floor surface (often called “micro-scratching”) is a finish-level issue that individual repairs can’t address economically. A floor restorer product—Bona Hardwood Floor Refresher, Minwax Hardwood Floor Reviver—applied to the entire floor fills micro-scratches with a new thin finish layer and restores a uniform appearance without sanding. This is the right approach before committing to full floor sanding.
How do I fix scratches on dark-stained wood floors? Dark stained floors show scratches more prominently than natural wood because the lighter raw wood beneath the finish contrasts sharply with the dark stain. Touch-up markers work well but color-matching is more critical—test multiple shades on a hidden area before applying to a visible scratch. For widespread scratching on dark stained floors, full refinishing with restaining is often the most practical solution.
The Bottom Line
Most wood floor scratches are fixable with simple products and a bit of patience—the key is correctly identifying the scratch depth before choosing a method. Surface scratches respond to paste wax and fine steel wool. Mid-depth scratches with color change need touch-up markers or wax sticks. Deep gouges need wood filler. And widespread scratching across the whole floor calls for either a floor restorer product or full sanding and refinishing. Clean the area thoroughly before any repair, color-match carefully, and always work in the direction of the grain—those three habits produce repairs that blend rather than announce themselves.
Enjoyed this project? Get even more DIY ideas that save (and make) you money.
Join our free newsletter for profitable DIY projects, clever cleaning hacks, home ideas, and creative crafts delivered straight to your inbox.
✓ Free forever • No spam • Unsubscribe anytime