
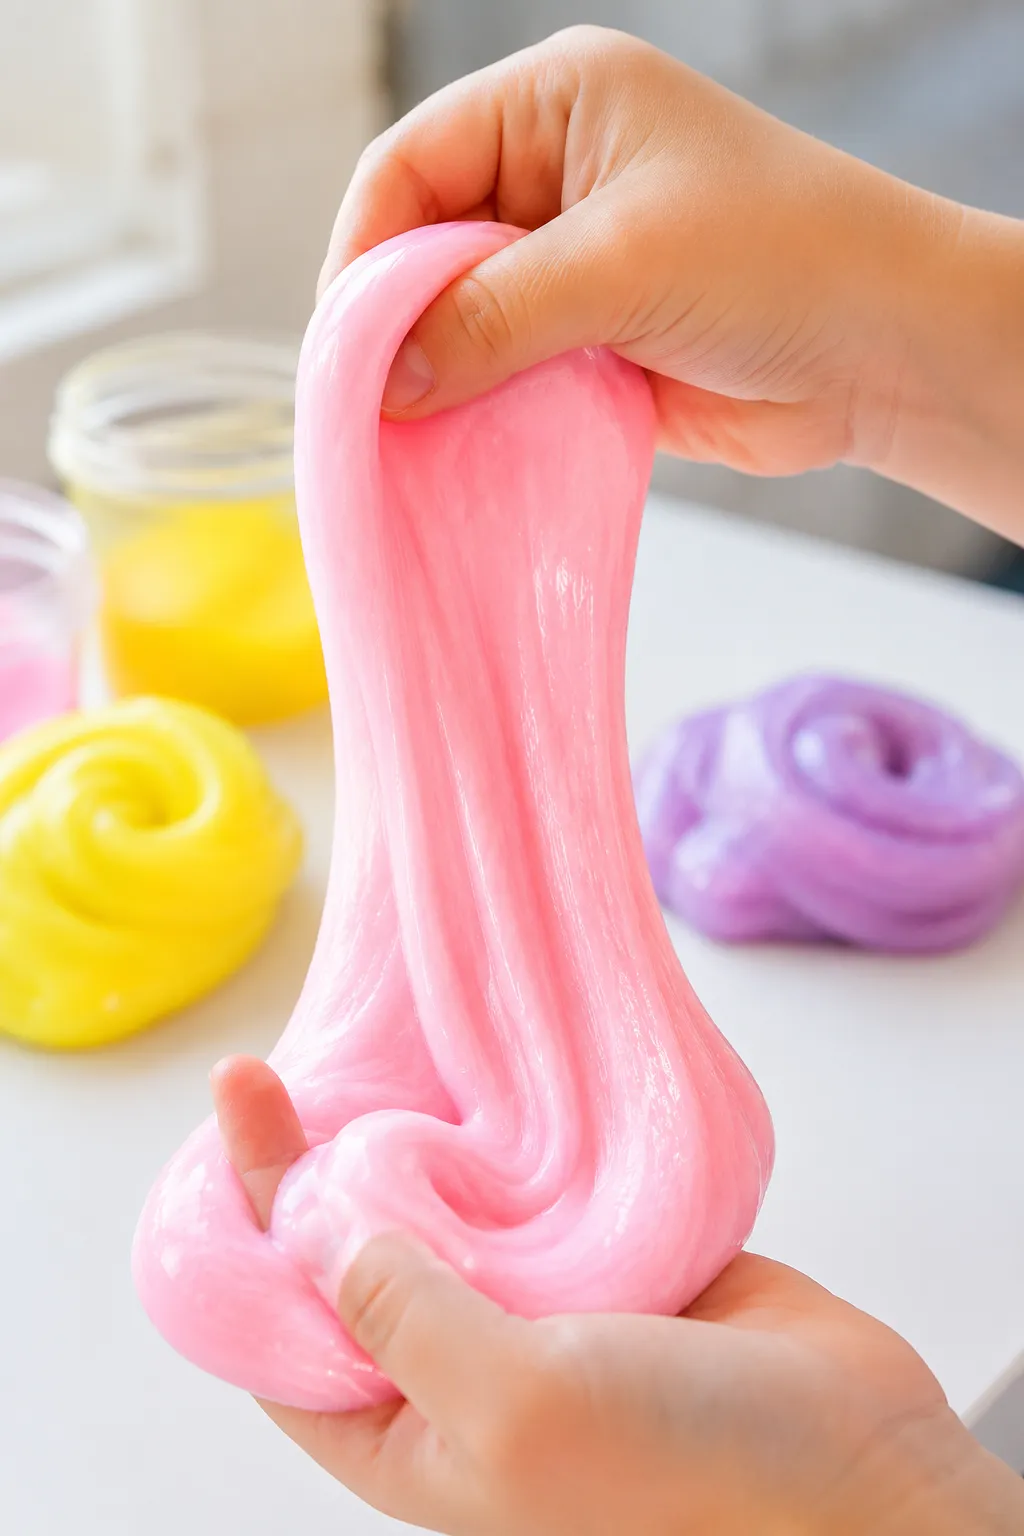
Making slime with contact lens solution is one of the easiest and most reliable ways to create soft, stretchy slime at home. Unlike traditional slime recipes that use borax powder, this method relies on contact lens solution and baking soda to activate the glue, creating a fun slime that’s safe, simple, and beginner-friendly.
Whether you’re making slime as a rainy-day activity, a classroom science experiment, or just for sensory play, this recipe delivers smooth, stretchy slime in just a few minutes using ingredients you probably already have.
In this guide, you’ll learn the exact recipe, the best contact lens solution to use, expert tips for perfect slime every time, fun variations to try, and simple solutions for common slime problems.
What Is Slime Made with Contact Lens Solution?
Slime made with contact lens solution is a homemade polymer created by mixing white school glue with baking soda and a contact lens solution that contains boric acid or sodium borate.
The contact lens solution acts as the activator, transforming the liquid glue into a stretchy, moldable slime through a simple chemical reaction. Unlike recipes that use borax powder, this method is easier for beginners because the activator is already diluted in the contact solution, making it much harder to over-activate your slime.
The result is a slime that’s:
- Soft and stretchy
- Smooth and glossy
- Easy to knead
- Less messy than many other recipes
- Great for kids and beginners
You can also customize it by adding food coloring, glitter, foam beads, charms, or even shaving cream to create completely different slime textures.
For this recipe to work, the solution must contain boric acid and/or sodium borate in the ingredients list. These ingredients react with the baking soda and glue to create the stretchy polymer that gives slime its unique texture.
What You’ll Need
- 1 cup white PVA school glue (Elmer’s glue works especially well)
- 1 teaspoon baking soda
- 1–2 tablespoons contact lens solution (must contain boric acid or sodium borate)
- Food coloring (optional)
- Fine glitter (optional)
- Foam beads (optional)
- Mixing bowl
- Spoon or spatula
- Airtight container for storage
How to Make Slime with Contact Lens Solution
Step 1: Pour the Glue into a Bowl
Pour one cup of white school glue into a large mixing bowl.
Using a larger bowl makes mixing much easier and prevents spills once the slime starts forming.
Step 2: Add Food Coloring
If you’d like colored slime, add a few drops of food coloring now.
Mix thoroughly until the color is completely blended into the glue.
You can create almost any color combination, including:
- Pink
- Purple
- Blue
- Green
- Rainbow
- Neon colors
- Pastel shades
Step 3: Stir in the Baking Soda
Add one teaspoon of baking soda.
Mix well until no powder remains.
The baking soda helps prepare the glue for activation and contributes to the slime’s smooth texture.
Step 4: Add the Contact Lens Solution Slowly
Begin by adding one teaspoon of contact lens solution.
Stir continuously.
The glue will gradually become thicker.
Continue adding small amounts of solution, stirring after each addition.
Avoid pouring in too much at once.
Most recipes require between one and two tablespoons depending on:
- The brand of glue
- The contact lens solution
- Humidity
- Room temperature
When the slime starts pulling away from the sides of the bowl, stop adding activator.
Step 5: Knead the Slime
Remove the slime from the bowl and knead it with your hands.
At first, it may feel sticky.
Keep kneading for two to three minutes.
As you work the slime, it becomes smoother, stretchier, and much less sticky.
If necessary, add one or two extra drops of contact lens solution while kneading.
Avoid adding large amounts because over-activated slime becomes stiff and rubbery.
Step 6: Customize Your Slime
Now comes the fun part.
Mix in your favorite additions, such as:
- Glitter
- Foam beads
- Sequins
- Small charms
- Confetti
- Color-changing pigment
- Scented oils (just a few drops)
Fold everything into the slime until evenly distributed.
What Your Slime Should Look and Feel Like
A successful batch should:
- Stretch several inches without breaking
- Feel smooth instead of grainy
- Be soft but not runny
- Pull cleanly away from your hands
- Hold together as one piece
- Bounce back slightly when pressed
- Have a glossy finish
If your slime still sticks to everything after several minutes of kneading, it probably needs one or two more drops of activator.
If it tears instead of stretching, you’ve likely added too much activator.
Tips for Getting the Best Results
Add the Activator Slowly
The biggest mistake beginners make is pouring in too much contact lens solution all at once.
Adding it gradually gives you complete control over the texture.
Knead Before Adding More Activator
Many people think their slime isn’t working when it’s actually just under-kneaded.
Spend at least two or three minutes kneading before deciding it needs more activator.
Use White Glue for Beginners
White glue is more forgiving than clear glue.
It creates softer slime that’s easier to make and less likely to become stiff.
Mix Ingredients Thoroughly
Every ingredient should be fully incorporated before adding the next.
Proper mixing helps ensure a smooth, even texture.
Don’t Over-Activate
It’s much easier to add another drop of activator than to fix slime that’s become rubbery.
Stop adding contact lens solution as soon as the slime comes together.
Let the Slime Rest
Place your finished slime in an airtight container for about 15 to 30 minutes before playing with it.
This allows the ingredients to fully bond, often making the slime even smoother and stretchier.
Quick Fixes for Common Problems
| Problem | Potential Solution | Alternative Approach |
| Slime is too sticky | Add one or two drops of contact lens solution while kneading. | Continue kneading for another two minutes before adding more activator. |
| Slime is too stiff | Knead in a small amount of lotion or warm water. | Mix in a teaspoon of fresh glue to soften it. |
| Slime tears instead of stretching | The slime is over-activated. Add a little glue and knead thoroughly. | Let it rest for 15 minutes before trying again. |
| Slime won’t form | Check that your contact lens solution contains boric acid or sodium borate. | Add another pinch of baking soda if needed. |
| Slime is too runny | Add a few more drops of contact lens solution gradually. | Continue mixing before adding more activator. |
| Slime feels rubbery | Too much activator was added. | Knead in lotion or fresh glue to restore softness. |
| Glitter or beads won’t stay mixed in | Knead longer to distribute them evenly. | Add decorations gradually instead of all at once. |
| Slime dried out | Add a few drops of warm water or lotion and knead well. | Store it in an airtight container immediately after use. |
How to Store Slime
Proper storage helps homemade slime stay soft and stretchy for weeks.
- Store it in an airtight plastic container or zip-top bag.
- Keep it at room temperature.
- Avoid leaving it in direct sunlight or near heat sources.
- Wash hands before playing with slime to keep it clean.
- Always seal the container immediately after use.
When stored properly, homemade slime usually lasts two to four weeks.
If it starts to feel a little firm after storage, knead it for a minute or add a tiny drop of lotion to restore its softness.
FAQs
Can I make slime without baking soda?
No. For this recipe, baking soda is needed to help the contact lens solution activate the glue properly. Without it, the slime may remain sticky or fail to form.
Can I use saline solution instead of contact lens solution?
Only if the saline solution contains boric acid or sodium borate. Plain saline solution without these ingredients will not activate the glue.
Why is my slime still sticky?
Most sticky slime simply needs a little more kneading. If it’s still sticky after several minutes, add one or two drops of contact lens solution and continue kneading.
Can I use clear glue instead of white glue?
Yes. Clear glue works well and produces transparent slime. It may require slightly different amounts of activator depending on the brand.
Is homemade slime safe for children?
The ingredients used in this recipe are generally considered safe for supervised play, but slime should never be eaten. Young children should always make and play with slime under adult supervision, and everyone should wash their hands after handling it.
Why does my slime shrink over time?
Slime naturally loses a little moisture after repeated use. Keeping it sealed in an airtight container helps slow this process. If it becomes firm, knead in a small amount of lotion or a few drops of water.
Can I add food coloring after the slime is finished?
Yes, but it’s much easier to mix the food coloring into the glue before adding the activator. This produces a more even color without streaks.
How long does homemade slime last?
When stored properly in an airtight container, most slime stays soft and stretchy for two to four weeks. If it develops an unpleasant smell, mold, or excessive discoloration, it’s time to discard it and make a fresh batch.
Closing Thoughts
Making slime with contact lens solution is one of the simplest and most dependable ways to create homemade slime. With just white glue, baking soda, and the right contact lens solution, you can make soft, stretchy slime that’s perfect for sensory play, science activities, or rainy-day fun.
The secret to success is adding the activator slowly, kneading the slime thoroughly, and stopping as soon as it reaches the perfect consistency. Once you’ve mastered the basic recipe, you can experiment with glitter, fluffy slime, clear slime, butter slime, or crunchy slime to create endless variations.
With the right ingredients and a little patience, you’ll have a smooth, stretchy slime that’s fun to make and even more fun to play with.
Enjoyed this project? Get even more DIY ideas that save (and make) you money.
Join our free newsletter for profitable DIY projects, clever cleaning hacks, home ideas, and creative crafts delivered straight to your inbox.
✓ Free forever • No spam • Unsubscribe anytime




