
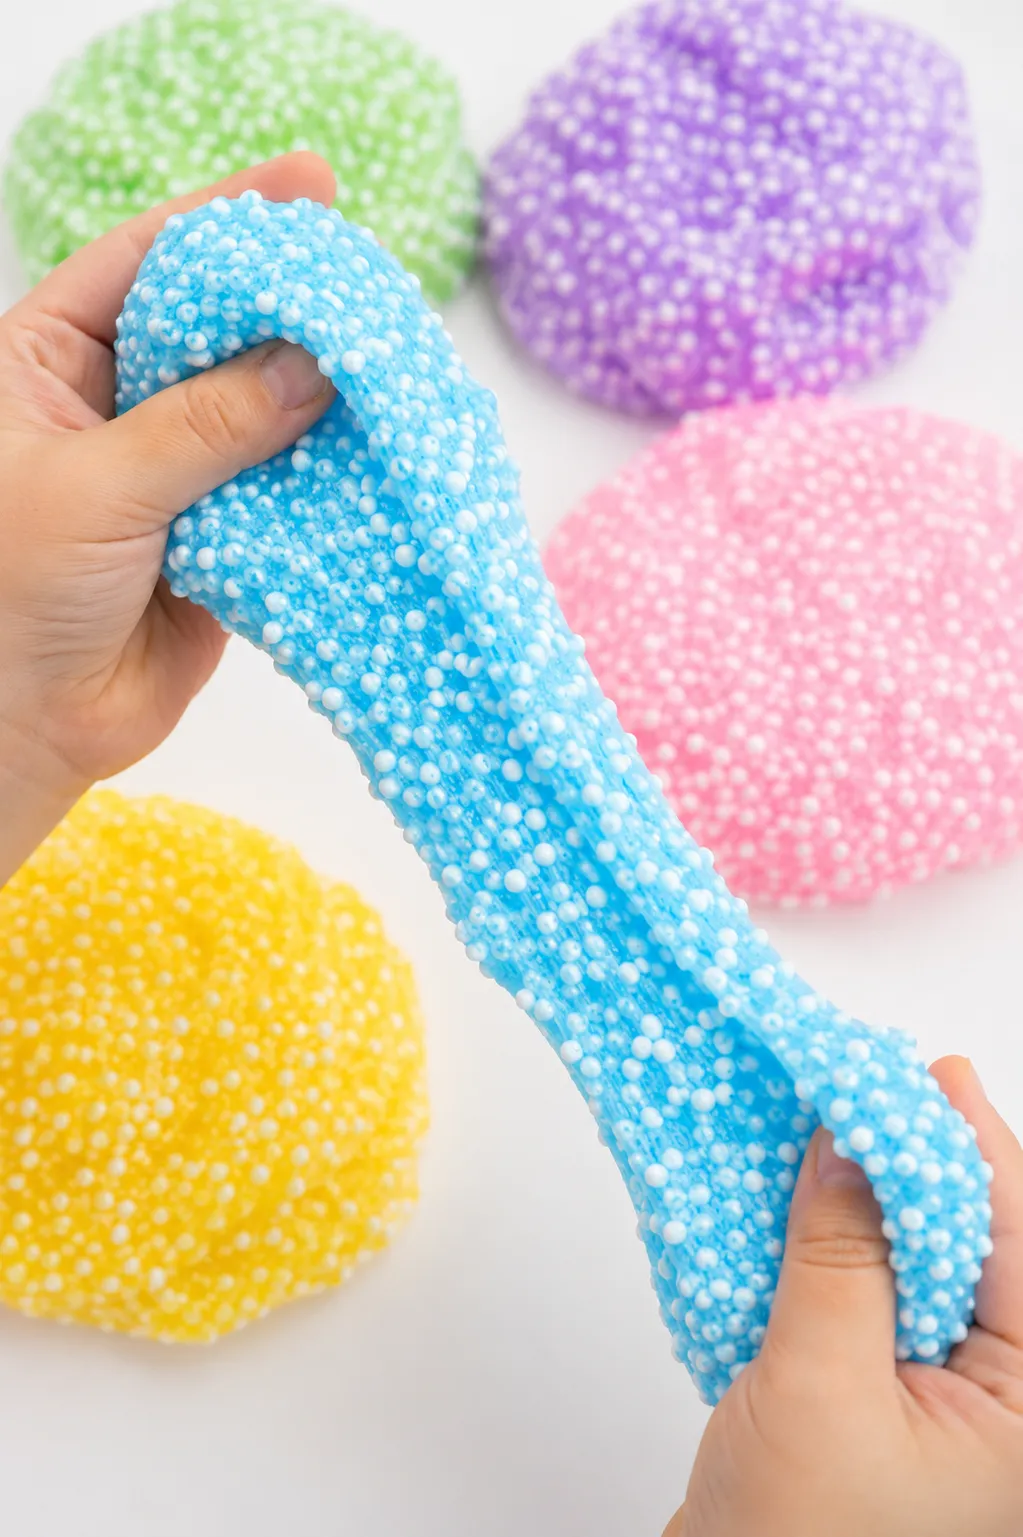
Foam slime, widely known as floam, is the slime that looks like it’s packed with tiny styrofoam balls and compresses into a satisfying, squishy mass when you press into it. Unlike regular slime that stretches and flows, floam holds its shape more, bounces back slightly when compressed, and makes that distinctive soft crunching sound that makes it so addictive to play with.
Here’s the full recipe with exact ratios, the steps that actually matter, and a complete troubleshooting guide for when things don’t go as planned.
What Is Floam and Why Does It Feel Different From Regular Slime?
Regular slime is a polymer network with nothing filling the spaces inside it, which is what gives it that free-flowing, elastic quality. Floam fills those spaces with tiny foam beads, which changes the texture in two significant ways.
First, the beads resist compression and then spring back, giving floam that bouncy, squishy quality regular slime doesn’t have. Second, the beads interrupt the continuous polymer network of the slime base, making floam less stretchy and more moldable than regular slime. It holds shapes briefly, compresses into a ball and springs back, and makes a soft crackling sound when manipulated that’s a big part of why it’s so satisfying to handle.
What You’ll Need
- 1 cup of white PVA school glue (Elmer’s white glue works consistently well)
- 1 teaspoon of baking soda
- 1 to 2 tablespoons of contact lens solution (must contain boric acid as an active ingredient)
- 1 to 3 cups of foam beads (small polystyrene micro beads sold specifically for floam or slime)
- Food coloring or liquid watercolors (optional)
- Shaving cream (optional, for an extra fluffy base)
- A large mixing bowl and spoon
- Airtight container for storage
A Note on Foam Beads
Foam beads for floam are small polystyrene micro beads, not the larger fishbowl beads used in fishbowl slime. They’re widely sold as “floam beads” or “foam beads for slime” at craft stores and online.
The size of the beads affects the finished texture significantly. Smaller beads produce a smoother, denser floam that holds shapes well. Larger micro beads produce a chunkier, crunchier texture with more noticeable individual beads. Many floam recipes use a mix of sizes for the best of both textures.
How to Make Foam Slime (Floam)
- Pour the white glue into a large mixing bowl.
- Add food coloring if using and stir until the color is fully distributed through the glue.
- Add the baking soda and stir thoroughly until no white powder remains visible.
- Add contact lens solution one teaspoon at a time, stirring continuously after each addition.
- Continue adding the solution gradually until the mixture pulls away from the bowl and comes together as a single mass.
- Take the slime out of the bowl and knead with your hands for two to three minutes until smooth and non-sticky.
- If the slime still feels sticky after kneading, add one drop of contact lens solution at a time while continuing to knead. Stop as soon as stickiness is gone.
- Once the base slime feels smooth and stretchy, flatten it out and add a generous handful of foam beads.
- Fold the slime over the beads and knead them in, gathering any that escape back into the slime.
- Continue adding beads in small handfuls, kneading between each addition, until the floam reaches your preferred density.
- Give the slime a final two-minute knead to fully settle the beads throughout the base.
What Floam Should Look and Feel Like
A properly made batch of floam should:
- Feel soft and squishy rather than rubbery or tough
- Hold its shape briefly when molded rather than flowing immediately like regular slime
- Spring back slightly when compressed
- Make a soft crackling or crunching sound when pressed or folded
- Stretch slowly and resist tearing when pulled gently
- Have beads distributed evenly throughout rather than collecting in lumps
Tips for Getting the Best Results
- Add the activator slowly. This is the step most responsible for whether floam turns out right. Adding too much contact lens solution too quickly is the most common reason floam ends up tough and rubbery rather than soft and squishy.
- Get the base right before adding beads. The slime base needs to be at the right consistency before beads go in. Adding beads to an under-activated or over-activated base makes the problem harder to fix afterward.
- Add beads gradually. Adding them all at once makes them harder to distribute evenly. Small handfuls kneaded in one at a time gives a much more uniform result.
- Use white glue for floam specifically. Clear glue produces a different texture that doesn’t complement the foam beads as well as white glue does. White glue gives floam that satisfying opaque, doughy quality.
- Add shaving cream to the base before activating for an extra fluffy, airier texture that many people prefer for floam specifically.
- Let the finished floam rest in a sealed container for 30 minutes after making it. The texture often improves slightly as the beads settle fully into the slime base.
Foam Slime Variations
Classic White Floam
The simplest version and the one closest to the original commercial floam product. Plain white glue base, no color, white or mixed foam beads. The result is a clean, cloud-white floam that looks exactly like the store-bought version.
Fluffy Floam
Add half a cup of white shaving cream to the glue before any other ingredients and stir it in thoroughly before following the standard recipe from Step 3. The shaving cream creates an airier, fluffier base slime that carries the foam beads in a lighter, less dense matrix, producing a floam that feels almost like a squishy cloud.
Colored Floam
Add liquid watercolors or a few drops of food coloring to the glue in Step 2. Liquid watercolors produce more vibrant, evenly distributed color than standard food coloring for this application. Match the color of the floam base to the color of the beads for a monochrome look, or use contrasting colors so the beads stand out visually against the base.
Glitter Floam
Mix fine glitter into the glue base before activation for a sparkly floam that catches light as it moves. Silver or holographic glitter works particularly well against a white base. Add the glitter at the same stage as the food coloring, before the baking soda and activator go in.
Galaxy Floam
Use a deep purple or dark blue tinted base with silver and holographic glitter mixed in, then add a mix of white, black, and silver foam beads. The finished floam has genuine visual depth that catches light from multiple angles and looks particularly striking in low light.
Scented Floam
Add a few drops of fragrance oil, essential oil, or extract (vanilla, lavender, and strawberry are all popular choices) to the glue base before activating. The scent adds an extra sensory dimension and makes the floam noticeably more engaging to play with for extended periods.
Quick Fixes for Common Problems
| Problem | Potential Solution | Alternative Approach |
| Floam is too sticky | Add contact lens solution one drop at a time while kneading | Let it rest five minutes in a sealed container, since it sometimes self-corrects slightly |
| Floam is too tough or rubbery | Knead in a small amount of lotion to soften it | Add a small amount of fresh unactivated white glue and knead through to dilute the activator |
| Beads keep falling out | The base is slightly under-activated—add one drop more of contact lens solution | Work beads in more slowly with smaller handfuls and more kneading time between additions |
| Floam feels dense and heavy rather than fluffy | Add shaving cream to the next batch before activating for a lighter base | Knead a small amount of shaving cream into the finished floam to lighten the texture |
| Beads are clumping in one area | Pull the slime into a flat sheet and redistribute beads manually before kneading again | Add fewer beads next time and build up density more gradually |
| Floam dried out after storage | Knead in a few drops of water or a small amount of lotion | Add a small amount of fresh glue and knead through to restore body |
| Color looks uneven or streaky | Liquid watercolors distribute more evenly than food coloring—switch for next batch | Knead longer after adding color, since streakiness usually resolves with more working time |
| Floam not holding its shape at all | Either too little activator or too few beads—add both gradually | Start fresh with a higher bead-to-slime ratio for a more moldable result |
How to Store Foam Slime
- Store in a fully airtight container or sealed zip-lock bag with the air pressed out before sealing.
- Keep at room temperature—refrigeration changes the texture in ways that aren’t easily reversed.
- Properly stored floam stays in good condition for two to three weeks.
- If it feels slightly stiffer after storage, a brief knead warms it back up.
- If it’s noticeably dried out, knead in a few drops of water or a small amount of lotion to revive it.
FAQs
Can I make floam without contact lens solution?
Yes. Liquid starch works as an alternative activator and produces a slightly softer texture that many people prefer for floam specifically. Add it gradually the same way as contact lens solution, stopping as soon as the stickiness is gone.
How many beads should I add?
This depends entirely on the texture you’re going for. A light bead ratio of roughly half a cup per cup of glue produces stretchy slime with a light crunch. A heavy bead ratio of two to three cups per cup of glue produces dense, moldable floam that barely flows. Most people end up somewhere in the middle after experimenting with their first batch.
Why does my floam feel different after a day?
Floam often improves in texture after resting overnight in a sealed container. The beads settle more evenly into the slime matrix and the overall consistency becomes more uniform. If it feels worse rather than better, it was exposed to air during storage.
Is floam safe for young children?
The foam beads are a potential inhalation hazard for very young children, and the slime itself isn’t meant to be eaten. Adult supervision is recommended for children under four. The ingredients are generally non-toxic in small amounts but hands should be washed before and after play.
Why is my floam not squishy?
Either the slime base is over-activated and too stiff, or there aren’t enough beads to create the characteristic floam texture. Try softening the base with a small amount of lotion and adding more beads, since both factors contribute to the squishiness floam is known for.
Bottom Line
Floam gets its reputation as one of the most satisfying slime textures because the combination of soft slime base and foam beads genuinely delivers something regular slime doesn’t. Get the base consistency right before adding beads, build up the bead density gradually rather than all at once, and store it properly between sessions. Once you’ve made a batch that feels right, the texture is instantly recognizable as something worth making again.
Enjoyed this project? Get even more DIY ideas that save (and make) you money.
Join our free newsletter for profitable DIY projects, clever cleaning hacks, home ideas, and creative crafts delivered straight to your inbox.
✓ Free forever • No spam • Unsubscribe anytime




