
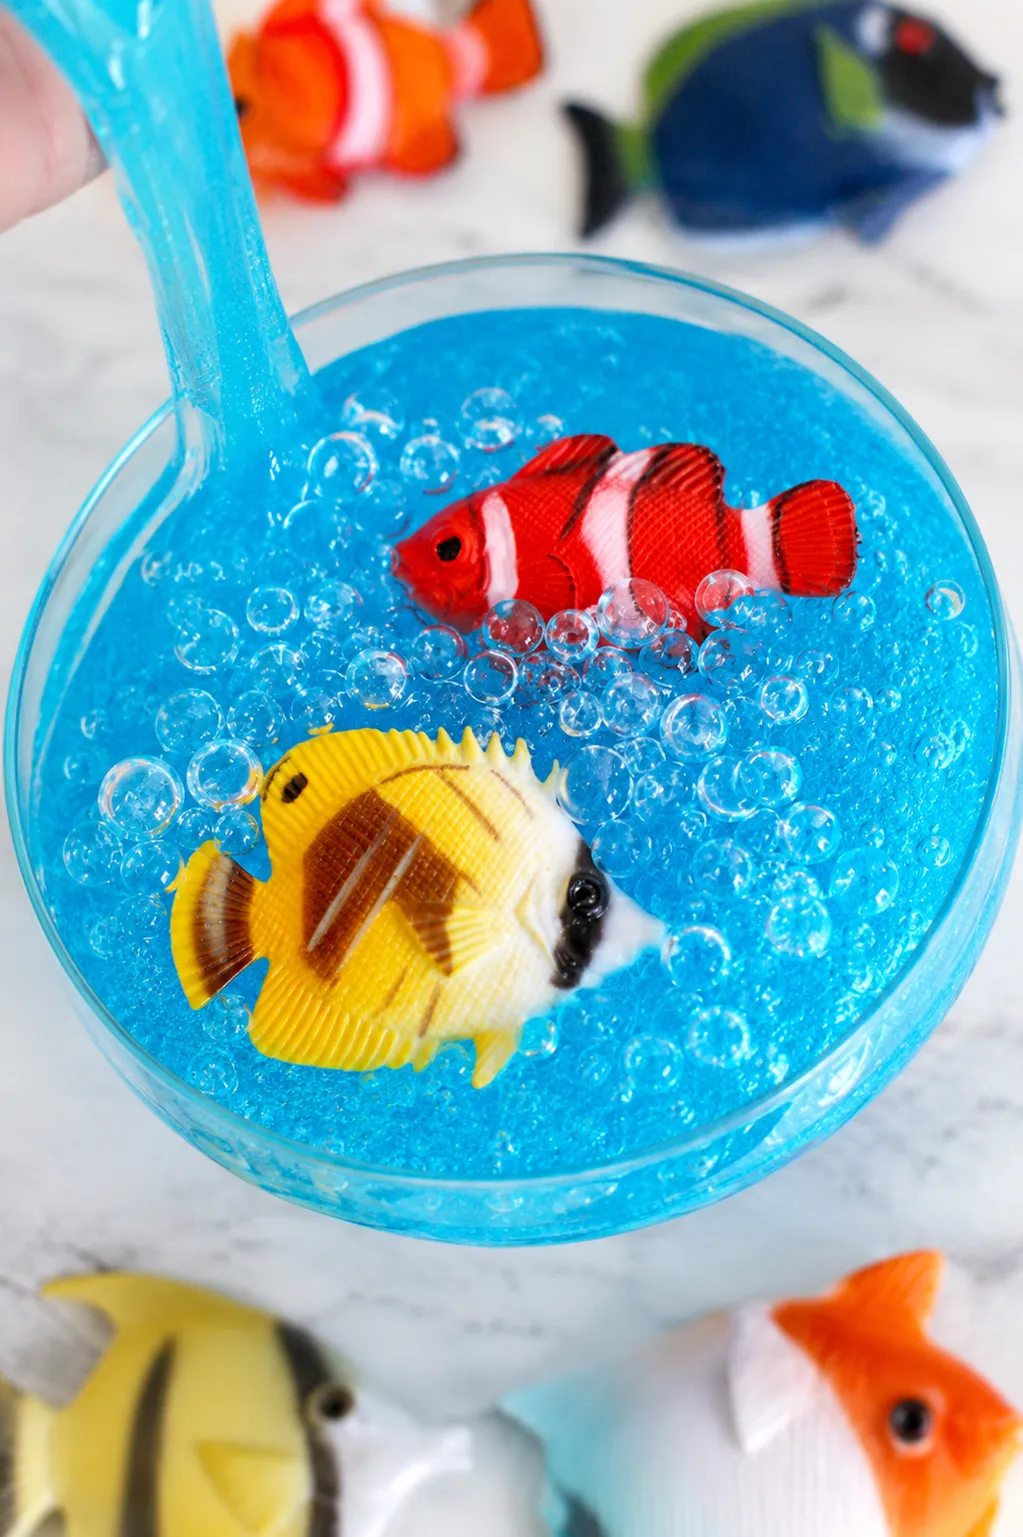
If you’ve ever watched a video of someone pressing their hand into a bowl of slime packed with tiny colorful beads and wondered how something could look that satisfying, fishbowl slime is what you were looking at. The crunch when you press into it. The way the beads shift and resettle when you stretch it. The clicking sound when you fold it back on itself.
Fishbowl slime is one of those sensory experiences that’s hard to describe accurately until you’ve actually touched it, which is part of why it shows up so consistently in satisfying slime compilation videos with millions of views.
The recipe itself is simpler than the finished result suggests. A clear glue base, an activator, a handful of fishbowl beads, and some patience with the consistency before the beads go in. Here’s the full process.
What Are Fishbowl Beads?
Before getting into the recipe, it’s worth clarifying what fishbowl beads actually are since this is the ingredient most people haven’t encountered before and the one that defines the whole slime type.
Fishbowl beads, sometimes called fishbowl vase filler beads or slime beads, are small, round, hard plastic beads about the size of a small pea, available in clear, translucent, and solid colors as well as mixed rainbow packs. They’re the same beads used as decorative filler in vases and centerpieces, widely available at craft stores, dollar stores, and online. A bag of fishbowl beads is inexpensive and contains enough beads for multiple batches of slime.
The appeal of these specific beads over other types comes down to a few properties. Their smooth, hard surface contrasts beautifully with the soft, stretchy slime base. Their round shape makes them shift and roll satisfyingly when the slime is pressed or stretched. And their slight transparency, particularly in the clear version, creates a visual depth in the finished slime that looks especially good in a clear or lightly colored base.
What You’ll Need
- 1 cup of clear PVA school glue (Elmer’s clear glue is the most widely used and most reliable)
- ½ teaspoon of baking soda
- 1 to 2 tablespoons of contact lens solution (must contain boric acid as an active ingredient)
- 1 to 2 cups of fishbowl beads
- Food coloring or liquid watercolors (optional, for a tinted base)
- Glitter (optional, for extra visual depth in the finished slime)
- A large mixing bowl
- A spoon or spatula
- Airtight container for storage
A note on the contact lens solution: not all contact lens solutions activate slime. The product needs to contain boric acid in the ingredient list to work as an activator with the baking soda and glue. Saline solution that contains only sodium chloride won’t work. Check the label before buying.
Why Clear Glue Rather Than White Glue
White glue makes perfectly good slime for most recipes, but fishbowl slime specifically benefits from a clear glue base for one important reason: the beads. In a white, opaque slime base the fishbowl beads are visible but their transparency is lost, and the whole effect becomes less striking. In a clear slime base, the beads’ own colors and translucency pop beautifully, the light passes through both the slime and the beads, and the overall visual is much closer to what makes fishbowl slime so appealing in videos.
Clear glue slime also tends to have a slightly stretchier, more elastic quality than white glue slime when made correctly, which complements the hard, clicky beads nicely since the contrast between the stretchy base and the rigid beads is where most of the sensory satisfaction comes from.
How to Make Fishbowl Slime
- Pour the full cup of clear glue into a large mixing bowl. Clear glue straight from the bottle is quite runny compared to white glue, which is normal, and it will firm up significantly once the activator is added.
- Add the baking soda to the glue and stir thoroughly until fully dissolved with no visible white powder remaining. The baking soda doesn’t change the consistency noticeably at this stage but is essential for the activation step that comes next, since it reacts with the boric acid in the contact lens solution to create the polymer cross-links that turn the glue into slime.
- If you want a tinted base, add food coloring or liquid watercolors now and stir until the color is fully and evenly distributed through the glue. For a classic fishbowl slime look, a very light tint works better than a deeply saturated color, since you want the beads to remain visible and the transparency of the base to come through. A single drop of blue or purple food coloring in a full cup of glue produces a beautiful barely-there tint that enhances rather than competes with the beads.
- If adding glitter, stir it in at this stage as well, since adding it later once the slime has formed makes it harder to distribute evenly.
- Add the contact lens solution one teaspoon at a time, stirring continuously after each addition. The mixture will start changing texture almost immediately, becoming less liquid and more cohesive as the activator begins cross-linking the glue molecules.
- Keep adding the contact lens solution gradually, stirring well between each addition, until the slime starts pulling away from the sides and bottom of the bowl and coming together into a single mass. This typically happens somewhere between one and two tablespoons of solution total, but add slowly rather than pouring in the full amount at once since going too fast makes it easy to overshoot.
- Once the slime has mostly come together in the bowl, take it out and begin kneading it with your hands. It may feel slightly sticky at first, and that’s expected. Kneading for two to three minutes activates the rest of the cross-linking and the stickiness reduces significantly as you continue working it.
- If the slime still feels sticky after a few minutes of kneading, add the contact lens solution one drop at a time directly to the slime while continuing to knead. Add no more than needed, since the most common mistake in slime-making is over-activating, and slime that has too much activator turns tough, rubbery, and snap-prone rather than stretchy and smooth.
- Once the slime feels smooth, non-sticky, and nicely stretchy, it’s ready for the beads.
Adding the Fishbowl Beads
- Flatten the slime out on a clean surface or in the bowl and add a generous handful of fishbowl beads, roughly half a cup to start. Fold the slime over the beads and begin kneading them in.
- The beads will try to escape at first, rolling out from the edges of the slime as you work them in. This is normal and part of the process. Keep gathering them back and kneading until they’re distributed through the slime enough to stay in place as you work.
- Add more beads in small handfuls, kneading between each addition, until the slime is as bead-heavy as you want it. The more beads you add, the crunchier and more textured the finished slime will be. A ratio of roughly one cup of beads per cup of original glue produces a good balance between stretchy slime and crunchy beads, but this is genuinely a matter of personal preference so adjust to taste.
- Keep adding until you’re happy with the bead density, give the slime a final knead to settle everything together, and it’s ready.
What Fishbowl Slime Should Look and Feel Like
Knowing what you’re aiming for makes troubleshooting easier. A properly made batch of fishbowl slime should stretch slowly and smoothly without snapping or tearing when pulled at a moderate pace. It should hold together as a cohesive mass without being so stiff that it resists stretching. When pressed, the beads should shift and click audibly.
When folded, the beads redistribute evenly rather than collecting in lumps. The base should be transparent or translucently tinted rather than cloudy or opaque, and it should feel smooth and cool to the touch rather than rubbery or sticky.
Tips for Getting the Best Results
- Use fresh glue rather than a bottle that’s been sitting open for a while, since clear glue exposed to air for extended periods sometimes changes consistency in ways that affect how well it activates.
- Work slowly with the activator rather than trying to get to the finished consistency quickly. Rushing this step is the source of most fishbowl slime problems.
- Let the slime rest for five minutes after making it and before adding beads, since clear glue slime often benefits from a short rest period where the cross-linking continues slightly on its own, which can take a slightly sticky slime to a perfectly non-sticky one without needing more activator.
- If the finished slime feels slightly too stiff after adding beads, the beads themselves can make it feel firmer than the base slime alone. This is normal, and a small amount of lotion kneaded in softens it back to the right texture without affecting the beads.
- Store the slime in an airtight container between play sessions, since clear slime exposed to air slowly deflates and loses its stretchiness. Properly stored fishbowl slime stays in good condition for two to three weeks.
Fishbowl Slime Variations
Clear Fishbowl Slime
Clear fishbowl slime with rainbow beads is the classic version and the most popular for good reason. A completely clear, untinted base with a rainbow mix of beads produces the most visually striking contrast and shows off the transparency of both the slime and the beads at their best.
Blue ocean Fishbowl Slime
Blue ocean fishbowl slime uses a pale blue tinted base with clear and white beads for an underwater effect that looks exactly like a fishbowl filled with water. Add a few tiny plastic fish or sea creature charms pressed into the slime for extra theme commitment.
Galaxy Fishbowl Slime
Galaxy fishbowl slime combines a deep purple or dark blue tinted base with silver and holographic glitter added to the base before activation, then mixes in clear and iridescent fishbowl beads. The finished result has genuine depth and shimmer that catches light from multiple angles simultaneously.
Butter Fishbowl Slime
Butter fishbowl slime adds a small amount of white model magic or air dry clay kneaded into the base slime before adding beads, which produces a softer, slightly matte texture for the slime base that contrasts with the hard, shiny beads in a different way than the classic clear base does.
Glow-In-The-Dark Fishbowl Slime
Glow-in-the-dark fishbowl slime uses glow-in-the-dark pigment powder or glow-in-the-dark paint mixed into the clear glue base before activation. Charge it under a light and then take it into a dark room for a genuinely dramatic reveal that never gets old with kids.
Quick Fixes for Common Problems
| Problem | Potential Solution | Alternative Approach |
| Slime is too sticky even after kneading | Add contact lens solution one drop at a time while kneading, checking after each drop | Let it rest for five minutes before adding more activator, since clear glue slime often self-corrects slightly with a short rest |
| Slime is too tough, rubbery, or snaps when stretched | Too much activator was added—knead in a small amount of clear hair gel or lotion to soften it | Add a small amount of fresh unactivated clear glue and knead it through to dilute the activator concentration |
| Slime looks cloudy rather than clear | Clear glue slime often starts cloudy and clears up after resting in an airtight container for 24 to 48 hours | Make sure clear glue was used rather than white glue, which never clears |
| Beads keep falling out of the slime | The slime base may be slightly under-activated and too soft to hold beads—add a tiny bit more activator | Work the beads in more slowly with smaller handfuls at a time, giving each addition more kneading time before adding more |
| Slime deflated and became flat after storage | This is normal for clear glue slime exposed to air—store in a fully airtight container and knead before next use | If deflation is severe, knead in a small amount of fresh clear glue to restore body |
| Slime feels slimy rather than stretchy | Usually means slight under-activation—add a drop or two more of contact lens solution | Try letting it rest overnight in a sealed container, since some batches firm up naturally with time |
| Beads are all clumping in one spot | Distribute more evenly during the kneading phase, working beads into different areas of the slime rather than adding them all to one spot | Pull the slime into a flat sheet and scatter beads across the whole surface before folding and kneading |
| Finished slime has air bubbles throughout | Knead more slowly and deliberately to work out air pockets | Let the slime rest in a sealed container for a day, since air bubbles often rise and disappear on their own |
How to Store Fishbowl Slime
Fishbowl slime stores best in a fully airtight container, either a plastic container with a snap-on lid or a large zip-lock bag with all the air pressed out before sealing. Exposure to air is the main thing that degrades clear slime over time, causing it to become less clear, lose body, and eventually dry out.
Stored properly at room temperature, fishbowl slime typically stays in good condition for two to three weeks. Avoid refrigerating it since the cold changes the texture in ways that aren’t easily reversed.
If the slime feels slightly stiffer after storage, a brief knead warms it back up to a workable consistency. If it’s significantly dried out, a small amount of lotion or a drop of contact lens solution kneaded in often revives it for another play session.
FAQs
Where can I find fishbowl beads?
Most craft stores carry them in the floral or vase filler section, and dollar stores often carry them seasonally. They’re also widely available online, where you’ll find the largest variety of colors and sizes, often sold specifically as “slime beads” or “fishbowl slime beads” alongside other slime-making supplies.
Can I use a different activator instead of contact lens solution?
Yes, liquid starch works as an alternative activator for fishbowl slime, producing a slightly different texture that some people prefer. Add it gradually the same way as contact lens solution. Borax dissolved in water also works but is less commonly recommended for slime made with kids since it requires more care in handling than contact lens solution.
Does it matter what color the fishbowl beads are?
Not for the recipe itself, since the beads don’t interact chemically with anything else in the slime. The color choice affects the visual result significantly though, and mixing multiple bead colors in the same batch generally produces a more visually interesting finished slime than a single bead color alone.
Why isn’t my clear slime clearing up?
Clear glue slime almost always starts opaque or cloudy right after making due to the air incorporated during mixing and the baking soda. Leaving it in a sealed airtight container for 24 to 48 hours without touching it allows the air bubbles to rise out and the slime to become truly clear. Touching or kneading it during this clearing period reintroduces air and resets the process.
Is fishbowl slime safe for young children?
The beads are a choking hazard for children under three, and the slime itself isn’t meant to be eaten. For younger toddlers, supervision is essential. The recipe ingredients are generally non-toxic in small amounts but shouldn’t be ingested. Wash hands before and after play, and keep the slime away from very young children who might mouth the beads.
Closing Thoughts
Fishbowl slime earns its popularity because the finished result genuinely delivers on every level, the sound, the texture, the visual, and the feel are all working together in a way that produces something distinctly more satisfying than regular slime alone. Get the base consistency right before adding beads, add the beads gradually rather than all at once, and store it properly between sessions. Make it once and it’s very likely to become a regularly requested recipe.
Enjoyed this project? Get even more DIY ideas that save (and make) you money.
Join our free newsletter for profitable DIY projects, clever cleaning hacks, home ideas, and creative crafts delivered straight to your inbox.
✓ Free forever • No spam • Unsubscribe anytime




