
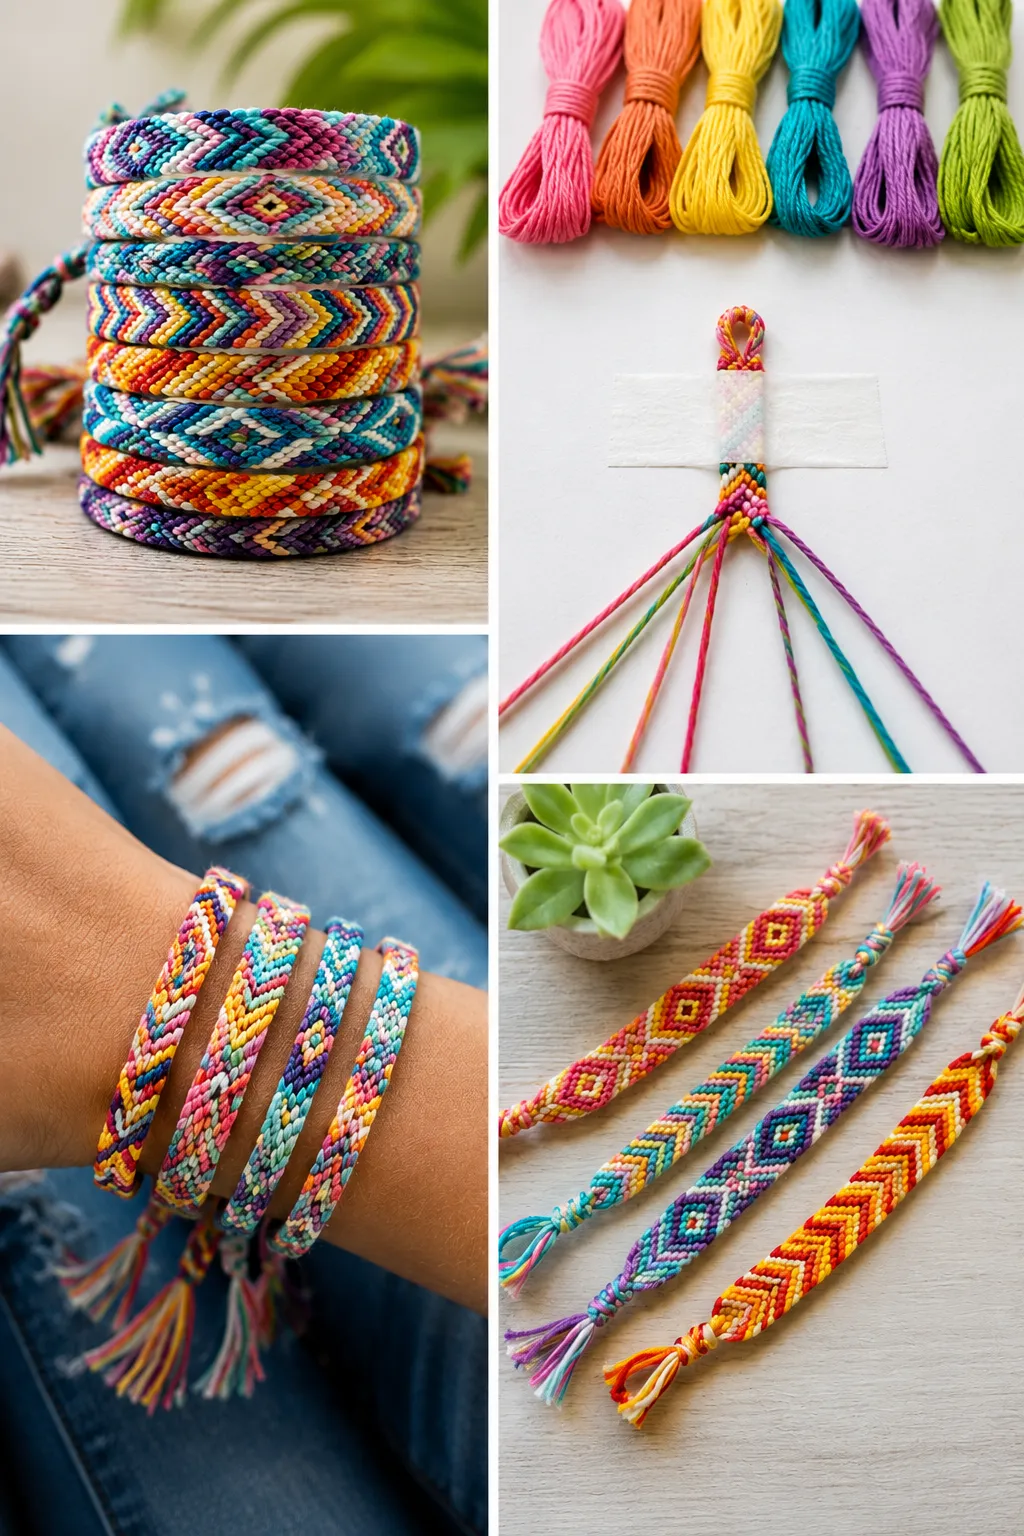
Friendship bracelets have been around long enough to feel timeless, and the reason they’ve stuck around through every craft trend that’s come and gone is pretty simple. They’re genuinely satisfying to make, they produce something wearable and meaningful at the end, and the skills build on each other in a way that makes each new pattern feel like a real achievement. A kid who masters the basic diagonal stripe can move to a chevron. A chevron leads to an arrow pattern. The learning curve is real but never steep enough to be discouraging.
The other thing that makes friendship bracelets endure is the material cost. A few skeins of embroidery floss from a craft store and a safety pin or clipboard are genuinely all you need to get started, and a single skein of floss makes multiple bracelets. There’s no expensive equipment, no special workspace, and the portability means it’s one of those crafts that goes everywhere.
Here are six patterns that work well for beginners, ordered from simplest to slightly more involved, with full step-by-step instructions for each.
Before You Start: The Basics That Apply to Every Pattern
A few foundational techniques apply across every bracelet pattern below, and understanding them before diving into the first pattern makes everything go more smoothly.
Choosing Your Thread
Embroidery floss is the standard material for friendship bracelets and is available at any craft store in hundreds of colors. It comes in small skeins that are inexpensive to buy individually, and most beginners end up building a collection of colors over time as they make more bracelets.
Cotton embroidery floss is the most common and most beginner-friendly since it grips knots well and doesn’t slip. Silk floss has a beautiful sheen but is more expensive and slightly more slippery to work with. Metallic thread adds sparkle to bracelets but can fray and tangle more easily than cotton, making it better as an accent thread alongside cotton rather than as the primary material for a first attempt.
How Much Thread to Cut
A common beginner mistake is cutting thread that’s too short and running out partway through. For a standard wrist-sized bracelet, cut each strand to approximately 60 to 70 centimeters, roughly arm’s length from fingertips to shoulder. This is longer than it seems necessary but accounts for the thread consumed by knotting and leaves enough at each end for tying off.
For patterns with more strands or more complex knotting that consumes thread faster, cut longer, approximately 80 to 90 centimeters per strand.
Setting Up Your Work Surface
Bracelets need to be anchored while you work so the threads stay taut. The most common approaches are:
- Safety pin method: Pin the knotted top of the bracelet to a pillow, a jean leg, or a firm piece of fabric, then work with the bracelet pinned in front of you.
- Clipboard method: Tape the knotted top to a clipboard and clip it to hold, working on the flat clipboard surface.
- Door handle method: Loop the knotted top over a door handle and work with the threads hanging down.
Any of these works equally well and is a matter of personal preference.
The Basic Forward Knot
Every friendship bracelet pattern uses some version of this fundamental knot, so learning it before starting any specific pattern is worth the time.
Take the working thread (the one doing the knotting) and the anchor thread (the one being knotted onto). Hold the anchor thread taut with one hand. With the working thread, make a shape like the number 4 over the anchor thread by crossing the working thread over the anchor thread and then looping it up and through the space created. Pull upward firmly and slide the knot up to the top of the anchor thread. This is one half of a complete knot. Make the same 4 shape again with the same working thread on the same anchor thread and pull up again. Two of these motions make one complete forward knot. The working thread moves one position to the right each time a complete forward knot is made.
The Basic Backward Knot
The backward knot is the mirror image of the forward knot. Instead of making a 4 shape, make a reverse 4 (or P shape) by crossing the working thread over the anchor thread from the right side, looping it under and through from the other direction. Pull upward to set the knot. Two of these motions make one complete backward knot. The working thread moves one position to the left each time a complete backward knot is made.
Finishing a Bracelet
All patterns end with the same basic finishing technique. Once the bracelet is the desired length, divide the remaining threads into two groups and braid each group for about two centimeters. Tie a knot at the end of each braid to secure. The starting knot and ending braids allow the bracelet to be tied around a wrist.
Pattern 1: The Basic Stripe (Two Colors)
This is the simplest possible friendship bracelet and the absolute best starting point for a first attempt. It teaches the forward knot and nothing else, which makes it the perfect introduction to the technique before any additional complexity.
What You’ll Need
- 2 colors of embroidery floss
- 2 strands of each color, 4 strands total
- Cut to approximately 60 centimeters each
How to Make It
- Hold all four strands together and fold them in half so you have a loop at one end and eight strand ends at the other.
- Tie an overhand knot about three centimeters from the folded end to create a loop, then separate the strands so you have four working strands.
- Arrange the strands in the color order you want, alternating colors.
- Anchor the bracelet using your preferred method.
- Take the leftmost strand and make two complete forward knots onto each of the other three strands, working from left to right across all threads.
- The strand that started on the left is now on the far right. This completes one row.
- Repeat from Step 5, always starting with the new leftmost strand and knotting across all other threads to the right.
- Continue until the bracelet reaches the desired length.
The result is a diagonal stripe pattern that runs from upper left to lower right in repeating color rows.
Pattern 2: The Candy Stripe (Multiple Colors)
The candy stripe is the same basic technique as the two-color stripe but with more colors, producing a more visually complex diagonal stripe pattern that looks significantly more impressive despite using exactly the same forward knot.
What You’ll Need
- 4 to 6 colors of embroidery floss
- 1 strand of each color
- Cut to approximately 70 centimeters each
How to Make It
- Fold all strands together and tie a starting knot as described in Pattern 1.
- Arrange strands in your chosen color order.
- Take the leftmost strand and make two complete forward knots onto every other strand, working left to right.
- The leftmost strand is now on the far right. Pick up the new leftmost strand and repeat.
- Continue until the bracelet reaches the desired length.
The more colors used, the wider the color repetition cycle before colors start appearing again in the same position, which produces broader stripes and a more complex visual pattern from the same simple technique.
Pattern 3: The Chevron (V Pattern)
The chevron is the most recognizable friendship bracelet pattern and one of the most popular. It produces a repeating V shape across the width of the bracelet and uses both forward and backward knots, which makes it slightly more complex than the stripe patterns but still very manageable for beginners once the basic knots are understood.
What You’ll Need
- 2 to 4 colors of embroidery floss
- 2 strands of each color
- Cut to approximately 80 centimeters each
- Arrange symmetrically with colors mirrored on each side
How to Make It
- Fold all strands and tie a starting knot, then arrange strands symmetrically. If using 4 colors (A, B, C, D), arrange them as A, B, C, D, D, C, B, A from left to right.
- Take the leftmost strand and make forward knots onto each strand toward the center, stopping at the middle of the bracelet. The leftmost strand moves right with each knot.
- Take the rightmost strand and make backward knots onto each strand toward the center, stopping at the middle. The rightmost strand moves left with each knot.
- When the two working strands meet in the center, join them with a forward knot. This completes one V and both working strands are now in the center.
- Spread the strands back out, with the just-joined strands now at the center positions.
- Repeat from Step 2, taking the new leftmost and rightmost strands for the next row.
- Continue until the bracelet reaches the desired length.
Pattern 4: The Arrow Pattern
The arrow pattern reverses the V of the chevron to produce an upward-pointing arrow shape repeated across the bracelet. It uses the same two knots as the chevron but in a different sequence, which produces a distinctly different visual result from the same basic technique.
What You’ll Need
- 2 to 4 colors of embroidery floss
- 2 strands of each color
- Cut to approximately 80 centimeters each
- Arrange symmetrically
How to Make It
- Arrange strands symmetrically as with the chevron pattern.
- Take the two center strands and use them as the working strands rather than the outer ones. The left center strand makes backward knots moving left toward the outer edge. The right center strand makes forward knots moving right toward the outer edge.
- Continue until each center working strand has knotted onto every other strand and reached the outer edge.
- Join the two working strands at the outer edges with a backward knot on the left side and a forward knot on the right side.
- The working strands are now on the outside. Bring them back to the center for the next row.
- Repeat until the bracelet reaches the desired length.
The arrow pattern is the same construction as the chevron but working from the center outward rather than from the outside inward, which produces the inverted V arrow shape.
Pattern 5: The Diagonal Stripe (Four Colors)
This pattern uses four colors in a repeating diagonal stripe that’s slightly more visually complex than the basic two-color stripe, producing a bolder, more graphic result that looks particularly striking in high-contrast color combinations.
What You’ll Need
- 4 colors of embroidery floss
- 2 strands of each color, 8 strands total
- Cut to approximately 70 centimeters each
How to Make It
- Fold strands and tie a starting knot.
- Arrange strands in color order: A, A, B, B, C, C, D, D from left to right.
- Take the leftmost strand (first A strand) and make forward knots onto each of the seven remaining strands, working left to right across all threads.
- The first A strand is now on the far right. The bracelet shows one diagonal stripe of color A.
- Take the new leftmost strand (second A strand) and repeat across all threads.
- The second A strand joins the first on the far right. Two A stripes are now visible.
- Continue with the B strands, then C, then D, then back to A.
- The bracelet builds a repeating four-color diagonal stripe pattern.
Pattern 6: The Fishtail Braid Bracelet
The fishtail is the most tactile of the six patterns since it involves braiding rather than knotting, which produces a different textural result from any of the knotted patterns and is particularly satisfying to make because the visual pattern develops much faster than the knotted versions.
What You’ll Need
- 2 colors of embroidery floss
- 4 strands of each color, 8 strands total
- Cut to approximately 70 centimeters each
How to Make It
- Fold strands and tie a starting knot.
- Separate the strands into two groups of four, one group per color, held in each hand.
- Take the outermost strand from the left group and move it to join the right group, placing it on the inside of the right group rather than the outside.
- Take the outermost strand from the right group and move it to join the left group, placing it on the inside of the left group.
- Gently pull both groups apart to tighten the crossover.
- Repeat Steps 3 through 5 continuously, always taking the outermost strand from each side and crossing it to the inside of the opposite group.
- The fishtail braid pattern develops as you continue, with a distinctive herringbone-like pattern appearing between the two colors.
- Continue until the bracelet reaches the desired length.
Tips for Better Results Across All Patterns
- Keep tension consistent. Uneven tension is the most common cause of bracelets that look lumpy or irregular. Try to pull each knot with the same amount of force every time, neither too tight nor too loose.
- Keep threads untangled as you work. Letting threads twist and tangle around each other is the main cause of frustration in bracelet-making. Pause every few rows to unwind any twists before continuing.
- Work with threads flat against your work surface. Threads that bunch up or cross over each other before being knotted produce uneven results. Keep them spread flat and in order before each row.
- Don’t rush the knots. Each complete knot requires two motions, not one. Beginners who make only one half-knot instead of two full motions end up with a twisted, uneven pattern that doesn’t look right.
- Start with two or three colors before using more. More colors means more threads to manage and more opportunities for tangles. Building confidence with two or three colors first makes the jump to more complex multi-color patterns significantly less frustrating.
- Use high-contrast color combinations for the most visible patterns. Dark and light colors next to each other show the knot pattern most clearly. Similar colors next to each other blur the pattern, which can be intentional for a subtle effect but makes it harder to learn and check the pattern as a beginner.
Quick Fixes for Common Problems
| Problem | Potential Solution | Alternative Approach |
|---|---|---|
| Bracelet is curling or twisting | Tension is uneven—try to maintain consistent pull on each knot | Wet the bracelet slightly and lay flat under a heavy book to straighten while drying |
| Threads keep tangling | Separate threads and work with them spread flat before each row | Use shorter thread lengths if tangling is severe, since shorter threads are easier to manage |
| Knots look uneven or bumpy | Make sure each complete knot has two full motions rather than one | Practice the forward and backward knot separately on spare thread before starting a full bracelet |
| Lost track of which thread is the working strand | Place a small paper clip on the current working thread as a position marker | Use a different color as the first working strand so it’s always visually distinct |
| Bracelet is too narrow | Use more strands per color for a wider finished bracelet | Combine two or three strands of floss as if they were one for a chunkier, wider version |
| Pattern looks wrong and doesn’t match the expected design | Check that both motions of each knot are being made correctly—one motion produces a backward knot even when making a forward one | Back up a few rows by gently pulling threads to undo recent knots and restart from a point where the pattern looked correct |
| Running out of thread partway through | Cut a new length and join it by tying the new thread to the short end with a secure knot, hiding the join in the back of the bracelet | Plan thread length more generously next time, cutting 20 percent longer than the minimum estimate |
How to Size a Friendship Bracelet
Measure the wrist it’s being made for before starting, since a bracelet that’s too short to tie on is very frustrating to discover after the knotting is complete.
A standard adult wrist is approximately 15 to 18 centimeters. A child’s wrist is typically 12 to 15 centimeters. Add approximately four to five centimeters to the measured wrist size for the starting knot and tie-off braids, since these take up length that isn’t part of the knotted pattern.
If the bracelet is a surprise gift and the wrist can’t be measured directly, making the knotted section 12 to 14 centimeters long and finishing with longer tie-off braids of three to four centimeters each allows it to be adjusted to fit most wrist sizes.
Making Friendship Bracelets as a Group Activity
Friendship bracelets work particularly well as a group activity for parties, sleepovers, and camps because the making and the exchanging are both part of the experience.
Set up a shared floss station with colors arranged by type or organized in a rainbow order, and let each person choose their own colors before starting. This makes the decision-making part of the activity rather than a bottleneck.
For groups with mixed experience levels, pair beginners with more experienced bracelet-makers rather than separating them by skill, since the teaching and helping that happens between paired participants is one of the most genuinely connecting elements of the activity.
For parties where time is limited, set up pre-cut thread bundles in several color combinations so participants can start immediately rather than spending time selecting and cutting threads.
FAQ
What age is friendship bracelet making appropriate for?
Children as young as seven or eight can learn the basic stripe pattern with some adult guidance on setting up and the knot technique. The chevron and more complex patterns are more appropriate from around age ten and up when fine motor control and patience for multi-step patterns are more developed. Adults and teens find all six patterns accessible, and the more complex patterns in this list are genuinely engaging for adult crafters as well.
Is embroidery floss the only material that works?
It’s the most common and most beginner-friendly, but thin yarn, hemp cord, and waxed cotton cord all work for friendship bracelet patterns. Thicker materials produce chunkier bracelets that work better with fewer strands. Thinner materials like silk thread produce more delicate, finer bracelets. Embroidery floss is the standard for a reason since it’s consistent in thickness, grips knots well, and comes in more color options than any other material at a comparable price point.
How long does it take to make a friendship bracelet?
The basic stripe pattern takes most beginners thirty to forty-five minutes for a first attempt, with speed improving significantly after the technique becomes familiar. The chevron takes sixty to ninety minutes for a first attempt. With practice, experienced bracelet-makers can complete a chevron in twenty to thirty minutes.
How do I fix a mistake several rows back without unraveling the whole bracelet?
Gently and patiently pull the working threads to loosen and undo knots one at a time, working backward from the current row to the mistake. Embroidery floss knots undo more easily than they appear to if pulled gently rather than yanked. A needle or pin can help loosen tight knots without damaging the thread. Accept that going back more than five or six rows is usually more effort than finishing the bracelet and starting a new one.
Can friendship bracelets get wet?
Cotton embroidery floss bracelets are generally water-safe and the traditional practice of wearing a friendship bracelet until it falls off naturally means they typically get wet many times during their lifespan. The colors may fade slightly with repeated washing and the knots may tighten when wet and loosen when dry, which can cause slight texture changes. Metallic threads are more vulnerable to water damage and are better kept dry.
In Conclusion
Friendship bracelets are worth learning because the skills stack cleanly from one pattern to the next, each one building on what came before rather than being completely new from scratch. Start with the two-color stripe to understand the forward knot, move to the candy stripe to practice with more threads, then try the chevron once forward and backward knots both feel natural. The six patterns here take most beginners from first attempt to making something genuinely impressive in a weekend of practice, and at the end of that weekend the result is a wearable, meaningful craft that lasts.
Enjoyed this project? Get even more DIY ideas that save (and make) you money.
Join our free newsletter for profitable DIY projects, clever cleaning hacks, home ideas, and creative crafts delivered straight to your inbox.
✓ Free forever • No spam • Unsubscribe anytime




