
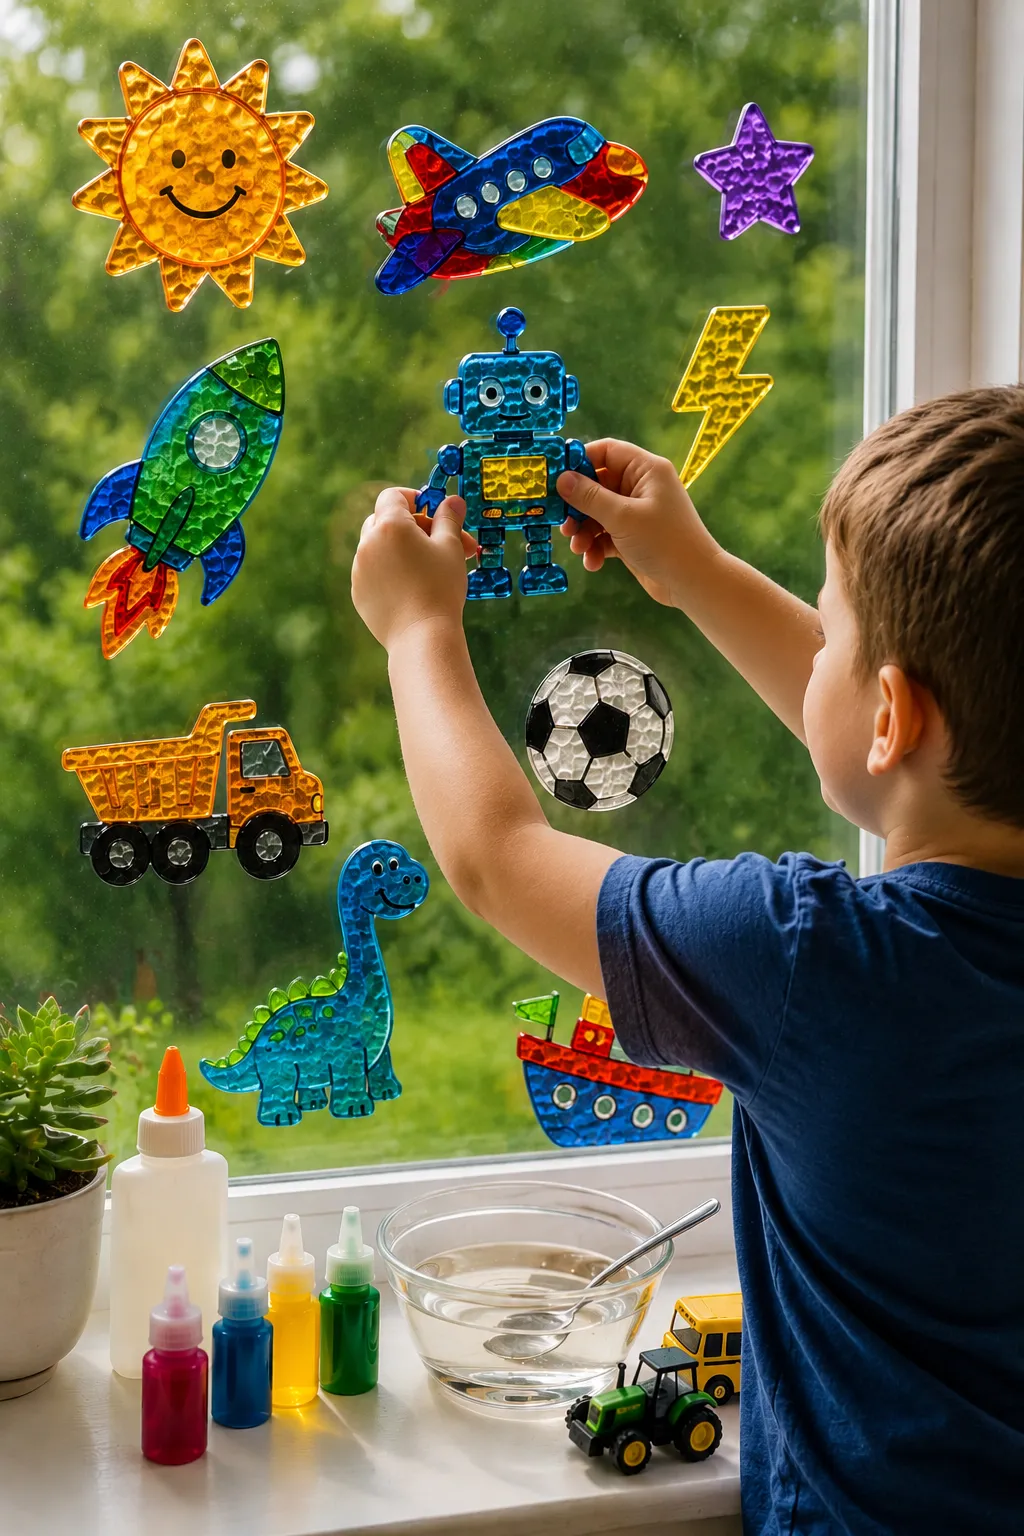
Window clings are one of those things kids love to peel off and reposition repeatedly, which is most of the appeal of the ones sold in stores. Making them at home produces the same peel-and-stick result with a few advantages over the store-bought version: the shapes and designs are completely customizable, the making process is its own activity, and a batch of homemade window clings costs a fraction of what a store-bought set does.
The recipe uses glue and food coloring to create a flexible, translucent film that sticks to glass through static cling rather than adhesive. That’s the same mechanism as commercial window clings, which is why they can be peeled off, repositioned, and reused multiple times without leaving any residue on the window.
The no-mess part comes from the specific method used to pour and dry the clings, which keeps the liquid contained on a non-stick surface rather than spreading across a table. Here’s the full process.
How DIY Window Clings Actually Work
Understanding the science makes it easier to troubleshoot if something goes wrong and helps kids engage with the activity at a deeper level than just following steps.
The base of homemade window clings is PVA glue mixed with food coloring, poured into shapes and allowed to dry into a flexible plastic film. As PVA glue dries, it forms a thin, flexible polymer film that retains some electrostatic charge, which is what allows it to cling to smooth glass surfaces without any added adhesive.
The film needs to be thick enough to stay flexible and peel cleanly from the mold, but not so thick that it takes forever to dry or loses its translucency. The right consistency is thinner than straight glue from the bottle but thicker than heavily watered-down glue, which is why the specific recipe ratio matters here more than in some other craft recipes.
Temperature and humidity affect drying time significantly. A warm, dry room produces clings in four to six hours. A cool, humid room may take up to twenty-four hours. Never rush the drying with a hair dryer or oven since heat causes the glue film to bubble and warp rather than drying flat.
What You’ll Need
- White PVA school glue or clear PVA glue (both work but produce different visual results)
- Gel food coloring in multiple colors
- Water
- Plastic page protectors or a silicone baking mat (the non-stick drying surface)
- Permanent marker or a black fine-tip marker
- Printed or hand-drawn templates
- Squeeze bottles or small piping bags (for fine control during pouring)
- Scissors
- A flat, level surface for drying
White Glue vs. Clear Glue for Window Clings
This is worth choosing deliberately since the two options produce noticeably different visual results.
White PVA glue dries to a translucent but slightly cloudy result. Colors made with white glue look more like stained glass with a slightly opaque quality, softer and more muted than the deeply saturated colors of commercial clings. This version is slightly easier to work with since white glue is thicker and flows more predictably than clear glue.
Clear PVA glue dries to a more genuinely transparent result that lets more light through, producing more vivid, jewel-toned colors that look closer to commercial stained glass window clings. The tradeoff is that clear glue is runnier and spreads more easily during pouring, which requires more careful application.
For a first attempt, white glue is the more forgiving option. For the most visually impressive result once the technique is comfortable, clear glue is worth trying.
Preparing the Glue Mixture
The recipe ratio is two parts glue to one part water, which thins the glue enough to flow easily into shapes but keeps it thick enough to build up a film with sufficient body to peel cleanly.
- Pour two tablespoons of glue into a small bowl or cup for each color you’re making.
- Add one tablespoon of water and stir thoroughly until fully combined with no streaks of unincorporated water.
- Add gel food coloring and stir until the color is fully and evenly distributed. Gel coloring produces much more vivid results in dried glue films than liquid food coloring since the concentration is higher and the extra liquid from liquid coloring can affect the drying ratio.
- Transfer the colored mixture into a squeeze bottle or small piping bag for controlled pouring. Small condiment squeeze bottles available at dollar stores work perfectly and make the application significantly more precise than pouring directly from a cup.
- Repeat for each color you’re using.
Preparing the Templates
The template is what gives the window cling its shape, placed underneath the transparent page protector as a guide for pouring.
- Find or draw simple outline templates for the shapes you want to make. Simple, bold outlines with clear interior areas work much better than designs with thin, delicate lines that are hard to fill precisely. Good beginner shapes include: suns, stars, hearts, simple flowers, fish, butterflies, simple animals, and geometric shapes.
- Print or draw the templates on white paper, making the outlines bold and dark since they need to show through the page protector during the pouring stage.
- Place the template flat on a level surface.
- Place the plastic page protector or silicone mat directly on top of the template, smoothing out any air bubbles so it lies flat against the template underneath.
- The outlines of the template should be clearly visible through the transparent page protector from above.
How to Make the Window Clings
Outlining With Black Glue
The outline step creates the defined borders that separate colors in the finished cling, similar to the lead lines in stained glass. This is optional but produces a significantly more polished, defined result than filling colors in without any outline.
- Mix a small amount of glue and water in the standard 2:1 ratio and add a generous amount of black gel food coloring, significantly more than for regular colors, since the outline needs to be opaque rather than translucent to read clearly as a border.
- Transfer to a squeeze bottle with a fine tip.
- Trace the outline of each template design directly onto the page protector surface, following the lines visible through the clear plastic from below.
- Allow the black outline to dry for at least thirty minutes before filling in colors, since adding colors while the outline is still wet blurs the border between outline and fill.
Filling in Colors
- Once the outlines are dry or if skipping the outline step, fill in each section of the design with the corresponding color using the squeeze bottle.
- Work from the center of each color section outward toward the border, since filling from the edges in tends to push the outline line out of position on still-wet outline glue.
- Fill each section to a consistent thickness, approximately two to three millimeters deep, since sections that are too thin become fragile and tear easily when peeling, and sections that are too thick take significantly longer to dry.
- Keep the application level and smooth by working slowly, since rushing causes uneven thickness and air bubbles that create thin spots in the finished film.
- For areas where two colors meet without an outline border between them, pour one color and allow it to begin setting (approximately thirty minutes) before adding the adjacent color, since touching wet-to-wet causes the colors to bleed into each other.
Adding Details
- After the base color fills are complete, additional detail colors can be added on top of the partially dried base layer, such as dots, stripes, or small accent shapes within a larger filled area.
- Use the finest squeeze bottle tip available for detail work, or use a toothpick to draw detail lines through the wet glue.
- Glitter can be sprinkled onto wet glue fills before they dry for a sparkly window cling that catches light particularly well when displayed in a window.
Drying
- Move the template and page protector to a completely flat, level surface where it won’t be disturbed.
- Leave completely undisturbed for a minimum of four to six hours in a warm, dry room. Overnight drying is always preferable and produces cleaner, more complete films.
- Do not touch, tilt, or move during drying since any disturbance causes the wet glue to shift and create uneven thickness.
- The clings are fully dry when the surface feels completely firm and dry to the touch with no tacky areas remaining. Any remaining tackiness means the cling needs more drying time and will tear during peeling if removed too soon.
Peeling and Using
- Once completely dry, gently peel one corner of the cling away from the page protector using a fingernail or the edge of a butter knife.
- Peel slowly and steadily rather than pulling quickly, since fast peeling can tear thinner sections of the cling.
- If the cling resists peeling or tears, it may need additional drying time. Return to the drying surface and leave for another two to four hours before attempting to peel again.
- Press the peeled cling firmly onto a clean, dry glass window, pressing from the center outward to push out any air bubbles.
- To reposition, peel from a corner and re-stick to the new location.
Design Ideas for DIY Window Clings
Seasonal Designs
Window clings are particularly popular as seasonal decorations since they can be changed easily without any adhesive or damage to the window. Making seasonal sets throughout the year keeps the activity returning as a regular craft.
Spring designs include flowers, butterflies, bees, ladybugs, and rainbows. Summer themes suit suns, ice cream cones, beach balls, and tropical fish. Fall works well with leaves in orange and red, pumpkins, and simple harvest designs. Winter and holiday themes produce some of the most striking window clings, since snowflakes and Christmas designs look particularly beautiful when backlit by winter sunlight.
Rainbow Suncatcher Clings
These produce the most stunning results when hung in a south or west-facing window that gets direct sunlight since the translucent colored film scatters light across the room in colored patches similar to a crystal suncatcher.
Fill a large circle or free-form shape with horizontal stripes of rainbow colors in order, allowing each stripe to begin setting before adding the next to prevent color bleeding. The finished rainbow cling in a sunny window creates a genuinely beautiful light effect.
Alphabet and Number Clings
Individual letter and number clings made from simple block letter templates have educational value alongside their decorative appeal, since kids can arrange and rearrange letters on a window to spell words. Use a bold, block font for the template since thin serif fonts don’t have enough fill area for the glue to create a strong enough film.
Stained Glass Window Style
Use the black outline method extensively for this version, creating complex geometric or floral designs divided into many separate colored sections by black borders. The result genuinely resembles a miniature stained glass window and is the most impressive display option of any window cling design.
Personalized Name Clings
Spelling a child’s name in individual letter clings and displaying them on a bedroom window is a popular personalized version that also makes a meaningful handmade gift.
Tips for the Best Results
- Level surface during drying is non-negotiable. The glue flows to the lowest point of any surface it’s on, so even a slight tilt produces clings that are thick at one edge and paper-thin at the other. Use a spirit level to check the drying surface before laying clings down.
- Thicker is more durable. A slightly thicker pour takes longer to dry but produces a cling that peels more cleanly and survives more peel-and-restick cycles without tearing. Aim for layers that feel slightly raised when touched through the page protector.
- Let outlines dry before filling colors. Rushing this step by adding color fills while the outline is still wet is the main cause of bleeding and undefined borders in the finished cling.
- Use gel food coloring exclusively. Liquid food coloring adds extra water that affects the drying ratio and produces paler, less vivid colors in the finished film. Gel coloring is more concentrated and doesn’t change the liquid ratio significantly.
- Clean windows produce better cling. Dust, fingerprints, and residue on window glass significantly reduce how well static cling works. Cleaning the window with glass cleaner before applying clings produces noticeably better adhesion.
- Store flat between uses. Folding or crumpling stored window clings causes permanent creases that are visible when the cling is applied to the window. Store them flat between sheets of parchment paper or in a plastic page protector.
Troubleshooting Beyond the Table
Clings That Won’t Stick to Windows
This is usually caused by one of three things: the window surface is dirty or has residue from previous adhesives, the room is very dry which reduces the static charge, or the cling dried unevenly and has a warped surface that prevents full contact with the glass.
Clean the window thoroughly with glass cleaner, ensure the cling is completely flat with no curled edges, and press firmly from center to edges when applying. In very dry environments, breathing lightly on the cling surface immediately before applying creates a very thin moisture layer that temporarily enhances the cling effect.
Clings That Fall Off Frequently
Static cling is affected by environmental conditions including humidity, temperature, and sunlight exposure. Clings in humid rooms fall off more easily than in dry ones. Direct sunlight hitting the window can warm it enough to reduce the static charge temporarily.
Clings that fall off frequently are best repositioned in shadier window locations or in rooms with lower ambient humidity.
Quick Fixes for Common Problems
| Problem | Potential Solution | Alternative Approach |
|---|---|---|
| Cling tore while peeling | It wasn’t fully dry—return to the drying surface for several more hours before trying again | Peel more slowly from the corner and support the cling from below as it releases |
| Colors bled into each other | Allow each color to partially set for 30 minutes before adding adjacent colors | Use the black outline border method to create physical separation between colors |
| Cling is too thin and fragile | Pour a thicker layer next time, building up two passes if needed | After peeling, apply a second thin coat of glue on the back surface and allow to dry again to add thickness |
| Air bubbles visible in finished cling | Work more slowly during pouring, moving the squeeze bottle tip gradually to avoid trapping air | Pop any visible bubbles immediately after pouring using a toothpick |
| Colors look pale and washed out | Switch from liquid food coloring to gel coloring | Add significantly more gel coloring to the next batch |
| Cling won’t peel off page protector | Leave to dry longer—any remaining tackiness means incomplete drying | Silicone mats release more easily than page protectors if peeling is consistently difficult |
| Cling keeps falling off the window | Clean window thoroughly with glass cleaner before applying | Apply in a lower-humidity room or on a cold-pane window where static cling is stronger |
FAQ
How long do DIY window clings last?
Properly dried and carefully handled, homemade window clings last several weeks to a few months before the film begins to lose flexibility and the static cling reduces. They don’t last as long as commercial clings since they lack the industrial-grade plasticizers used in manufactured versions, but they’re easily remade since the material cost is minimal.
Can I make window clings on a silicone mat instead of a page protector?
Yes, and silicone mats actually release the dried clings more easily than plastic page protectors in most cases. The tradeoff is that templates placed underneath a silicone mat are harder to see through the opaque surface, so either trace the template directly onto the mat with a washable marker beforehand or use a clear silicone mat if available.
What happens if the cling gets wet?
PVA glue is water-soluble, which means wet window clings can soften and lose their shape if exposed to significant moisture. For interior window applications this isn’t usually an issue, but homemade window clings should not be used on exterior windows or in very humid bathroom or kitchen environments where condensation regularly forms on the glass.
Can older kids design their own patterns?
Absolutely, and this is one of the most engaging parts of the activity for older children. Graph paper design works well for planning window cling shapes since the grid helps with proportion. Digital drawing apps on a tablet or phone can also be used to design and then print templates.
Is there a way to make the clings peel off more easily for younger kids?
Leaving the edges of each cling slightly thicker than the center creates a natural tab that’s easier for small fingers to grab. You can also intentionally leave a small unfilled tab at the corner of each cling specifically for peeling, which eliminates the frustration of trying to find the edge to begin peeling.
Conclusion
DIY window clings work because the making and the using are both genuinely satisfying parts of the activity. The squeeze bottle pouring, the watching of colors set and transform into flexible film, and the peeling and sticking that follows all deliver in different ways. Get the level surface right, use gel food coloring, let everything dry fully before peeling, and the result is a set of custom window decorations that kids want to make again in every new season and holiday. The no-mess reputation is genuinely earned as long as the squeeze bottles are used rather than free-pouring from cups.
Enjoyed this project? Get even more DIY ideas that save (and make) you money.
Join our free newsletter for profitable DIY projects, clever cleaning hacks, home ideas, and creative crafts delivered straight to your inbox.
✓ Free forever • No spam • Unsubscribe anytime




