
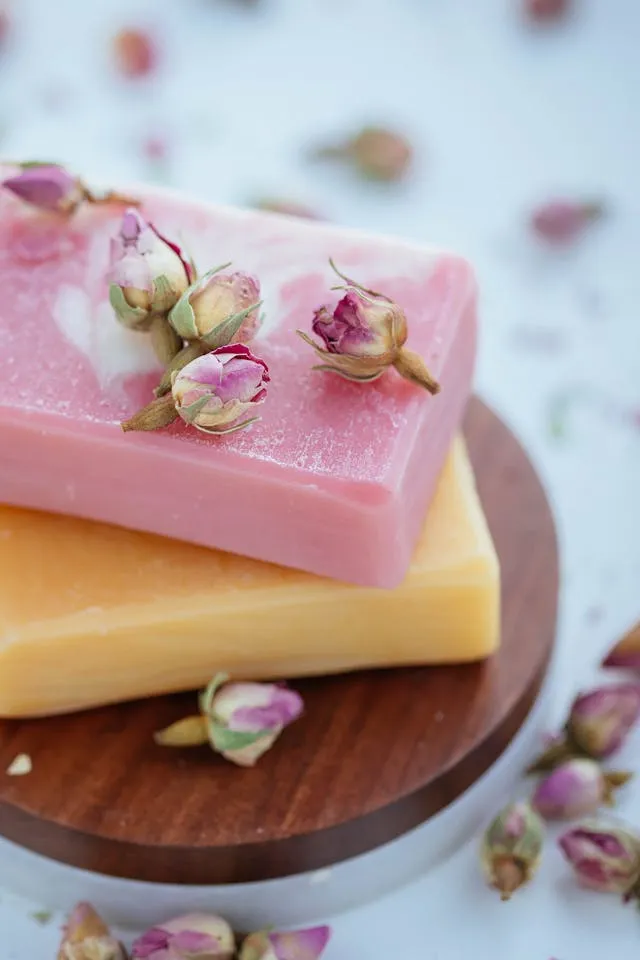
Glycerin soap’s translucent, clear, jewel-like appearance makes it look almost too good to use. It’s genuinely moisturizing, because glycerin is a humectant that draws moisture from the air to the skin. And it’s one of the most forgiving soap-making projects a beginner can start with, because the melt-and-pour method requires no lye handling, no complicated temperature management, and no weeks-long cure time.
But there’s more than one way to make glycerin soap, and the method you choose determines everything about the process, the ingredients, and the final bar. This guide covers both approaches—the straightforward melt-and-pour method using a premade glycerin soap base, and how to make a glycerin soap base from scratch using the hot process method for those who want full control over every ingredient.
Both produce real, skin-nourishing glycerin soap. The difference is complexity, time, and how much customization you want.
This short video explains how to make glycerin soap:
The Difference Between Glycerin Soap Types
Before buying materials or starting the process, it helps to understand exactly what kind of glycerin soap you’re making:
Clear melt-and-pour glycerin base: A premade, fully saponified soap base that contains added glycerin, alcohol, and sugar to create its transparency. You melt it, customize it, and pour it. No lye involved. The glycerin content is already built in. This is the most accessible starting point for beginners.
Opaque glycerin-enriched melt-and-pour base: Similar to clear base but with added oils or titanium dioxide that make it opaque white. Still contains glycerin. Easier to work with for certain colorants that don’t show well in clear base.
Homemade glycerin soap base (hot process method): You make the soap from scratch using oils, lye, and water, then add glycerin, alcohol, and sugar after saponification to create the clear base. Full control over every ingredient. Requires lye handling. Produces a base comparable in quality to commercial melt-and-pour bases.
Glycerin-enriched cold process soap: Standard cold process soap with extra glycerin added at trace. This produces an opaque bar—not the clear translucent kind—but with enhanced moisturizing properties. A good option for soapmakers who already know cold process and want to boost glycerin content without making a full clear base.
Stop Doing This When Making Glycerin Soap
Overheating the melt-and-pour base. This is the most common beginner mistake and it degrades the base quality noticeably. Overheated glycerin base develops a skin on top, loses fragrance more quickly, and produces a finished bar with an uneven, pitted surface. Always melt slowly at low heat—30-second microwave intervals at 50% power, or a double boiler over barely simmering water.
Adding water-based liquids to melted base. Water is the enemy of melt-and-pour soap. Adding aloe vera juice, floral waters, or other water-based additives causes the soap to seize, become cloudy, or develop mold during storage. Stick to oil-based additives, cosmetic-grade colorants, and fragrance or essential oils that are compatible with soap base.
Using too much fragrance oil. More fragrance does not mean better-smelling soap. Fragrance oils above the recommended usage rate—typically one ounce per pound of base—cause glycerin soap to sweat excessively, become soft, or develop a sticky surface. Follow the fragrance supplier’s recommended usage rate for melt-and-pour specifically, as it differs from cold process rates.
Pouring at too high a temperature. Pouring melted base that’s too hot into molds causes several problems: fragrance burns off before the soap sets, colorants shift or bleed, and delicate additives like dried flowers or botanicals scorch or sink to the bottom unevenly. Let the melted base cool to around 120–130°F before pouring.
Skipping the alcohol spritz between layers. If you’re making layered glycerin soap—pouring one color, letting it set, then pouring another—you must spritz the surface of the set layer with rubbing alcohol before pouring the next layer. Without this step, the layers don’t bond and will separate cleanly when the bar is cut or used.
Not wrapping finished bars. Glycerin is hygroscopic—it actively pulls moisture from the surrounding air. An unwrapped glycerin soap bar left in a humid environment will develop condensation on the surface (called “glycerin dew” or sweating) within hours. Wrap finished bars in plastic wrap or shrink wrap immediately after unmolding to keep them looking clean and clear.
What You’ll Need
For melt-and-pour glycerin soap:
- Clear or white glycerin melt-and-pour soap base — available from craft stores, Brambleberry, Bulk Apothecary, or online suppliers
- Microwave-safe glass measuring cup or double boiler setup
- Soap molds — silicone molds work best; individual cavity molds or loaf molds both work
- Fragrance or essential oils — cosmetic grade only
- Colorants — cosmetic-grade mica powders, liquid soap colorants, or skin-safe dyes
- Rubbing alcohol in a spray bottle — for surface bubbles and layer bonding
- Kitchen thermometer
- Silicone spatula
- Sharp knife for cutting the base into chunks
- Plastic wrap for wrapping finished bars
Optional add-ins:
- Cosmetic-grade glitter or shimmer
- Dried botanicals (lavender buds, rose petals, calendula)
- Honey (a small amount — no more than one teaspoon per pound of base)
- Oatmeal (finely ground)
- Activated charcoal
- Kaolin clay
For homemade glycerin soap base (hot process method):
- Digital kitchen scale — weight measurements only; volume is not accurate enough
- Safety goggles and gloves
- Sodium hydroxide (lye)
- Distilled water
- Oils — coconut oil, castor oil, and a liquid oil like sunflower or canola (recipe below)
- Vegetable glycerin — available at pharmacies or soap suppliers
- High-proof alcohol — isopropyl alcohol (91% or higher) or high-proof grain alcohol like Everclear
- Sugar or sorbitol — contributes to transparency and lather
- Slow cooker or double boiler
- Stick blender
- Stainless steel or heavy-duty plastic containers — no aluminum
- Soap mold
Step-by-Step: How to Make Glycerin Soap with Melt-and-Pour Base
Step 1: Cut the soap base into small, even cubes. Work on a clean, dry cutting board. Cut the base into roughly one-inch pieces—smaller pieces melt more evenly and reduce the risk of hot spots that overheat sections of the base while others are still solid. Dry hands and dry tools are important here; any water introduced at this stage affects the finished soap.
Step 2: Melt the base slowly using a microwave or double boiler. For microwave melting, place the cut base in a microwave-safe glass measuring cup and heat at 50% power in 30-second intervals, stirring between each interval. Stop heating as soon as the last solid pieces melt—residual heat in the liquid base will melt them without additional microwave time. For double boiler melting, place the base pieces in a heat-safe bowl over a pot of barely simmering water, stirring occasionally until fully melted.
Step 3: Check the temperature. Insert a kitchen thermometer into the melted base. You want it between 120–140°F before adding any extras. Above 150°F, fragrance burns off and colorants behave unpredictably. Below 120°F, the base may be starting to set and won’t incorporate additives evenly.
Step 4: Add colorant first. At 120–140°F, add your colorant and stir thoroughly until completely dispersed. For mica powders, mix the mica with a few drops of lightweight oil (like fractionated coconut oil) to form a paste before adding to the melted base—this prevents clumping and produces more even color distribution. Liquid soap colorants can be added directly. Start with less than you think you need—colors appear more intense in the melted base than in the finished bar.
Step 5: Add fragrance or essential oils and stir gently. Add fragrance at the manufacturer’s recommended rate—typically around one ounce per pound of base. Stir slowly and gently rather than vigorously to avoid creating air bubbles in the base. Some fragrance oils cause glycerin base to accelerate (thicken quickly) or seize—if this happens, work quickly and pour immediately.
Step 6: Add any skin-nourishing extras. If you’re adding honey, finely ground oatmeal, activated charcoal, or other additives, stir them in now. Keep liquid additives minimal—no more than one teaspoon per pound of base—to avoid affecting the soap’s ability to set properly.
Step 7: Let the base cool slightly before pouring. Allow the temperature to drop to around 120°F if it’s higher than that. This gives a longer working time, reduces fragrance loss, and produces a cleaner pour with fewer surface bubbles.
Step 8: Pour into molds in a slow, steady stream. Pour from a low height—just above the mold cavity—to minimize air incorporation. Fill each cavity fully and evenly. Tap the mold gently on the counter a few times to release any trapped air bubbles.
Step 9: Spritz the surface immediately with rubbing alcohol. As soon as the soap is poured, spritz the surface lightly with 91% or higher isopropyl alcohol. This pops surface bubbles and leaves a smooth, professional finish. Don’t oversaturate—a light mist is all that’s needed.
Step 10: Allow to set at room temperature. Glycerin melt-and-pour soap sets within 30 minutes to two hours at room temperature depending on the mold size and ambient temperature. Do not put it in the freezer—the rapid temperature change causes condensation inside the soap that creates a frosty, cloudy appearance. The refrigerator is acceptable for speeding setting time but isn’t necessary.
Step 11: Unmold and wrap immediately. Once fully set and firm to the touch, unmold the soap. Silicone molds release cleanly with gentle pressure. Wrap each bar in plastic wrap or shrink wrap immediately after unmolding—glycerin soap left unwrapped will begin to sweat within hours in most indoor environments, and the condensation collects dust and diminishes the clear appearance.
How to Make Glycerin Soap Base from Scratch (Hot Process Method)
Making your own glycerin soap base gives you complete control over the oil blend and ingredient quality. The process produces a base equivalent to commercial melt-and-pour base that can be used immediately or stored for future projects.
Base Recipe (produces approximately 2 lbs of soap base)
Oils:
- 7 oz (198g) coconut oil — contributes hardness and lather
- 3 oz (85g) castor oil — contributes lather and humectancy
- 6 oz (170g) sunflower or canola oil — contributes conditioning
Lye solution:
- 2.3 oz (65g) sodium hydroxide — verify with a lye calculator before use
- 3 oz (85g) distilled water
Transparency additives (added after saponification):
- 3 oz (85g) vegetable glycerin
- 3 oz (85g) high-proof alcohol (91% isopropyl or grain alcohol)
- 2 oz (57g) sugar dissolved in 2 oz (57g) water (sugar water solution)
Step 1: Prepare your lye solution. Wearing goggles and gloves, slowly add the measured sodium hydroxide to the distilled water in a heat-safe container, stirring until fully dissolved. Never add water to lye—always lye to water. The solution will heat significantly. Set aside to cool to 100–110°F.
Step 2: Melt and combine your oils. Melt the coconut oil gently if solid, then combine with the castor oil and liquid oil in your slow cooker on low heat. Allow to reach 100–110°F—similar temperature to the lye solution.
Step 3: Add the lye solution to the oils and blend to trace. Pour the cooled lye solution into the oils, not the other way around. Use a stick blender to mix in short bursts, alternating with hand stirring, until the mixture reaches trace—a pudding-like consistency where a drizzle from the blender leaves a trail on the surface before sinking.
Step 4: Cook the soap in the slow cooker until saponification is complete. Cover the slow cooker and cook on low heat, checking and stirring every 30 minutes. The soap will go through several stages—it will expand and look waxy, then become translucent and gel-like around the edges, then become uniformly translucent throughout. This full cook typically takes two to three hours. The soap is ready when a small amount dissolved in water produces a clear solution with no milky cloudiness—this is called the zap test alternative. The pH should be around 8–9 at this stage.
Step 5: Add the glycerin and alcohol. Once saponification is complete, add the vegetable glycerin and stir thoroughly to incorporate. Then add the alcohol slowly while stirring—the alcohol helps dissolve the soap mass and begins creating the transparent structure. The mixture will become noticeably more fluid and begin to clarify as the alcohol incorporates.
Step 6: Add the sugar water solution. Dissolve the sugar completely in the hot water before adding to the soap mixture. Stir in slowly. The sugar solution contributes further to transparency and enhances lather. The base should become increasingly clear and fluid at this stage.
Step 7: Maintain heat and stir until fully clear. Keep the slow cooker on low and continue stirring until the base is uniformly transparent with no cloudy streaks or opaque areas. This can take 30 minutes to an hour after the transparency additives are incorporated. If cloudy areas persist, a small additional amount of alcohol helps clarify them.
Step 8: Pour the base into a mold or storage container. Pour the clear base into a silicone loaf mold or a heat-safe container for storage. Allow to cool and set at room temperature. Once fully set, the base can be cut into chunks for immediate use or stored in an airtight container for future use.
Step 9: Use the base exactly as you would commercial melt-and-pour base. To use, cut off the amount needed, melt slowly, add colorants and fragrance, pour into molds, and finish as described in the melt-and-pour method above.
You’re Probably Doing This Wrong: Colorants in Clear Base
Clear glycerin base is beautiful precisely because of its transparency—and that transparency makes colorant behavior very different from opaque soap bases. Colors that look subtle and elegant in clear base when melted often look much darker and more intense in the finished bar once set. Colors that look too light when melted are usually just right once set.
The other common issue is using colorants that aren’t truly soap-safe. Some cosmetic colorants that work fine in lotions or bath bombs bleed, migrate, or change color in soap. Mica powders formulated specifically for soap, liquid soap dyes, and lab-certified colorants from soap suppliers are the reliable choices. Craft store acrylic paints, food coloring gels, and candle dyes all produce unpredictable results in glycerin soap base and are not recommended.
Embed Designs: Taking Glycerin Soap Further
One of the most distinctive things you can do with clear glycerin base that isn’t possible with opaque soaps is embed objects inside the bar—creating a soap with a visible design suspended in the clear base.
Basic embed technique: Make small soap shapes in opaque or colored base first and allow them to set completely. Then pour a layer of clear base into a larger mold, let it partially set until a thin skin forms on top (about five to ten minutes), spritz with alcohol, place the embed shapes on the partially set layer, spritz again, and pour the remaining clear base over the top. The embeds are suspended in the clear base and visible from the outside of the finished bar.
This technique works for decorative shapes, letters, numbers, small toys encased in a thin soap layer, and layered designs. The alcohol spritz between every layer is critical—without it, the layers separate.
Quick Reference: Melt-and-Pour Base Comparison
| Base Type | Transparency | Best For | Colorant Behavior |
|---|---|---|---|
| Clear glycerin base | Fully transparent | Jewel tones, embeds, layered designs | Colors appear deeper than in liquid state |
| White glycerin base | Opaque white | Pastel colors, matte finish bars | Colors appear lighter than in liquid state |
| Shea butter base | Opaque cream | Sensitive skin, extra moisturizing | Similar to white base |
| Goats milk base | Opaque off-white | Skin-nourishing, rustic appearance | Similar to white base |
| Hemp seed base | Semi-translucent | Natural, earthy aesthetic | Slight green tint affects color results |
How Is Glycerin Soap Different From Regular Soap?
All soap contains glycerin. When oils and lye undergo saponification—the chemical reaction that produces soap—glycerin is a natural byproduct. The difference is what happens to that glycerin afterward.
In commercial soap manufacturing, most of the naturally produced glycerin is extracted from the soap and sold separately to cosmetic companies. What’s left is a harder, less moisturizing bar. This is why many commercial soaps leave skin feeling dry—the moisturizing component has been removed.
In handmade cold process and hot process soap, the glycerin stays in the bar. This is one of the main reasons handmade soap feels so different on skin compared to commercial bars.
Glycerin soap—specifically the clear, translucent kind—takes this further by adding extra glycerin beyond what saponification naturally produces, along with alcohol and sugar, which create the transparent structure and enhance the humectant properties. The result is a bar that’s noticeably more moisturizing and visually distinct from opaque handmade soaps.
FAQs
Is glycerin soap good for all skin types? Glycerin soap is generally well-tolerated by most skin types, including sensitive and dry skin, because of its humectant properties and typically mild formulation. People with very oily skin sometimes find pure glycerin soap too moisturizing. As with any new skin product, a patch test on a small area before full use is sensible.
Why is my clear glycerin soap cloudy after setting? Cloudiness in set glycerin soap usually comes from one of three causes: water introduced during the melt-and-pour process (even from steam condensation), the soap cooling too quickly, or fragrance or essential oils that cause ricing or acceleration in the base. Some essential oils—particularly those high in eugenol like clove and cinnamon—reliably cloud clear base. Check your fragrance supplier’s soap compatibility notes before using any essential oil in clear base.
How long does homemade glycerin soap last? Well-formulated glycerin soap kept wrapped in a cool, dry place typically lasts 12 to 24 months. The main enemies of glycerin soap shelf life are humidity (which causes sweating and eventual stickiness) and oils in the formula going rancid. Bars made with oils high in unsaturated fatty acids—like sunflower or hemp seed oil—have shorter shelf lives than those made primarily with coconut oil.
Can I add fresh ingredients like fruit or milk to glycerin base? Fresh ingredients—fruit purees, fresh juices, fresh milk—introduce bacteria and significantly shorten shelf life, sometimes causing mold within weeks. If you want the skin benefits of ingredients like oat milk or honey, use cosmetic-grade versions specifically formulated for soap rather than fresh kitchen ingredients. Powdered versions (oat powder, powdered milk, powdered goats milk) are stable alternatives that work well in melt-and-pour base.
What’s the difference between vegetable glycerin and regular glycerin? Vegetable glycerin is derived from plant oils—typically palm, coconut, or soy—through a hydrolysis process. Regular or synthetic glycerin can be petroleum-derived. For cosmetic soap making, vegetable glycerin is the standard choice and is what most soap suppliers sell when they list glycerin without qualification. If sourcing matters to you, confirm the origin with your supplier.
Can I use glycerin soap base for shampoo bars? Clear glycerin base can be used as a starting point for shampoo bars, but standard melt-and-pour glycerin base isn’t ideally formulated for hair—it typically has a higher pH than hair prefers and lacks the conditioning agents that make a good shampoo bar. Specialty shampoo bar bases formulated specifically for hair are a better starting point if that’s your goal.
Conclusion
Glycerin soap rewards beginners because the melt-and-pour method is genuinely accessible—no lye, no cure time, and results that look professional within a few hours of starting. The clear base’s transparency is its signature, and getting the most out of it means understanding how colorants behave differently in clear versus opaque bases, keeping water out of the process, wrapping finished bars immediately, and not rushing the melting or pouring temperature. For those ready to go deeper, making the base from scratch using the hot process method produces a comparable result with full ingredient control—the extra complexity is real but manageable once you’re comfortable with basic soap chemistry. Either way, the finished bars are genuinely different from commercial soap in a way that’s immediately noticeable on skin.
Enjoyed this project? Get even more DIY ideas that save (and make) you money.
Join our free newsletter for profitable DIY projects, clever cleaning hacks, home ideas, and creative crafts delivered straight to your inbox.
✓ Free forever • No spam • Unsubscribe anytime




