
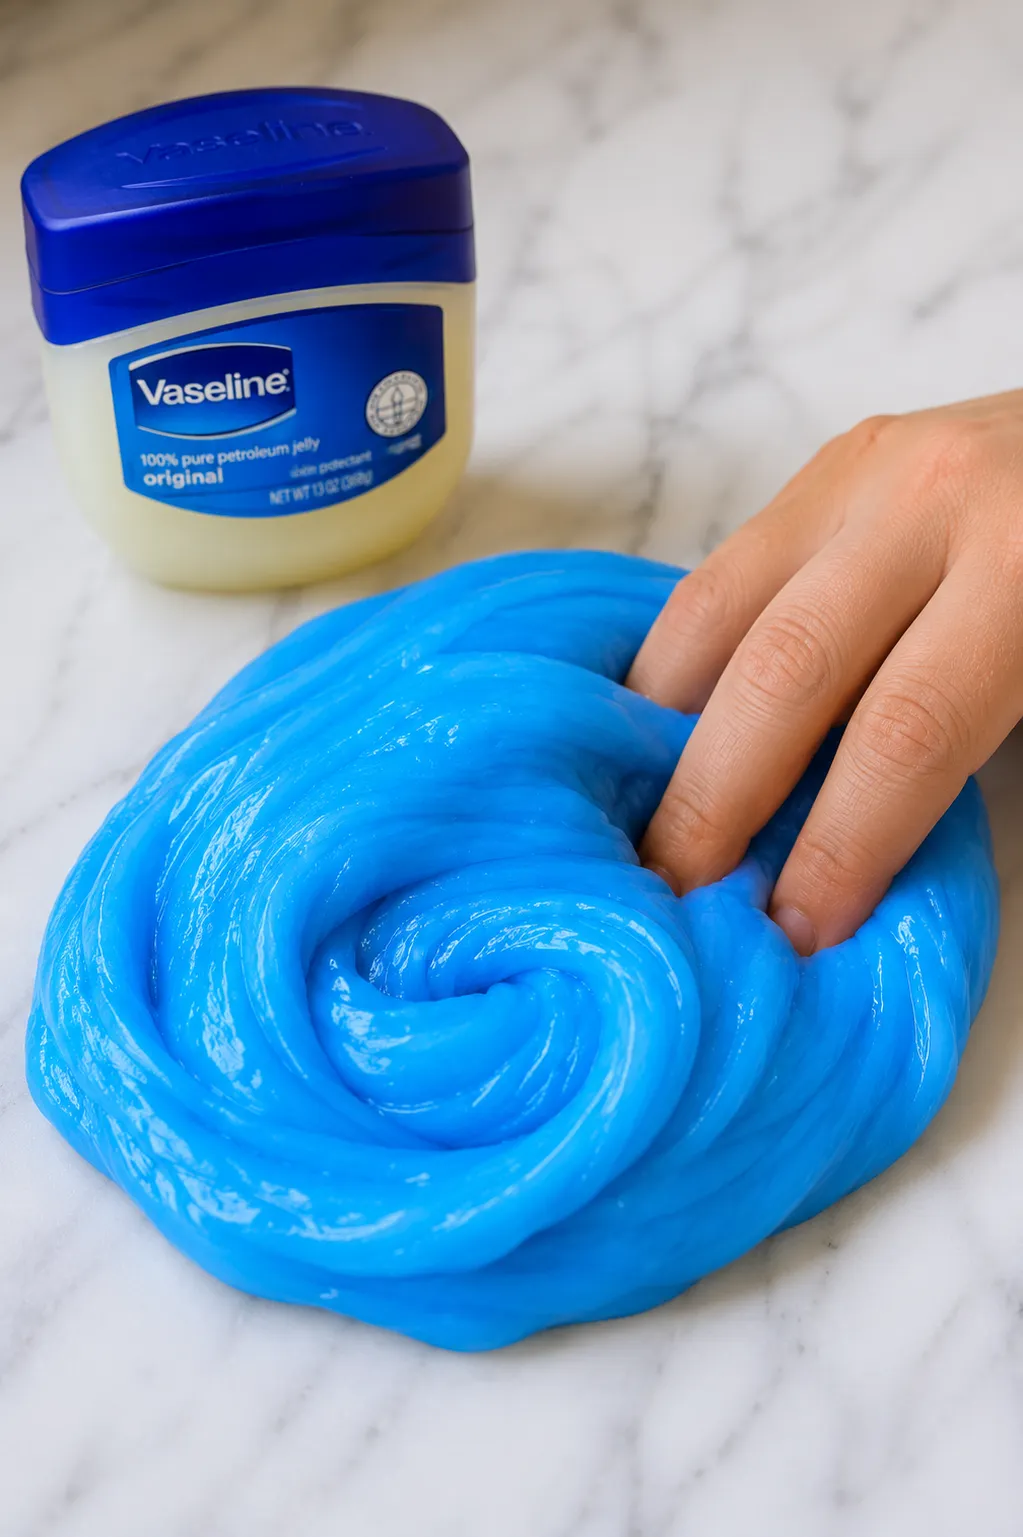
Most slime recipes use the same basic formula: glue, baking soda, and an activator. Vaseline slime takes that foundation and adds petroleum jelly into the mix in a way that genuinely changes the finished texture rather than just adding a different ingredient for the sake of it. The result is noticeably smoother and stretchier than standard slime, with a silky surface quality that most glue-only recipes don’t achieve.
It’s also one of the more skin-friendly standard slime recipes since Vaseline is a well-established skin protectant that actually conditions the hands during play rather than leaving them feeling dry or tight the way some slime batches can.
Here’s exactly how it works, what ratio of Vaseline to glue produces the best texture, and every variation worth trying once the basic version is mastered.
Why Vaseline Changes Slime Texture
Petroleum jelly acts as a plasticizer in the slime matrix, which means it makes the polymer network more flexible and less prone to tearing than the same slime made without it. A plasticizer doesn’t change the chemical structure of the slime, it just makes the existing structure more pliable, which is why Vaseline slime stretches longer without snapping and feels silkier against the skin than standard slime.
It also reduces the surface stickiness of the finished slime by providing a lubricating layer at the surface of the polymer network, which is why Vaseline slime typically requires slightly less activator than the equivalent standard batch to reach a non-sticky consistency.
The tradeoff is that too much Vaseline produces slime that’s too soft and doesn’t hold its shape well, and that the petroleum jelly can make some surfaces greasy if the slime is pressed against them for extended periods. Using the right ratio and knowing which surfaces to avoid during play manages both of these easily.
What You’ll Need
- 1 cup of white PVA school glue
- 1 tablespoon of Vaseline (petroleum jelly)
- 1 teaspoon of baking soda
- 1 to 2 tablespoons of contact lens solution containing boric acid
- Food coloring or liquid watercolors (optional)
- Glitter (optional)
- A large mixing bowl
- A spatula or spoon for mixing
- A microwave-safe bowl for warming the Vaseline if needed
- Airtight container for storage
Preparing the Vaseline
Vaseline straight from the jar is quite stiff and doesn’t incorporate into glue easily when cold. Taking thirty seconds to warm it slightly makes a significant difference to how smoothly it blends into the recipe.
Place one tablespoon of Vaseline in a small microwave-safe bowl and heat for ten to fifteen seconds until it softens to a liquid or near-liquid consistency. Alternatively, hold the jar under warm running water for a minute or work the Vaseline between your fingers for thirty seconds until it softens.
The goal is soft and easily spreadable but not fully liquid. Fully melted Vaseline that’s hot to the touch should be allowed to cool slightly before adding to the glue since very hot petroleum jelly can affect the glue’s ability to activate properly.
How to Make Slime With Vaseline
- Pour the white glue into a large mixing bowl.
- Add the softened Vaseline to the glue and stir thoroughly until fully combined. This takes more mixing than adding liquid ingredients since petroleum jelly is thicker, and a few minutes of vigorous stirring is needed to get it truly incorporated rather than just swirled through.
- Add food coloring or liquid watercolors if using and stir until evenly distributed through the glue and Vaseline mixture.
- Add glitter at this stage if using.
- Add the baking soda and stir thoroughly until no powder remains visible.
- Begin adding contact lens solution one teaspoon at a time, stirring continuously after each addition.
- Continue adding gradually, watching as the mixture starts pulling away from the bowl sides and coming together into a cohesive mass. Vaseline slime typically reaches the right consistency with slightly less activator than standard slime, so watch the texture carefully rather than adding a predetermined amount.
- Once the slime has mostly come together in the bowl, remove it and begin kneading with hands.
- The Vaseline will make itself immediately apparent during kneading since the slime feels noticeably silkier and smoother than standard slime from the first moment of contact.
- Knead for two to three minutes until fully smooth and non-sticky.
- If stickiness remains, add contact lens solution one drop at a time while kneading, stopping as soon as the stickiness resolves.
What Vaseline Slime Should Feel Like
A correctly made batch of Vaseline slime should:
- Stretch significantly longer than standard slime before snapping
- Feel silky and smooth rather than the slightly tacky surface of regular slime
- Have a slight sheen from the petroleum jelly visible on the surface
- Hold together well without tearing easily during gentle stretching
- Feel noticeably moisturizing rather than drying on skin contact
- Return slowly to its resting shape after stretching rather than snapping back quickly
If the slime feels greasy rather than silky, too much Vaseline was used. If the texture feels identical to standard slime with no apparent difference, the Vaseline wasn’t fully incorporated during mixing and should be kneaded more thoroughly.
Tips for Getting the Best Result
- Fully incorporate the Vaseline before adding any other ingredients. The most common reason Vaseline slime doesn’t have the right texture is incomplete mixing of the petroleum jelly into the glue at the start. Take extra time on this step since the Vaseline needs to be genuinely combined rather than just mixed through.
- Use slightly less activator than you would for standard slime. The Vaseline’s lubricating effect means the slime reaches non-stickiness with less activator, and going past that point over-activates faster than with standard slime.
- Warm the Vaseline before adding it. Cold petroleum jelly mixed into cold glue takes significantly longer to incorporate and often leaves visible streaks of unincorporated Vaseline in the finished slime.
- Stick to one tablespoon per cup of glue. More than one tablespoon produces a slime that’s too soft and greasy. Less than half a tablespoon produces a result indistinguishable from standard slime since the amount is too small to make a meaningful difference.
- Knead for longer than standard slime. The extra kneading time ensures the Vaseline is evenly distributed through the whole slime mass rather than concentrated in certain areas, which produces inconsistent texture if not addressed.
Vaseline Slime Variations
Clear Vaseline Slime
Use clear PVA glue instead of white for a translucent version that shows off the slime’s silky quality more visually than the opaque white version. Clear Vaseline slime has the same texture as the standard version but the transparency makes the stretching and movement of the slime much more visually interesting to watch.
Tint with a small amount of gel food coloring for a colored translucent version that combines the visual appeal of clear slime with the improved texture of the Vaseline addition.
Fluffy Vaseline Slime
Add half a cup of white shaving cream to the glue and Vaseline mixture before the baking soda and activator to produce a fluffy Vaseline slime that combines the light, airy texture of fluffy slime with the smooth, silky quality the Vaseline adds.
Fold the shaving cream in gently rather than stirring to preserve the foam structure, then follow the standard Vaseline slime recipe from the baking soda step onward.
Butter Vaseline Slime
Add a small amount of white model magic or air dry clay to the finished Vaseline slime during kneading for a butter slime version that benefits from the Vaseline’s plasticizing effect. Butter slime made with Vaseline has a noticeably smoother, more spreadable quality than standard butter slime and is particularly pleasant to handle for extended periods.
Scented Vaseline Slime
Add two to three drops of fragrance oil or essential oil to the glue and Vaseline mixture before activating. The Vaseline component helps carry and hold fragrance in the slime particularly well since petroleum jelly is itself used as a fragrance carrier in many cosmetic products. Lavender, vanilla, and coconut are all popular scent choices that complement the already skin-friendly nature of the recipe.
Glitter Vaseline Slime
Mix fine holographic or iridescent glitter into the glue and Vaseline mixture before activating. The Vaseline’s slight sheen combined with glitter creates a particularly luminous finished slime that catches light dramatically during stretching and folding. This version photographs exceptionally well and makes a popular gift slime.
Colored Vaseline Slime Set
Make three or four small batches in different colors using the same Vaseline recipe for each, then display them together in matching clear containers. The color variety combined with the consistent silky texture across each batch produces an impressive set that looks genuinely professional.
Vaseline Slime Without Glue
Some versions of Vaseline slime circulate online that use no glue at all, relying entirely on Vaseline, cornstarch, and sometimes dish soap to produce a slime-like material. These are worth knowing about since they represent a completely different approach to the recipe.
The Vaseline and Cornstarch Version
This glue-free version produces something closer to a moldable putty than true slime, with properties similar to cloud dough but with the added smoothness of the petroleum jelly. It doesn’t stretch or flow the way glue-based slime does, but it’s significantly more skin-friendly since it contains no activator ingredients at all.
What you’ll need:
- 2 tablespoons of Vaseline
- 4 tablespoons of cornstarch
- Food coloring (optional)
How to make it:
- Warm the Vaseline until soft and spreadable.
- Add cornstarch one tablespoon at a time, working it into the Vaseline thoroughly between additions.
- Continue adding cornstarch until the mixture forms a soft, moldable dough that holds its shape when pressed.
- Add food coloring during the mixing stage if using and knead until evenly distributed.
The finished material is smooth, soft, and feels similar to clay rather than slime. It’s best described as a very smooth, petroleum jelly-based putty rather than slime in the traditional sense, but it’s genuinely pleasant to handle and completely skin-safe.
The Vaseline, Dish Soap, and Cornstarch Version
Adding dish soap to the Vaseline and cornstarch combination produces something slightly more slime-like in texture, with a bit more flow and stretch than the two-ingredient version.
What you’ll need:
- 2 tablespoons of Vaseline
- 2 tablespoons of dish soap
- 3 to 4 tablespoons of cornstarch
How to make it:
- Combine the Vaseline and dish soap and mix until smooth.
- Add cornstarch gradually, working it in with a spoon initially and then kneading by hand once the mixture becomes stiff enough to handle.
- Continue adding cornstarch until the mixture reaches the desired consistency, somewhere between moldable putty and slow-flowing slime.
This version has a slightly more authentic slime texture than the two-ingredient version but doesn’t stretch as well as glue-based Vaseline slime.
Quick Fixes for Common Problems
| Problem | Potential Solution | Alternative Approach |
|---|---|---|
| Vaseline not fully incorporating into the glue | Warm the Vaseline more thoroughly before adding and stir more vigorously for longer | Use an electric hand mixer on low speed for thirty seconds to fully blend the petroleum jelly into the glue |
| Slime feels greasy rather than silky | Too much Vaseline was used—reduce to one tablespoon per cup of glue in the next batch | Knead a small amount of cornstarch through the finished slime to absorb some of the excess grease |
| Slime over-activated and turned rubbery quickly | Vaseline slime reaches non-stickiness with less activator than standard slime—add more slowly next time | Knead in a small amount of lotion and a few drops of fresh unactivated glue to soften an over-activated batch |
| No noticeable texture difference from standard slime | The Vaseline wasn’t fully incorporated—visible streaks of unmixed Vaseline in the slime indicate incomplete mixing | Knead more thoroughly for an additional two to three minutes and assess again, since the texture difference becomes apparent with full incorporation |
| Vaseline slime leaving greasy marks on surfaces | The Vaseline migrates slightly to slime surfaces during play—play on a silicone mat or plastic tray rather than directly on furniture or carpet | Wipe slime-contact surfaces with a small amount of dish soap and water immediately after play |
| Glue-free Vaseline cornstarch version too stiff | Add Vaseline one teaspoon at a time while kneading to soften | Add a tiny drop of water and work through carefully, since too much water makes this version sticky rather than smooth |
| Scent fading quickly from Vaseline slime | Add a few extra drops of fragrance oil and knead through to refresh | Store with a drop of fragrance oil placed on top of the slime surface before sealing the container |
How to Store Vaseline Slime
Vaseline slime follows the same basic storage rules as standard slime with one additional consideration: the petroleum jelly can make the container surface slightly greasy over time as it migrates toward the edges of the slime mass.
Store in a fully airtight plastic container or glass jar at room temperature. Plastic is preferable to fabric-lined containers since any Vaseline migration won’t damage or stain plastic the way it might fabric.
Properly stored Vaseline slime lasts approximately three to four weeks before significant texture changes. The Vaseline component means it’s slightly less prone to drying out than standard slime during the same storage period, since the petroleum jelly provides an ongoing moisture-retention effect.
If the slime feels slightly stiffer after storage, warming it briefly between the hands before kneading restores the silky texture faster than kneading from cold.
FAQ
Does Vaseline slime feel different enough from regular slime to be worth making separately?
Yes, noticeably so. The silkier surface, the longer stretch before snapping, and the skin-conditioning quality during play are all genuine differences that are apparent immediately on contact rather than being subtle. Anyone who plays with both versions back to back will be able to tell the difference without being told what changed.
Is Vaseline slime safe for children with sensitive skin?
Vaseline is one of the most widely recommended skin protectants for eczema and sensitive skin, so the addition of petroleum jelly makes this version gentler than standard slime rather than more irritating. The boric acid in the contact lens solution remains the ingredient most likely to cause issues for very sensitive skin, so the same precautions that apply to standard slime apply here as well.
Can I use a Vaseline alternative like another petroleum jelly brand?
Any petroleum jelly product works since they’re all essentially the same ingredient regardless of brand. Generic petroleum jelly from a pharmacy produces identical results to name-brand Vaseline at a fraction of the cost.
Why does my Vaseline slime look shiny when I stretch it?
The sheen during stretching comes from the petroleum jelly at the surface of the slime catching light as the polymer network extends. This is a feature of the recipe rather than a problem and is part of what makes Vaseline slime look distinctive during play.
Can I add foam beads or fishbowl beads to Vaseline slime?
Yes, either type of bead can be added using the same process as any other slime. Fishbowl beads in particular work very well with Vaseline slime since the silky slime base makes the hard beads’ surface feel even more dramatically different by contrast than they do in standard slime.
To Conclude
Vaseline slime earns its place as a worthwhile variation on the standard recipe because the difference in texture is genuine and immediately perceptible rather than marginal. The extra step of warming and thoroughly incorporating the petroleum jelly takes less than two minutes and produces a finished slime that stretches better, feels better on skin, and has a silky smoothness that most standard batches simply don’t achieve. Make it once with the right ratio and it becomes a regular part of the slime-making rotation rather than a one-time experiment.
Enjoyed this project? Get even more DIY ideas that save (and make) you money.
Join our free newsletter for profitable DIY projects, clever cleaning hacks, home ideas, and creative crafts delivered straight to your inbox.
✓ Free forever • No spam • Unsubscribe anytime




