
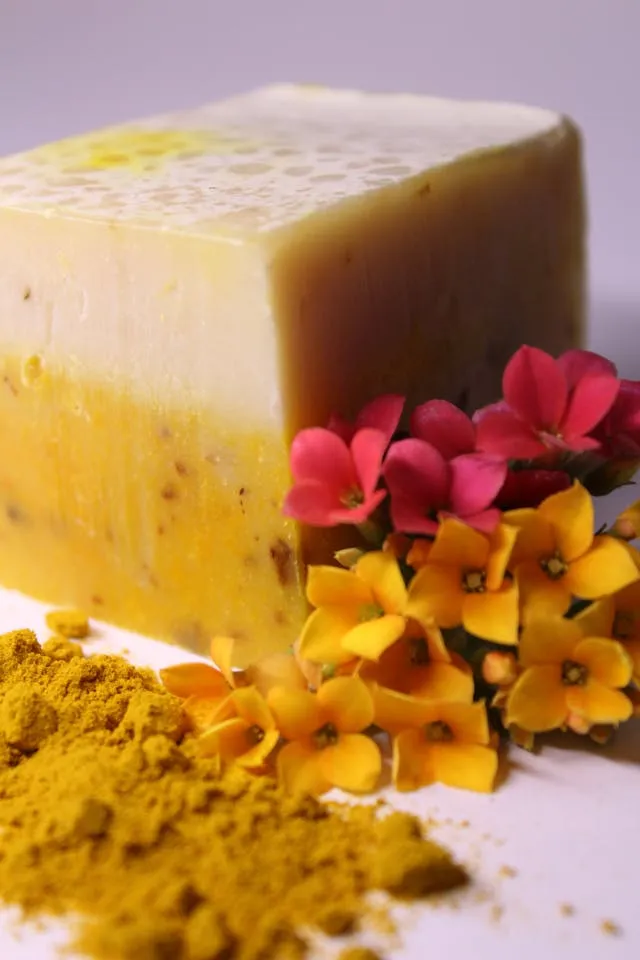
Turmeric has been used in skin care for thousands of years, and for good reason. Curcumin—the active compound that gives turmeric its bright yellow color—has well-documented anti-inflammatory and antioxidant properties. In soap, it works as a gentle brightening agent, helps even skin tone, and gives every bar that distinctive golden hue that looks incredible on a shelf.
The catch? Turmeric is a powerful pigment. It will stain your tools, your counter, and potentially your skin if you use too much. The good news is that at the right concentration in soap, it rinses off cleanly and leaves skin with a subtle glow rather than a yellow tint.
This guide covers six different turmeric soap recipes, from simple beginner-friendly melt and pour bases to more advanced cold process formulations—including a kojic acid version for hyperpigmentation, a lemon brightening bar, a honey moisturizing recipe, and a ginger variation that takes the whole formula up a notch.
What Turmeric Does in Soap
Before diving into the recipes, it helps to understand what you’re working with. Turmeric in soap serves a few purposes:
- Brightening: Curcumin inhibits melanin production, which over time can help fade dark spots and even out skin tone.
- Anti-inflammatory: It soothes irritated or acne-prone skin.
- Antioxidant: It helps protect skin cells from oxidative stress.
- Color: It gives soap a beautiful golden-yellow tone that ranges from pale champagne to deep amber depending on the amount used.
The typical usage rate for turmeric powder in soap is 1 teaspoon per pound of soap base for melt and pour, and 1–2 teaspoons per pound of oils for cold process. More than that and you risk staining the skin—or at minimum, bright yellow lather, which surprises people.
What You’ll Need (General Supplies)
Depending on which recipe you make, you’ll draw from this list:
- Turmeric powder (cosmetic or food grade)
- Melt and pour soap base (clear or white) or cold process oils
- Soap molds (silicone loaf or individual cavity molds)
- A digital kitchen scale
- Microwave-safe bowls or a double boiler
- Stick blender (for cold process)
- Thermometer
- Fragrance or essential oils
- Protective gloves and goggles (essential for cold process)
- Rubbing alcohol in a spray bottle (for melt and pour, to remove bubbles)
Dedicate separate tools to soap making—turmeric stains plastic and silicone permanently.
Recipe 1: Basic Turmeric Melt and Pour Soap Recipe
This is the best starting point for beginners. Melt and pour requires no lye handling, minimal equipment, and produces a beautiful bar in under an hour.
What you’ll need:
- 500g clear or white melt and pour soap base
- 1 tsp turmeric powder
- 1 tbsp sweet almond oil or jojoba oil (optional, for added moisture)
- 15–20 drops of essential oil (frankincense, lavender, or tea tree all work well with turmeric)
- Soap molds
Instructions:
- Cut your soap base into small, even chunks. Smaller pieces melt more evenly and prevent overheating. Place them in a microwave-safe bowl or the top of a double boiler.
- Melt the soap base gently. In the microwave, heat in 30-second intervals, stirring between each, until fully melted. In a double boiler, stir continuously over medium-low heat. Don’t let it boil—overheated melt and pour turns grainy and loses its clarity.
- Let it cool to around 130–140°F before adding anything. Adding turmeric to scorching hot soap can cause it to clump rather than disperse evenly.
- Mix the turmeric powder with the optional carrier oil first. Combining it with a small amount of liquid oil before adding it to the soap base prevents clumping and gives you a smoother, more evenly colored bar.
- Stir the turmeric mixture into the melted base thoroughly. Use a whisk or spoon and stir for at least a minute to fully incorporate.
- Add your essential oils and stir again. Add these last, just before pouring, to preserve the scent.
- Pour into molds. Work quickly—melt and pour sets fast. Spray the surface immediately with rubbing alcohol to pop any air bubbles.
- Allow to set for at least 2–4 hours at room temperature before unmolding. Avoid the refrigerator—it causes condensation on the surface.
Cure time: Melt and pour soap can technically be used immediately, but waiting 24 hours gives a harder, longer-lasting bar.
Recipe 2: Lemon Turmeric Soap Recipe
Lemon and turmeric are a classic brightening combination. Vitamin C from lemon supports the skin-evening effects of curcumin, and the citrus scent pairs beautifully with turmeric’s earthy warmth. This is a melt and pour recipe, making it accessible to all skill levels.
What you’ll need:
- 500g white melt and pour soap base (white base makes the yellow color pop more than clear)
- 1 tsp turmeric powder
- 1 tsp lemon zest powder or lemon peel powder (dried, not fresh—fresh zest introduces moisture and bacteria)
- 1 tbsp lemon-infused jojoba oil or plain jojoba oil
- 20 drops lemon essential oil
- 10 drops bergamot essential oil (optional, adds depth)
- Soap molds
Instructions:
- Melt the white soap base in 30-second microwave intervals, stirring between each, until fully liquid.
- Combine the turmeric powder and lemon zest powder with the jojoba oil in a small dish. Mix until it forms a smooth paste with no dry lumps.
- Cool the melted base to 140°F, then stir in the turmeric-lemon paste thoroughly.
- Add the essential oils and stir for another 30 seconds to distribute evenly.
- Pour into molds and spray the surface with rubbing alcohol immediately to remove bubbles.
- Allow to set fully at room temperature for 4–6 hours before unmolding.
Note on lemon essential oil: Lemon essential oil is photosensitive, meaning it can cause skin sensitivity in sunlight. If this soap will be used on the face or body in daytime, substitute lemon fragrance oil, which doesn’t carry the same photosensitivity risk.
Recipe 3: Turmeric and Honey Soap Recipe
Honey is one of the best ingredients you can add to soap. It’s a natural humectant—it draws moisture from the air into the skin—and it adds a subtle sweetness to the scent profile that works beautifully with turmeric. This recipe produces a warm, golden bar that’s deeply moisturizing and suitable for dry or sensitive skin.
What you’ll need:
- 500g clear melt and pour soap base
- 1 tsp turmeric powder
- 1 tbsp raw honey (raw honey retains more enzymes and nutrients than processed)
- 1 tbsp sweet almond oil
- 15 drops chamomile essential oil or vanilla fragrance oil
- 10 drops sandalwood essential oil (optional)
- Soap molds
Instructions:
- Melt the soap base using 30-second microwave intervals until fully liquid, stirring between each round.
- Warm the honey very slightly (5 seconds in the microwave) so it’s easier to stir in. Cold honey can cause streaking.
- Mix the turmeric with the sweet almond oil to form a smooth paste.
- Cool the melted base to 130–140°F, then add the turmeric paste and stir thoroughly.
- Add the warmed honey and stir gently but thoroughly. Honey can cause slight bubbling—this is normal.
- Add essential oils and give a final stir.
- Pour into molds and spray with rubbing alcohol to eliminate surface bubbles.
- Allow to set for 4–6 hours before unmolding.
Important: Honey lowers the melting point of melt and pour soap slightly, which means honey soaps can get soft in hot, humid environments. Store finished bars somewhere cool, or wrap them in shrink wrap to maintain firmness.
Recipe 4: Turmeric Ginger and Honey Soap Recipe
This is an upgraded version of the honey recipe above with the addition of ginger—which brings its own set of skin benefits. Ginger is a circulation booster and has antibacterial properties that make it particularly good for congested or acne-prone skin. Together, turmeric, ginger, and honey create a warming, therapeutic bar that smells incredible.
What you’ll need:
- 500g clear melt and pour soap base
- 1 tsp turmeric powder
- ½ tsp ginger powder (start conservatively—ginger can be sensitizing at high concentrations)
- 1 tbsp raw honey
- 1 tbsp castor oil (helps build lather)
- 15 drops ginger essential oil
- 10 drops orange or clove essential oil
- Soap molds
Instructions:
- Melt the soap base in 30-second intervals, stirring between each, until fully liquid and smooth.
- Combine the turmeric powder, ginger powder, and castor oil in a small bowl. Stir well until you have a smooth, lump-free paste.
- Warm the honey briefly so it incorporates more easily.
- Cool the melted base to 130–140°F, then add the turmeric-ginger paste and stir for a full minute.
- Add the warmed honey and stir gently until fully blended.
- Add the essential oils and give a final 30-second stir.
- Pour into molds immediately and spray with rubbing alcohol to remove surface bubbles.
- Let set for 4–6 hours before unmolding. The finished bar will be a deep, warm amber color.
Skin note: Do a patch test before using ginger on the face, especially for sensitive skin. Ginger can cause mild tingling—which many people enjoy—but in rare cases it can irritate reactive skin types.
Recipe 5: Turmeric Kojic Acid Soap Recipe
This is the most targeted recipe in this guide—specifically formulated for hyperpigmentation, dark spots, and uneven skin tone. Kojic acid is derived from fungi and is one of the most studied skin-brightening ingredients available. Combined with turmeric, you get a dual-action brightening bar that works on multiple pathways simultaneously.
This recipe uses a melt and pour base for accessibility, but the principles apply to cold process as well (though kojic acid performs better in lower-pH environments, which melt and pour provides more reliably than cold process).
What you’ll need:
- 500g clear melt and pour soap base
- 1 tsp turmeric powder
- 1 tsp kojic acid powder (available from cosmetic ingredient suppliers)
- 1 tbsp niacinamide powder (optional but synergistic—also a brightening ingredient)
- 1 tbsp jojoba oil
- 15 drops carrot seed essential oil (rich in beta-carotene, supports brightening)
- 10 drops lavender essential oil
- Soap molds
Instructions:
- Melt the soap base in 30-second microwave intervals until fully liquid.
- Mix the turmeric powder, kojic acid powder, and optional niacinamide with the jojoba oil in a small bowl. Stir thoroughly until smooth—kojic acid powder dissolves better when combined with an oil before being added to the base.
- Cool the melted base to 120–130°F. This is slightly lower than usual because kojic acid can degrade at high temperatures, reducing its effectiveness.
- Stir in the powder mixture slowly and thoroughly, ensuring even distribution throughout the base.
- Add the essential oils and stir for another 30 seconds.
- Pour into molds and spray immediately with rubbing alcohol.
- Allow to set fully for 6–8 hours before unmolding. Kojic acid soaps benefit from a slightly longer set time.
Usage guidance: Kojic acid increases sun sensitivity. Anyone using this soap regularly should follow up with SPF during the day. Start with every other day use to assess skin tolerance before using daily.
Recipe 6: Turmeric Cold Process Soap Recipe
Cold process soap making produces the most conditioning, long-lasting bars you can make at home. It requires handling lye (sodium hydroxide), which is caustic and demands proper safety precautions—but the result is a genuinely superior bar with a richer lather and better skin feel than melt and pour.
This recipe is for experienced soap makers or confident beginners who have done their research on lye safety.
What you’ll need:
- 400g olive oil (conditioning, gentle on skin)
- 200g coconut oil (cleansing, builds lather)
- 200g shea butter (moisturizing, creamy lather)
- 200g castor oil (boosts and stabilizes lather)
- 147g sodium hydroxide (lye) — always run your recipe through a lye calculator before starting
- 340g distilled water (or turmeric-infused water for deeper color)
- 2 tsp turmeric powder
- 30g fragrance or essential oil of choice (frankincense and orange is an excellent combination)
- Soap molds (silicone loaf mold recommended)
Safety first: Wear gloves, goggles, and long sleeves. Work in a well-ventilated area. Never add water to lye—always add lye to water. The mixture will heat up dramatically and release fumes briefly.
Instructions:
- Make your lye solution. Slowly pour the lye into the distilled water (not the other way around), stirring gently until fully dissolved. Set aside to cool to 90–100°F.
- Melt your solid oils. Gently melt the coconut oil and shea butter together in a large pot or double boiler. Once melted, add the olive oil and castor oil. Cool to 90–100°F—you want the lye solution and oils at similar temperatures.
- Mix the turmeric powder with a small amount of olive oil to form a paste. This prevents clumping when added to the batter.
- Combine lye solution and oils. Slowly pour the lye solution into the oils, not the reverse. Using a stick blender, blend in short bursts until you reach light trace—a consistency similar to thin pudding where a drizzle sits on the surface momentarily before sinking.
- Add the turmeric paste and blend until fully incorporated. The batter will turn a warm golden yellow.
- Add fragrance or essential oils and stir by hand or blend briefly to incorporate.
- Pour into the mold and tap gently on the counter to release air bubbles. Smooth the top with a spatula.
- Insulate the mold by covering with a piece of cardboard and wrapping in a towel. This keeps the heat in and encourages proper saponification.
- Leave undisturbed for 24–48 hours. After 24 hours, check if the soap has hardened enough to unmold. If it’s still soft, wait another day.
- Unmold and cut into bars. Use a sharp knife or soap cutter. The bars will still be caustic at this stage—wear gloves.
- Cure for 4–6 weeks in a cool, dry place with good air circulation. Curing hardens the bar, extends its life, and allows excess water to evaporate for a milder, longer-lasting soap.
Why cure time matters: Skipping or shortening the cure on cold process soap means a softer bar that dissolves faster and may still have traces of lye activity. Four weeks minimum is not optional—it’s chemistry.
Turmeric Soap Recipes Comparison
| Recipe | Skill Level | Best For | Key Benefit |
|---|---|---|---|
| Basic Melt & Pour | Beginner | All skin types | Easy entry point |
| Lemon Turmeric | Beginner | Dull, uneven skin | Vitamin C brightening |
| Turmeric & Honey | Beginner | Dry, sensitive skin | Deep moisture |
| Turmeric Ginger Honey | Beginner–Intermediate | Acne-prone skin | Antibacterial, warming |
| Kojic Acid | Intermediate | Hyperpigmentation | Targeted dark spot treatment |
| Cold Process | Advanced | All skin types | Superior conditioning bar |
Tips for Working with Turmeric in Soap
- Start with less than you think you need. A little turmeric goes a long way. Too much turns lather bright yellow and can temporarily tint light skin.
- Pre-mix with oil before adding to any base. This prevents clumping and ensures even color every time.
- Use cosmetic-grade turmeric if possible. Food-grade turmeric works, but cosmetic-grade is more finely milled and disperses more smoothly.
- Expect color variation. Turmeric behaves differently in clear vs. white bases, and oxidizes slightly over time—bars may deepen in color during cure. This is normal.
- Label your soaps clearly if gifting them. The yellow color surprises people who aren’t expecting it.
FAQ
Will turmeric soap stain my skin yellow? At the concentrations used in these recipes, no—the color rinses off with the lather. Using significantly more than recommended can leave a temporary tint on very light skin, which fades quickly.
How long does homemade turmeric soap last? Melt and pour bars last 1–2 years if kept dry between uses. Cold process bars last 2–3 years. Both last longer when stored away from humidity and direct sunlight.
Can I use fresh turmeric instead of powder? It’s not recommended. Fresh turmeric introduces water content and bacteria into the soap, which shortens shelf life and can cause spoilage. Stick with dried powder.
Is turmeric soap safe for all skin types? Generally yes, but always patch test first. People with very sensitive skin or known curcumin sensitivity should test on a small area before full use.
The Bottom Line
Turmeric is one of the most versatile ingredients you can work with in soap making—whether you’re making a simple beginner melt and pour bar or an advanced cold process formulation. Start with the basic melt and pour recipe to get comfortable with how turmeric behaves, then work your way up to the kojic acid or cold process versions as your confidence grows. The results—golden bars that actually do something good for your skin—are well worth the slightly stained spatulas.
Enjoyed this project? Get even more DIY ideas that save (and make) you money.
Join our free newsletter for profitable DIY projects, clever cleaning hacks, home ideas, and creative crafts delivered straight to your inbox.
✓ Free forever • No spam • Unsubscribe anytime




