
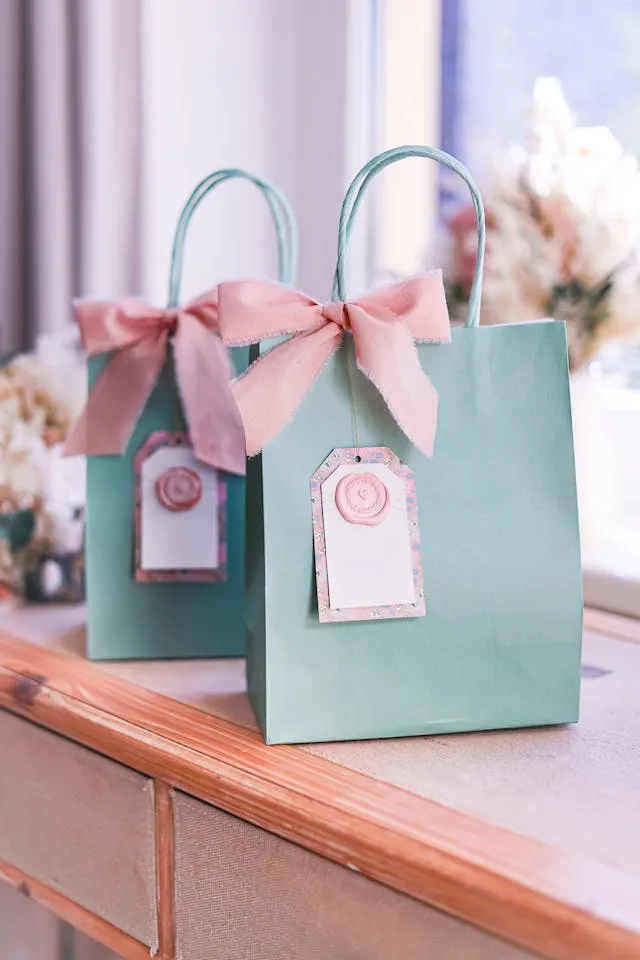
You’ve wrapped every gift, you’re five minutes from leaving for the party, and one present is the wrong shape for a box and you’re completely out of gift bags. Sound familiar?
Making a gift bag from wrapping paper is one of those skills that looks impressive but takes about three minutes once you’ve done it once. No special tools, no complicated folds, no craft experience required. Just wrapping paper, tape, scissors, and a basic folding sequence that produces a sturdy, attractive bag that looks intentional—not improvised.
This guide covers the standard method that works for most gift sizes, plus variations for tall, wide, and oddly shaped gifts, and the small details that separate a bag that holds together all day from one that falls apart before it reaches the recipient.
Here’s the Real Reason Most Homemade Gift Bags Look Cheap
It’s almost never the wrapping paper itself. Homemade gift bags look cheap when the proportions are wrong—the bag is too tall and narrow, or too wide and floppy, or the base isn’t reinforced and collapses under the weight of the gift. Getting the proportions right before you make a single fold is what separates a bag that looks store-bought from one that looks like a last-minute fix.
The other common issue is using paper that’s too thin. Standard wrapping paper works, but double-layering it—or reinforcing the base with a piece of cardboard—makes a significant difference in how the finished bag holds its shape and handles the weight of a gift.
Don’t Ignore the Proportion Step
Before cutting any paper, you need to know how big to cut it. This is the step most tutorials skip or gloss over with vague measurements, and it’s the reason most first attempts produce bags with wrong proportions.
Here’s a reliable sizing method that works for most standard gift bags:
Width of the paper: The width of your gift plus twice the depth, plus one inch for overlap. For example, a gift that is six inches wide and three inches deep needs: 6 + (2×3) + 1 = 13 inches of paper width.
Height of the paper: The height of your gift plus the depth (for the base fold) plus three to four inches (for the top fold-over that forms the bag’s rim). For a gift eight inches tall with a three-inch depth: 8 + 3 + 4 = 15 inches of paper height.
These aren’t rigid rules—wrapping paper is forgiving and you can adjust as you go—but starting with roughly correct dimensions means less trimming and fewer proportion problems with the finished bag.
What You’ll Need
- Wrapping paper — standard gift wrap works; heavier paper produces a sturdier bag
- Scissors
- Tape — regular clear tape or double-sided tape (double-sided gives cleaner results)
- A ruler or straight edge
- A pencil for marking measurements if needed
- A piece of cardboard cut to the bag’s base dimensions (optional but strongly recommended for heavier gifts)
- A hole punch
- Ribbon, twine, or cord for handles
- A bone folder or butter knife for creating crisp folds (optional but helpful)
Stop Doing This When Making Paper Gift Bags
Skipping the base reinforcement. A gift bag without a reinforced base folds in on itself under the weight of anything heavier than a card. A piece of cardboard cut to the exact base dimensions and slipped inside before adding the gift costs nothing and makes the bag behave like a real bag rather than a paper pouch.
Making the bag too tall. The instinct is to make the bag taller than the gift so it’s easy to close with tissue paper. But an overly tall bag with a small gift looks disproportionate and flops at the top. Aim for the bag to be two to three inches taller than the gift—enough for tissue paper to peek out attractively, not so much that the bag collapses inward.
Using too much tape on the outside. Visible tape on the exterior of a gift bag is what makes it look homemade in the wrong way. Use double-sided tape wherever possible for the main seams, and keep any regular tape on the inside or base where it won’t be seen.
Not creasing folds firmly enough. Soft, rounded folds produce a bag that looks shapeless. Every fold in this process should be creased firmly with a fingernail, a bone folder, or the flat edge of a ruler. Sharp creases give the bag its structure and shape.
Punching handle holes without reinforcing them first. Hole-punched handles in plain wrapping paper will tear through the paper within minutes of the bag being lifted, especially with a heavier gift. Always reinforce the handle holes with extra layers of tape—several overlapping pieces on both sides of the paper—before punching.
Step-by-Step: How to Make a Gift Bag from Wrapping Paper
Step 1: Cut your wrapping paper to the correct dimensions. Using the sizing method above, measure and cut a rectangle of wrapping paper. Cut as cleanly and straight as possible—uneven edges make the folding steps harder and affect the finished bag’s appearance. Use a ruler and a straight edge for the cleanest cut.
Step 2: Place the paper face-down on a flat surface. Work on a clean, hard surface where you can press folds firmly. Orient the paper so the shorter dimension runs left to right (this will become the width of the bag) and the longer dimension runs top to bottom (this will become the height).
Step 3: Fold and tape the side seam. Fold one of the long vertical edges over by about half an inch to create a clean finished edge, then bring the two vertical edges together and overlap them by about an inch. Tape the seam securely with double-sided tape or regular tape on the inside. You now have a paper tube, open at both the top and bottom.
Step 4: Create the base gussets. Stand the tube upright and flatten it so the side seam runs down one edge rather than sitting in the center of the front or back panel. Press firmly to create sharp creases along both sides. These side creases will become the gusset folds that give the bag its depth.
Step 5: Form the base by folding the bottom edges. Lay the flattened tube on your work surface. Fold the bottom edge up by an amount equal to half the desired bag depth plus about half an inch for overlap. For a bag with three inches of depth, fold up approximately two inches. Crease firmly across the full width.
Step 6: Open the base and create the base rectangle. Open the bottom of the flattened tube and press the sides inward to form a rectangular base—like opening the bottom of a paper grocery bag. The folded bottom flap and the opposite flap should overlap. Press all four base corners into clean right angles, creasing each one firmly.
Step 7: Tape the base closed securely. Fold the bottom flaps over each other and tape firmly. This is a structural element—use several pieces of tape in both directions across the base to ensure it holds. This is also where your cardboard reinforcement goes: cut a piece of cardboard to match the base rectangle dimensions exactly and slip it inside the bag before taping the base fully closed, or insert it through the top of the bag afterward.
Step 8: Fold the top rim of the bag. Fold the top edge of the bag down by about one inch, then fold it down again by another inch. This double fold creates a firm, clean rim at the top of the bag that looks finished and reinforces the area where the handles will attach. Crease firmly and tape or glue on the inside to hold the fold in place.
Step 9: Reinforce the handle areas before punching. On the front panel, measure and mark two handle hole positions—roughly centered and about one inch down from the top rim, spaced about three to four inches apart. Before punching, layer several overlapping pieces of clear tape over each marked position on both the inside and outside of the paper. This tape reinforcement is what prevents the handles from tearing through.
Step 10: Punch the handle holes. Using a hole punch, punch through the reinforced marks on both the front and back panels. Make sure the front and back holes align with each other so the handles sit evenly.
Step 11: Thread and tie the handles. Cut two equal lengths of ribbon, twine, or cord—each about 12 to 14 inches long for standard handles. Thread one end of each piece through the front holes from the outside, and tie a large knot on the inside so it can’t pull back through. Repeat with the back holes. Pull the handles gently to test the knots before adding the gift.
Step 12: Add the gift, tissue paper, and finishing touches. Place your cardboard base insert if you haven’t already, add the gift, and fill the top with tissue paper. The finished bag should stand upright on its own, hold its shape, and look like something you picked up at a store rather than assembled in five minutes on the kitchen counter.
You’re Probably Doing This Wrong: The Gusset Step
The gusset is the fold that gives the bag its depth—the ability to expand and hold a three-dimensional gift rather than sitting flat. Most first-timers either skip it entirely (producing a flat envelope rather than a bag) or don’t press it firmly enough (producing a bag with soft, rounded sides that won’t hold its shape). The gusset step—flattening the tube so the seam runs along the side edge and pressing sharp creases along both sides—is the structural foundation of the whole bag. Take the extra 30 seconds to crease these folds as sharply as possible.
How to Make a Gift Bag from Wrapping Paper for Different Gift Sizes
For tall, narrow gifts (wine bottles, rolled posters, tall candles): Use a much taller rectangle of paper and create a narrow base. The bag will be more cylindrical than rectangular. Reinforce the base especially well for heavy items like bottles, and consider using thicker ribbon for the handles.
For wide, flat gifts (books, framed photos, board games): Cut a wider rectangle and create a shallower, wider base. The proportions shift to produce a landscape-oriented bag rather than a portrait one. These bags benefit particularly from cardboard base reinforcement since the wide base spans more distance without support.
For small gifts (jewelry, gift cards, small ornaments): Use a half-sheet of standard wrapping paper. Everything scales down proportionally. For very small bags, skip the hole-punched handles and instead punch a single hole in the center of the front flap and thread a loop of ribbon through it as a decorative pull rather than a carrying handle.
For heavy gifts: Double-layer the wrapping paper before beginning—lay two sheets together and treat them as one throughout the folding process. The extra thickness makes a significant difference in structural integrity for anything over two or three pounds.
Quick Reference: Sizing Guide
| Gift Size | Paper Width Needed | Paper Height Needed |
|---|---|---|
| Small (jewelry box) | 8–10 inches | 10–12 inches |
| Medium (book, scarf) | 12–16 inches | 14–18 inches |
| Large (sweater, game) | 18–24 inches | 18–22 inches |
| Tall/bottle | 10–12 inches | 20–28 inches |
| Wide/flat (frame) | 20–28 inches | 12–16 inches |
FAQ
What type of wrapping paper works best for gift bags? Medium-weight wrapping paper works well for most gifts. Very thin, cheap wrapping paper tears easily at the handle holes and base even with reinforcement. Kraft paper, butcher paper, and newspaper all make excellent, sturdy gift bags and often look more intentional and stylish than standard gift wrap. Foil wrapping paper works but is less forgiving to fold neatly.
Can I make a gift bag without a hole punch? Yes. Instead of punched holes with ribbon handles, fold the top of the bag into a point like the top of a paper bag lunch sack and tie a ribbon around the gathered top. Alternatively, staple ribbon handles directly through reinforced areas of the rim—not as clean as punched holes, but functional and fast.
How do I keep the bag from tipping over before I give it? The cardboard base insert is the most effective solution. Without it, the bag relies entirely on the paper’s own stiffness to maintain its base shape, which isn’t reliable with standard wrapping paper. With the cardboard insert, the bag stands firmly on its own.
Can I decorate the outside of a homemade gift bag? Absolutely—and it’s one of the advantages of making your own. Stamps, stickers, hand-lettered names, washi tape accents, and twine bows all work well. Decorating before folding (while the paper is still flat) is significantly easier than decorating the finished bag.
How long does it take once you know the method? The first attempt typically takes 10 to 15 minutes including measuring and sizing. After a couple of practice runs, most people can produce a finished bag in three to five minutes. The folding sequence becomes muscle memory quickly.
Conclusion
Making a gift bag from wrapping paper is genuinely one of the most useful quick skills to have—it solves a real problem fast, costs nothing extra, and produces results that look deliberate rather than desperate. Get the proportions right before you start, crease every fold firmly, reinforce the handle holes before punching, and add the cardboard base insert for anything with real weight. Do those four things and the finished bag will hold its shape, carry the gift safely, and look like something you picked up at a shop rather than folded together on the counter five minutes before leaving. Once you’ve done it a couple of times, it becomes the kind of thing you do without thinking—which is exactly where the best practical skills end up.
Enjoyed this project? Get even more DIY ideas that save (and make) you money.
Join our free newsletter for profitable DIY projects, clever cleaning hacks, home ideas, and creative crafts delivered straight to your inbox.
✓ Free forever • No spam • Unsubscribe anytime




