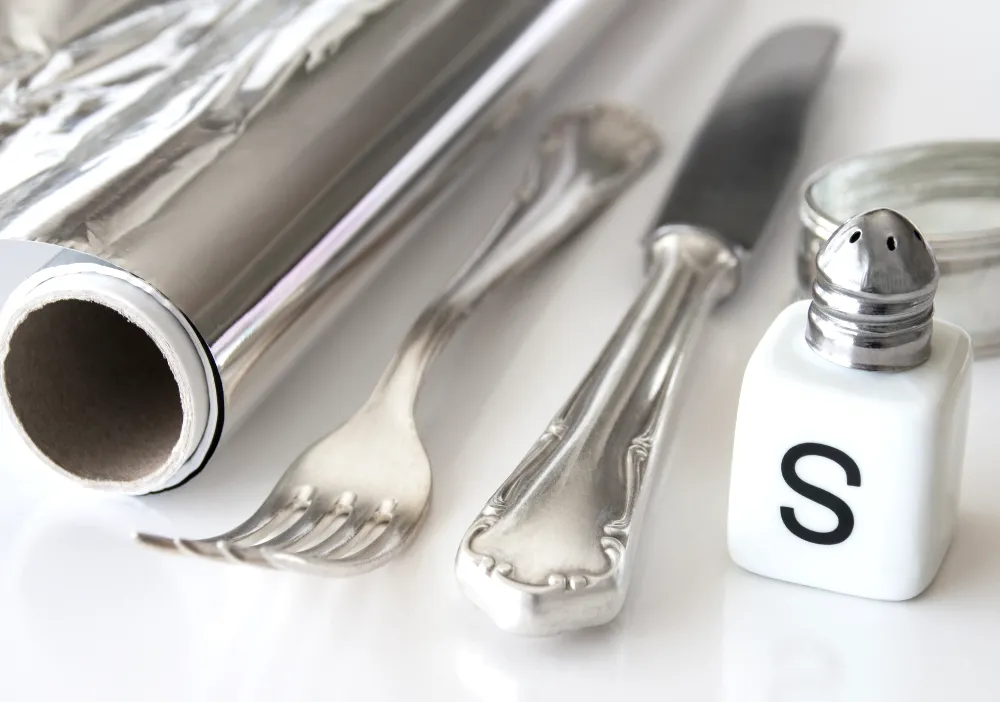
There’s a moment when you pull out a silver necklace or a set of flatware you haven’t used in months and realize it’s gone dark and dull. Tarnish is inevitable—it’s just silver reacting with sulfur compounds in the air—but reversing it doesn’t require expensive polishes or a trip to a jeweler.
The aluminum foil method is one of the most genuinely satisfying cleaning techniques you’ll come across. Unlike polishing, which physically abrades the surface to remove tarnish, this method uses an electrochemical reaction to transfer the tarnish off the silver and onto the foil. You’re not removing silver to reveal a clean surface—you’re chemically converting the tarnish back.
But “the aluminum foil method” isn’t just one thing. There are several variations—different electrolytes, different setups, different strengths—and knowing which one to reach for depending on your situation makes a real difference in results.
Why This Method Works (The Short Version)
Silver tarnish is silver sulfide—formed when silver reacts with sulfur in the air. When you place tarnished silver in contact with aluminum foil in a hot water bath, you create a simple electrochemical cell. Aluminum is more reactive than silver, so it donates electrons to the silver sulfide, breaking it apart. The sulfur migrates from the silver onto the aluminum, and the silver is restored to its original metallic state.
You’ll often see a faint yellow or grey residue appear on the foil and briefly smell sulfur—both signs the reaction is working. The silver isn’t being abraded or stripped. It’s being chemically restored.
What You’ll Need (General Supplies)
Depending on which method you use, you’ll draw from this list:
- Aluminum foil
- A glass bowl, baking dish, or clean sink basin
- Hot or boiling water
- Baking soda
- Table salt
- Washing soda (sodium carbonate)
- White vinegar
- Dish soap
- Soft microfiber cloths or clean white towels
- Tongs or a slotted spoon
- A soft toothbrush (for detailed pieces)
Method 1: Aluminum Foil and Baking Soda (The Standard Method)
This is the go-to version—the one that works on the widest range of silver items and handles everything from light surface tarnish to heavily blackened pieces. If you only learn one method, make it this one.
What you’ll need:
- Aluminum foil
- 1 tablespoon baking soda per cup of water
- Hot or boiling water
- A glass bowl or baking dish
Instructions:
- Line your bowl or baking dish with aluminum foil, shiny side facing up. Press it firmly against the bottom so there are no gaps—the silver needs direct contact with the foil for the reaction to work.
- Place your silver items directly on the foil in a single layer. Every piece needs to be touching the foil. Stacked or overlapping pieces won’t clean evenly.
- Sprinkle baking soda generously over the silver—one tablespoon per cup of water you plan to use. Add it dry rather than pre-dissolving it for a more vigorous reaction.
- Pour hot or boiling water over the silver and baking soda. You’ll see immediate bubbling and may briefly smell sulfur. Both are signs the reaction has started.
- Soak for 5–10 minutes. Watch the tarnish visibly fade as the minutes pass. For heavily tarnished pieces, extend to 15 minutes.
- Remove with tongs, rinse thoroughly under warm water, wash with a drop of dish soap, rinse again, and dry immediately with a soft cloth.
- Buff gently with a dry section of cloth to bring up the shine.
Best for: General tarnish on sterling silver jewelry, flatware, and decorative pieces.
Method 2: Aluminum Foil, Baking Soda, and Salt (Boosted Reaction)
Adding salt to the standard baking soda method isn’t just an optional extra—it meaningfully accelerates the electrochemical reaction by increasing the conductivity of the solution. For heavily tarnished pieces that have been sitting in a drawer for years, this is the version to use.
What you’ll need:
- Aluminum foil
- 1 tablespoon baking soda per cup of water
- 1 teaspoon table salt per cup of water
- Hot or boiling water
Instructions:
- Line your bowl with aluminum foil, shiny side up, pressing firmly against the bottom and sides.
- Lay your silver pieces flat on the foil, ensuring every piece has direct foil contact.
- Combine the baking soda and salt and sprinkle the mixture over the silver pieces before adding water.
- Pour boiling or very hot water over the silver, fully submerging all pieces. The bubbling will be more vigorous than with baking soda alone—this is expected.
- Soak for 5–15 minutes depending on the severity of tarnish. Heavily blackened pieces may need the full 15 minutes. Check progress at the five-minute mark.
- Remove, rinse thoroughly, wash with dish soap, rinse again, and dry immediately. Buff with a soft cloth to finish.
Best for: Heavily tarnished silver, large flatware sets, pieces that didn’t fully respond to the basic baking soda method alone.
Method 3: Aluminum Foil and Salt Only (No Baking Soda)
If you’re out of baking soda, salt alone can facilitate the reaction—it’s a perfectly effective electrolyte on its own, just slightly slower. This is a useful version to know for a quick clean when your pantry is low.
What you’ll need:
- Aluminum foil
- 1 tablespoon table salt per cup of water
- Hot or boiling water
Instructions:
- Line your bowl with aluminum foil, shiny side up.
- Place silver pieces directly on the foil in a single layer with full foil contact.
- Dissolve the salt in the hot water first (unlike baking soda, dissolving salt beforehand gives better results with this method), then pour the solution over the silver.
- Soak for 10–15 minutes—slightly longer than the baking soda method since salt alone produces a somewhat slower reaction.
- Watch for the sulfur smell and foil discoloration, which confirm the reaction is occurring even if it’s more gradual.
- Remove, rinse well, wash with dish soap, rinse again, and dry and buff immediately.
Best for: Light to moderate tarnish when baking soda isn’t available. Not the best choice for very heavy tarnish—use Method 2 for that.
Method 4: Aluminum Foil and Washing Soda (Strongest Reaction)
Washing soda (sodium carbonate) is a stronger electrolyte than baking soda (sodium bicarbonate). The reaction is noticeably more vigorous—more bubbling, faster tarnish transfer, and better results on very stubborn or long-neglected pieces. It’s available in the laundry aisle of most supermarkets.
What you’ll need:
- Aluminum foil
- ½ tablespoon washing soda per cup of water (use half the amount you would with baking soda—it’s significantly stronger)
- Hot or boiling water
Instructions:
- Line your bowl with aluminum foil, shiny side up.
- Lay silver pieces flat on the foil with full contact.
- Sprinkle the washing soda over the silver—remember to use half the quantity you’d use with baking soda.
- Pour boiling water over the silver. The reaction will be visibly more aggressive than the baking soda version—more bubbling, faster color change on the foil.
- Soak for 3–7 minutes only. Because the reaction is stronger, less time is needed. Check at the three-minute mark. Over-soaking with washing soda isn’t recommended for delicate or plated pieces.
- Remove promptly with tongs, rinse very thoroughly to remove all washing soda residue (it’s more alkaline than baking soda and needs a thorough rinse), wash with dish soap, rinse again, and dry immediately.
Best for: Severely tarnished sterling silver flatware and solid silver pieces that haven’t responded well to the standard baking soda method. Use with caution on plated silver.
Method 5: Aluminum Foil and White Vinegar (Acid-Based Variation)
This version swaps the alkaline electrolyte (baking soda or salt) for an acidic one—white vinegar. The mechanism is slightly different: vinegar helps dissolve and loosen the silver sulfide layer while the aluminum foil still facilitates electron transfer. The result is a gentler reaction that’s particularly useful for lightly tarnished pieces or silver that has other metals combined in the setting.
What you’ll need:
- Aluminum foil
- ½ cup white vinegar per 2 cups of water
- 1 teaspoon salt
- Hot water (not boiling—vinegar’s effectiveness doesn’t increase with higher heat the way baking soda’s does)
Instructions:
- Line your bowl with aluminum foil, shiny side up.
- Place silver pieces on the foil with direct contact.
- Mix the vinegar and salt into the hot water before pouring—unlike the baking soda methods, pre-mixing works better here.
- Pour the vinegar solution over the silver. The reaction will be quieter and less visibly dramatic than the baking soda methods—less bubbling, no sulfur smell—but it’s still working.
- Soak for 5–10 minutes, checking progress periodically.
- Remove, rinse very thoroughly—vinegar smell and residue need to be fully rinsed off—wash with dish soap, rinse again, and dry and buff immediately.
Best for: Light tarnish, mixed-metal pieces, and situations where a gentler reaction is preferred. Not recommended for heavy tarnish—the alkaline methods are more effective for that.
Method 6: Aluminum Foil Sink Bath (For Large Sets and Full Flatware)
This isn’t a different chemical method—it uses the same baking soda and salt formula as Method 2—but the setup is scaled up to handle large quantities of silver at once. It’s the most practical approach for a full flatware set, a collection of serving pieces, or multiple items that need cleaning in one session.
What you’ll need:
- Enough aluminum foil to line the bottom of a clean sink
- 1 tablespoon baking soda per cup of water
- 1 teaspoon salt per cup of water
- Enough boiling water to fully submerge all pieces
Instructions:
- Clean your sink thoroughly first. Any grease or food residue can interfere with the reaction and contaminate your silver.
- Line the entire bottom of the sink with aluminum foil, shiny side up, pressing it flat with no gaps or raised edges. Overlap sheets if necessary to cover the full surface.
- Lay all silver pieces in a single layer on the foil. For a large flatware set, work in two batches if everything won’t fit in one layer—stacking prevents even cleaning.
- Sprinkle baking soda and salt over all the pieces at the ratios above. For a sink that holds roughly 8 cups of water, use 8 tablespoons of baking soda and 8 teaspoons of salt.
- Pour boiling water carefully over all the pieces until everything is fully submerged. You’ll see vigorous bubbling across the entire surface—this is the reaction working simultaneously on all pieces.
- Soak for 5–15 minutes depending on the severity of tarnish. Stir gently once or twice during soaking to ensure even coverage, but avoid disturbing the foil lining.
- Remove pieces with tongs, rinse each one thoroughly under warm running water, wash with dish soap, rinse again, and dry immediately with soft cloths.
- Buff each piece with a clean dry cloth before setting aside. Don’t let pieces air dry—water spots form quickly on silver.
Best for: Full flatware sets, multiple serving pieces, or any situation where you have more than five or six silver items to clean at once.
Method Comparison at a Glance
| Method | Reaction Strength | Best For | Time Needed |
|---|---|---|---|
| Baking soda only | Moderate | General tarnish, jewelry | 5–10 min |
| Baking soda + salt | Strong | Heavy tarnish, flatware | 5–15 min |
| Salt only | Mild–Moderate | Light tarnish, no baking soda | 10–15 min |
| Washing soda | Very strong | Severely tarnished solid silver | 3–7 min |
| White vinegar + salt | Gentle | Light tarnish, mixed metals | 5–10 min |
| Sink bath | Strong (scaled up) | Large sets, multiple pieces | 5–15 min |
What Not to Clean with the Aluminum Foil Method
These methods are highly effective but not appropriate for everything:
- Antique or oxidized silver: The reaction removes all sulfide—including intentional decorative darkening in recessed areas. Use a polishing cloth instead for antique pieces.
- Silver-plated items: The reaction is gentle, but repeated use on thin plating can affect the surface over time. Use sparingly—once or twice a year.
- Jewelry with pearls, opals, emeralds, or glued stones: Hot water can loosen adhesives and damage soft or porous gemstones.
- Hollow-handled flatware: Extended hot water soaking can penetrate hollow handles. Keep soak time to 3–5 minutes maximum for these pieces.
- Items combining silver with wood, bone, or resin: Hot water immersion can warp, crack, or discolor these materials.
How to Keep Silver from Tarnishing After Cleaning
- Dry completely before storing. Even slight moisture dramatically accelerates tarnish formation.
- Store in anti-tarnish bags or cloth. Inexpensive and genuinely effective at slowing sulfur exposure.
- Keep rubber away from silver. Rubber contains sulfur and is one of the fastest ways to cause tarnish—avoid rubber-lined drawers and rubber bands near silver.
- Add chalk or silica gel packets to your storage area to absorb moisture.
- Wear silver jewelry regularly. Natural skin oils and gentle friction keep pieces polished between cleanings.
FAQ
Does the silver have to touch the foil directly? Yes—this is the most important part of the setup. The electrochemical reaction requires direct metal-to-metal contact. Pieces resting on top of other pieces without foil contact won’t clean properly.
Can I reuse the foil? The foil collects tarnish residue after use and loses effectiveness. Use fresh foil each time for best results.
Is this safe for sterling silver? Yes. Sterling silver responds excellently to all six methods. The reaction targets silver sulfide specifically and doesn’t harm the metal.
Why does my silver still look dull after the treatment? Usually means residue wasn’t fully rinsed off, or the piece wasn’t dried and buffed immediately. Rewash with dish soap, rinse thoroughly, dry right away, and buff with a soft cloth.
How often can I use these methods? For solid sterling silver, as often as needed. For silver-plated items, limit to a few times a year to protect the plating.
The Bottom Line
All six methods use the same fundamental principle—aluminum foil facilitating an electrochemical reaction that pulls tarnish off silver—but each has a specific strength. Start with Method 1 for general cleaning, upgrade to Method 2 or 4 for stubborn tarnish, and use the sink bath when you have a full set to restore. Whatever method you use, the non-negotiables are the same: make sure everything touches the foil, rinse thoroughly, and dry and buff immediately. Get those three things right and the results will look like professional cleaning every time.
Enjoyed this project? Get even more DIY ideas that save (and make) you money.
Join our free newsletter for profitable DIY projects, clever cleaning hacks, home ideas, and creative crafts delivered straight to your inbox.
✓ Free forever • No spam • Unsubscribe anytime