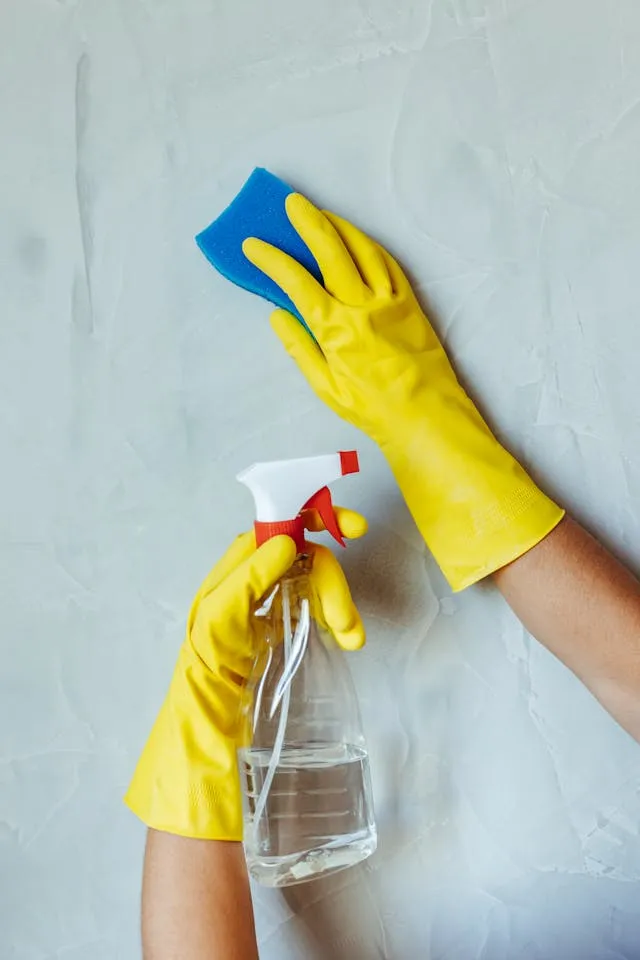
Most people avoid cleaning their walls until there’s an obvious mark or stain forcing the issue—and then they grab whatever cleaning product is nearby and scrub, only to end up with a faded patch, a streak, or a section of wall that looks worse than the original mark did.
Wall cleaning goes wrong in predictable ways. Too much moisture on flat or matte paint lifts the finish. Too much pressure on any paint type creates shiny burnish marks that catch light differently from the surrounding wall. The wrong cleaner on latex paint dissolves it. And cleaning one section without feathering into the surrounding area leaves tide marks that are more visible than the original stain.
The good news is that cleaning walls without damaging paint is completely achievable with the right technique for each paint type. The key is understanding that wall paint—particularly flat and matte finishes—is far more delicate than most people assume, and that gentler methods done correctly produce better results than aggressive methods that seem more thorough.
This guide covers seven cleaning methods from the driest and most gentle through to targeted stain treatments, with specific guidance on which paint finishes each method is safe for.
Know Your Paint Finish Before You Start
Paint finish determines everything about how you can clean it. Using the wrong method for the finish is the primary cause of paint damage during wall cleaning.
- Flat/matte: The most delicate finish. Highly porous surface that absorbs moisture and cleaning solution readily. Virtually impossible to clean aggressively without damaging. Requires the driest, gentlest methods.
- Eggshell: Slightly more durable than flat. Has a very low sheen that makes it marginally more resistant to moisture. Still requires careful, minimal-moisture cleaning.
- Satin: More durable and washable than eggshell. Can handle slightly more moisture and mild cleaning solutions. The most common finish in kitchens and bathrooms.
- Semi-gloss and gloss: The most durable and washable finishes. Can handle more aggressive cleaning and mild chemical cleaners without damage. Most kitchens and trim use semi-gloss or gloss.
Quick test for paint type: Run a slightly damp white cloth over an inconspicuous area of the wall with light pressure. If color transfers to the cloth, the paint is delicate—treat it as flat/matte regardless of its apparent sheen. If the cloth stays white and the wall looks unchanged, the paint is washable and can tolerate more cleaning.
General Rules That Apply to Every Method
- Always test on a hidden area first. A spot behind a door or furniture is ideal—apply the cleaning method and allow to dry completely before proceeding. What looks fine wet may show damage once dry.
- Clean from the bottom up. This is counterintuitive but prevents dirty water drips from running down onto uncleaned sections and creating streaks that are harder to remove than the original dirt.
- Feather the edges. Never clean a defined patch and stop—always blend the cleaned area into the surrounding wall in wider, lighter strokes to prevent visible boundaries between cleaned and uncleaned sections.
- Use white cloths only. Colored cloths transfer dye to damp walls—use white microfiber or white cotton cloths throughout.
- Less moisture is always better. Wring cloths and sponges until they’re barely damp. Water soaking into wall paint causes damage that shows up after drying.
- Dry the wall after cleaning. Pat dry with a clean cloth rather than allowing the wall to air dry—standing moisture on paint causes watermarks and can cause flat paint to lift.
What You’ll Need (Depending on the Method)
- A vacuum with a soft brush attachment
- Dry sponge (chemical sponge/dry cleaning sponge)
- White microfiber cloths
- Mild dish soap
- White vinegar
- Baking soda
- Warm and cold water
- A spray bottle
- Magic eraser (melamine foam)
- Isopropyl alcohol (rubbing alcohol)
- Commercial wall cleaner
- Two buckets (one for cleaning solution, one for rinse water)
- Rubber gloves
Method 1: Dry Cleaning First (The Step That Prevents Most Damage)
Dry cleaning before any wet method removes the loose dust, cobwebs, and surface debris that turn into smears and streaks the moment moisture touches them. It’s also the complete solution for walls that are dull from dust accumulation rather than genuinely stained—which describes most walls in most homes most of the time. Many walls that appear to need washing only need dry cleaning.
- Vacuum the wall surface using the soft brush attachment on the lowest suction setting. Work from ceiling to floor in overlapping vertical strips. The brush attachment lifts dust without direct contact pressure that could drag grit across the paint surface and scratch it. Pay particular attention to the top of walls where dust accumulates in a band just below the ceiling, around light switches and outlets where hand contact is frequent, and along the base of walls where dust settles.
- Use a dry microfiber cloth for any areas the vacuum can’t reach easily—around door frames, in wall texture detail, and in corners. Fold the cloth to a clean section frequently rather than dragging accumulated dust back across cleaned areas.
- Use a dry sponge (chemical sponge) for any scuff marks or surface soiling that didn’t respond to vacuuming. A dry sponge—also called a dry cleaning sponge or smoke sponge—is a vulcanized rubber sponge that picks up surface marks through a chemical adhesion process without any moisture. It’s one of the most effective tools for flat and matte paint because it cleans with zero moisture risk. Work in straight strokes in one direction rather than circular motions—circular motion on a dry sponge smears rather than lifts.
- Assess the wall in raking light (a lamp angled low across the surface) after dry cleaning. Many marks that appeared significant under normal overhead lighting disappear entirely once surface dust is removed. Only proceed to wet methods for marks that remain after thorough dry cleaning.
Best for: All paint finishes including flat and matte. Should precede every wet cleaning method. Adequate as the complete cleaning method for most walls that are dull rather than stained.
Method 2: Plain Warm Water (Best for Flat and Matte Paint)
For flat and matte paint finishes, plain warm water—no cleaning product—applied with a barely damp cloth is often the most effective cleaning method and the safest. Adding cleaning product to flat paint increases the risk of finish damage without necessarily improving the cleaning result, because the paint is porous enough that water alone lifts surface dirt effectively.
- Complete dry cleaning first (Method 1) to remove all loose debris before introducing any moisture.
- Fill a bowl with warm water. Warm water lifts dirt more effectively than cold but is gentler on paint than hot—hot water can soften some paint formulations and should be avoided.
- Dampen a white microfiber cloth in the water and wring thoroughly—more thoroughly than feels necessary. The cloth should feel barely damp when pressed against the back of your hand, with no moisture transferring. A cloth that’s too wet saturates the paint and causes lifting, watermarks, and sheen changes in flat finishes.
- Work from the bottom of the wall upward in small, gentle circular motions. Small sections—roughly 30cm x 30cm—allow you to control moisture application and dry each section before moving on.
- Use light pressure only. Flat paint burnishes easily—pressing hard creates shiny patches that catch light differently from the surrounding wall and are visible from across the room. Let the damp cloth do the work rather than pressure.
- Rinse the cloth in clean water and wring thoroughly between sections to avoid redistributing dirt.
- Dry each section immediately by patting with a clean dry white cloth. Don’t allow any section to air dry—standing moisture on flat paint causes watermarks that are often more visible than the original dirt.
- Feather outward from the cleaned area with lighter strokes in a wider radius to blend the boundary between cleaned and uncleaned wall.
Best for: Flat and matte paint finishes, lightly soiled walls, any wall where you’re uncertain about paint durability.
Method 3: Mild Dish Soap Solution (Best for Eggshell and Satin Paint)
For eggshell and satin finishes—the most common paint finishes in living areas and bedrooms—a very mild dish soap solution provides just enough cleaning power to handle the general traffic soiling, handprints, and light marks that accumulate over months without risking paint damage.
- Complete dry cleaning first.
- Set up two buckets: one with warm water and a tiny amount of dish soap, one with plain warm water for rinsing. The cleaning solution should be barely soapy—no more than two to three drops of dish soap per liter of warm water. More soap means more residue that dries to a streaky film on the wall.
- Dampen a white microfiber cloth in the soap solution and wring extremely thoroughly—the cloth should be barely damp, not wet.
- Test on a hidden area first and allow to dry completely before proceeding. Even mild dish soap can affect some paint formulations.
- Work in small sections from the bottom upward, using gentle circular motions with light pressure.
- Rinse the cloth in the plain water bucket, wring thoroughly, and wipe over the just-cleaned section to remove soap residue. This rinse step is the most commonly skipped and the most important—soap residue left on walls dries as a dull streak.
- Dry immediately with a clean dry cloth after rinsing each section.
- Change both the cleaning water and rinse water frequently. Dirty cleaning water redistributes soil across the wall; dirty rinse water leaves grey streaks on the cleaned surface. Changing water every few square meters maintains cleaning effectiveness.
Best for: Eggshell and satin paint finishes, general traffic soiling and handprints, walls in living areas and bedrooms that need periodic cleaning.
Method 4: White Vinegar Solution (Best for Grease and Kitchen Walls)
Kitchen walls behind and around the cooktop accumulate grease and cooking residue that water and mild soap can’t fully cut through. White vinegar’s mild acidity dissolves grease effectively and evaporates cleanly without leaving residue—making it safer for wall paint than stronger degreasers and more effective than soap for grease-based soiling.
- Complete dry cleaning first. Kitchen walls often have a combination of grease and dust that forms a sticky film—dry cleaning removes the loose surface layer before wet cleaning.
- Mix equal parts white vinegar and warm water in a spray bottle. Full-strength vinegar is too acidic for most paint finishes and can affect the sheen—diluting to 50/50 provides adequate grease-cutting without acidity risk.
- Test on a hidden area and allow to dry before proceeding—vinegar can affect some paint finishes, particularly older oil-based paints.
- Spray the solution onto a white microfiber cloth, not directly onto the wall. Direct spraying saturates the wall surface and drives moisture into the paint—applying via cloth gives you control over moisture level.
- Wipe the wall in gentle circular motions, working from the bottom upward in small sections.
- For heavier grease buildup near the cooktop, leave the vinegar solution on the surface for one to two minutes before wiping—the dwell time allows the acid to work through the grease layer. Don’t allow it to dry completely before wiping.
- Wipe with a clean cloth dampened with plain warm water to remove vinegar residue, then dry immediately.
- The vinegar smell dissipates completely as the wall dries—usually within 20–30 minutes.
Best for: Kitchen walls with grease and cooking residue, satin and semi-gloss finishes in cooking areas, any grease-based soiling that soap and water hasn’t fully addressed.
Method 5: Baking Soda Paste for Stubborn Marks (Best for Scuffs and Marks on Durable Finishes)
For semi-gloss and gloss paint—the most durable finishes typically used on trim, doors, and kitchen and bathroom walls—a mild baking soda paste provides gentle abrasion that lifts stubborn scuff marks, crayon, and marks that don’t respond to liquid cleaning methods. This method is not appropriate for flat, matte, or eggshell finishes where abrasion causes visible damage.
- Confirm the paint is semi-gloss or gloss before using this method. The baking soda paste is too abrasive for softer finishes.
- Complete dry cleaning and try liquid methods first. Baking soda paste is for marks that haven’t responded to gentler methods—use it as a targeted treatment, not a general cleaning approach.
- Mix a small amount of baking soda with just enough water to form a paste with a consistency similar to toothpaste. Make a small quantity—you’re treating specific marks, not painting the whole wall.
- Apply a small amount of paste to a damp cloth—not directly to the wall. This gives you control over how much abrasive contacts the paint surface.
- Rub very gently in the direction of any brush marks in the paint rather than circular motions—circular abrasion on semi-gloss paint leaves circular marks that catch light. Work in the same direction as the paint application for the most invisible result.
- Use minimal pressure. Even on semi-gloss and gloss, heavy pressure with an abrasive paste creates dulled patches. Let the paste do the work rather than the force behind it.
- Wipe away the paste with a clean damp cloth immediately and rinse the area with plain water.
- Dry immediately with a clean dry cloth and assess—the mark should have significantly reduced or disappeared. Repeat if any mark remains.
Best for: Semi-gloss and gloss finishes only, scuff marks and crayon, marks that haven’t responded to liquid methods.
Method 6: Magic Eraser (For Specific Marks on Washable Paint)
Magic erasers (melamine foam) are extremely effective at removing specific marks—crayon, pen, scuff marks, sticky residue—from washable paint surfaces. They work through micro-abrasion rather than chemicals, which is why they’re so effective on marks that resist chemical cleaners. The significant limitation is that this micro-abrasion also removes a tiny layer of paint with each use—making them appropriate only for washable paint finishes (satin, semi-gloss, gloss) and only for targeted spot treatment rather than general cleaning.
- Never use a magic eraser on flat or matte paint. The abrasion removes the flat finish and creates shiny patches that are immediately visible and permanent.
- Dampen the magic eraser with water and squeeze out the excess until it’s barely damp—not wet. Excess water from a magic eraser saturates the wall paint just as any wet cloth would.
- Rub the mark very gently with minimal pressure. Magic erasers work without pressure—pressing hard removes more paint than necessary and creates a dull spot.
- Work in small strokes on the specific mark rather than wiping across a broader area. The abrasive action on surrounding clean paint is unnecessary and cumulative over multiple cleaning sessions.
- Check progress frequently. Once the mark lifts, stop—continuing to rub after the mark is gone removes paint finish without purpose.
- Wipe the area with a clean damp cloth to remove any eraser residue and dry immediately.
- Inspect in raking light once dry to check for any dulling of the finish from the abrasion. Minor dulling on semi-gloss can sometimes be buffed back with a clean dry cloth; significant dulling indicates the eraser was too wet or too much pressure was used.
Best for: Specific marks on satin, semi-gloss, and gloss finishes only—crayon, pen marks, scuffs, sticky residue. Not appropriate for flat or matte paint under any circumstances.
Method 7: Targeted Stain Treatments (For Specific Stain Types)
Different stain types respond to different treatments, and using a general cleaning method on a specific stain type often just spreads it or sets it further into the paint. Matching the treatment to the stain produces significantly better results.
Crayon marks:
- Apply a small amount of non-gel white toothpaste to the mark and rub gently with a soft cloth in the paint direction.
- Wipe clean with a damp cloth and dry immediately.
- On flat paint, use a dry sponge rather than toothpaste—the abrasion risk is lower.
Pen and marker:
- Dab isopropyl alcohol (rubbing alcohol) onto a white cloth and blot the mark—don’t rub, which spreads ink. Press the cloth against the mark and lift.
- Work from the outer edge of the mark inward to prevent spreading.
- Repeat with a fresh section of cloth until the ink stops transferring.
- Wipe with a plain damp cloth and dry immediately.
- Test alcohol on a hidden area first—it can affect some latex paint formulations.
Grease and oil fingerprints:
- Sprinkle a small amount of dry baking soda or cornstarch directly onto the grease mark and allow to sit for five minutes—the powder absorbs the oil from the surface.
- Brush away the powder gently with a dry soft cloth.
- Follow with a light wipe using the white vinegar solution (Method 4) to remove any residual grease.
Water stains and tide marks:
- These are mineral deposits left by evaporated water rather than active dirt—they don’t respond to soap or detergent.
- Dab white vinegar directly onto the water mark with a cloth and allow to sit for two to three minutes. The acid dissolves the mineral deposits.
- Wipe with a clean damp cloth and dry immediately.
- For persistent water stains, a thin coat of paint over the affected area after cleaning is often the most practical solution.
Mold and mildew spots:
- Mix one part white vinegar with one part water and apply to the mold spot with a cloth.
- Allow to sit for ten minutes before wiping away.
- Do not scrub mold spots on walls—scrubbing disperses spores. Blot and lift rather than rub.
- Dry thoroughly—mold returns in areas that remain damp.
- For recurring mold on walls, address the underlying moisture source rather than repeatedly cleaning the surface.
Sticky residue from tape or stickers:
- Warm the residue slightly with a hairdryer on low heat for 15–20 seconds—heat softens adhesive without damaging paint.
- Rub gently with a cloth dampened with a small amount of cooking oil or rubbing alcohol—both dissolve adhesive without harming most paint finishes.
- Wipe with a plain damp cloth and dry immediately.
Method Comparison at a Glance
| Method | Best Paint Finish | Best For | Moisture Level |
|---|---|---|---|
| Dry cleaning | All finishes | Dust and surface debris | None |
| Plain warm water | Flat and matte | Light soiling | Minimal |
| Dish soap solution | Eggshell and satin | General traffic marks | Low |
| White vinegar solution | Satin and above | Grease and kitchen walls | Low |
| Baking soda paste | Semi-gloss and gloss only | Stubborn scuffs | Low |
| Magic eraser | Satin, semi-gloss, gloss only | Specific marks | Minimal |
| Targeted stain treatments | Varies by stain and finish | Specific stain types | Varies |
Common Mistakes That Damage Paint During Cleaning
Using too much water. Flat and matte paint absorbs moisture and the paint film softens when wet—too much water lifts the finish, leaves watermarks, and can cause the paint to pill or roll off entirely in small sections. Wring cloths until they feel barely damp.
Scrubbing in circles. Circular scrubbing motion on walls creates circular burnish marks on semi-gloss and swirl patterns in flat paint. Always work in straight lines in the direction of any visible brush marks in the paint.
Cleaning just the mark. Cleaning a defined patch and stopping creates a visible clean area against the surrounding dull wall—a different problem but equally obvious. Always blend outward with progressively lighter strokes.
Using multi-surface sprays. Many commercial multi-surface sprays contain alcohol, ammonia, or other solvents that damage latex paint finishes. Always check that any product is specifically safe for painted walls before applying.
Cleaning walls with abrasive sponges. The scratchy side of a kitchen sponge creates fine scratches in paint that are permanently visible as dull patches in any finish other than the flattest matte.
Not drying the wall. Allowing walls to air dry rather than patting dry leaves watermarks in flat and matte paint and tide marks in any finish. Pat dry immediately after any wet cleaning.
How to Maintain Clean Walls Between Deep Cleans
- Dust walls regularly with a dry microfiber cloth or soft brush vacuum attachment. Quarterly dusting prevents the dust film buildup that makes walls look dull and requires wet cleaning.
- Address marks immediately before they have time to set into the paint. Fresh marks are dramatically easier to remove than ones that have dried and bonded to the paint surface.
- Use a dry sponge for scuffs and marks as they occur rather than saving them for a cleaning session. Dry sponges require no moisture and handle surface marks on any paint finish without risk.
- Keep walls dry. In bathrooms and kitchens, running extraction fans and wiping down walls after steam-generating activities reduces the moisture exposure that leads to mold and paint lifting.
- Touch up paint for marks that don’t respond to cleaning rather than continuing to scrub. A small amount of matching paint applied with a fine brush addresses marks that cleaning can’t fix without the risk of damaging the surrounding finish.
FAQ
Can I use a steam cleaner on painted walls? No—steam drives moisture into paint under pressure and causes immediate damage to all paint types, particularly flat and matte. It also causes latex paint to soften and can strip paint entirely from walls with thinner finishes.
Why does my wall look streaky after cleaning? Almost always caused by soap or cleaning product residue left on the wall after insufficient rinsing, or by cleaning water that had become dirty and was redistributing grime across the wall. Use two buckets—one for cleaning solution, one for plain rinse water—and rinse each section after cleaning.
Is it safe to clean walls with painted-over wallpaper? Walls with paint over wallpaper are more sensitive to moisture than walls painted directly on plaster or drywall—the moisture can lift the wallpaper seams from beneath. Use dry cleaning and barely damp methods only, and avoid any section where seams are visible.
How do I clean flat paint without damaging it? Flat paint is the most challenging finish to clean. Dry cleaning only (vacuum and dry sponge) handles most flat paint cleaning without moisture risk. For marks that require moisture, use a barely wrung white cloth with plain warm water and minimal pressure—no cleaning product, no scrubbing, immediate drying.
Can I use baby wipes to clean walls? Baby wipes are gentle enough for most satin and above finishes for light marks—they’re essentially a very mild soap solution in cloth form. Avoid on flat and matte paint where the moisture they introduce can cause damage, and avoid on large areas where the residue they leave can build up.
The Bottom Line
Cleaning walls without removing paint is mostly about restraint—less moisture, less pressure, less cleaning product, less scrubbing than feels instinctively right. Start with dry cleaning every time and proceed to wet methods only for marks that remain. Use plain water before soap, and soap before anything more aggressive. Match the cleaning intensity to the paint finish—flat paint needs the most care and the least product; semi-gloss and gloss can handle significantly more. Clean from the bottom up, feather the edges of every cleaned area, dry the wall immediately after every wet method, and test everything on a hidden area first. Those habits produce clean walls without the streaks, fading, and damage that come from treating painted walls the same way you’d treat a tile floor.
Enjoyed this project? Get even more DIY ideas that save (and make) you money.
Join our free newsletter for profitable DIY projects, clever cleaning hacks, home ideas, and creative crafts delivered straight to your inbox.
✓ Free forever • No spam • Unsubscribe anytime