
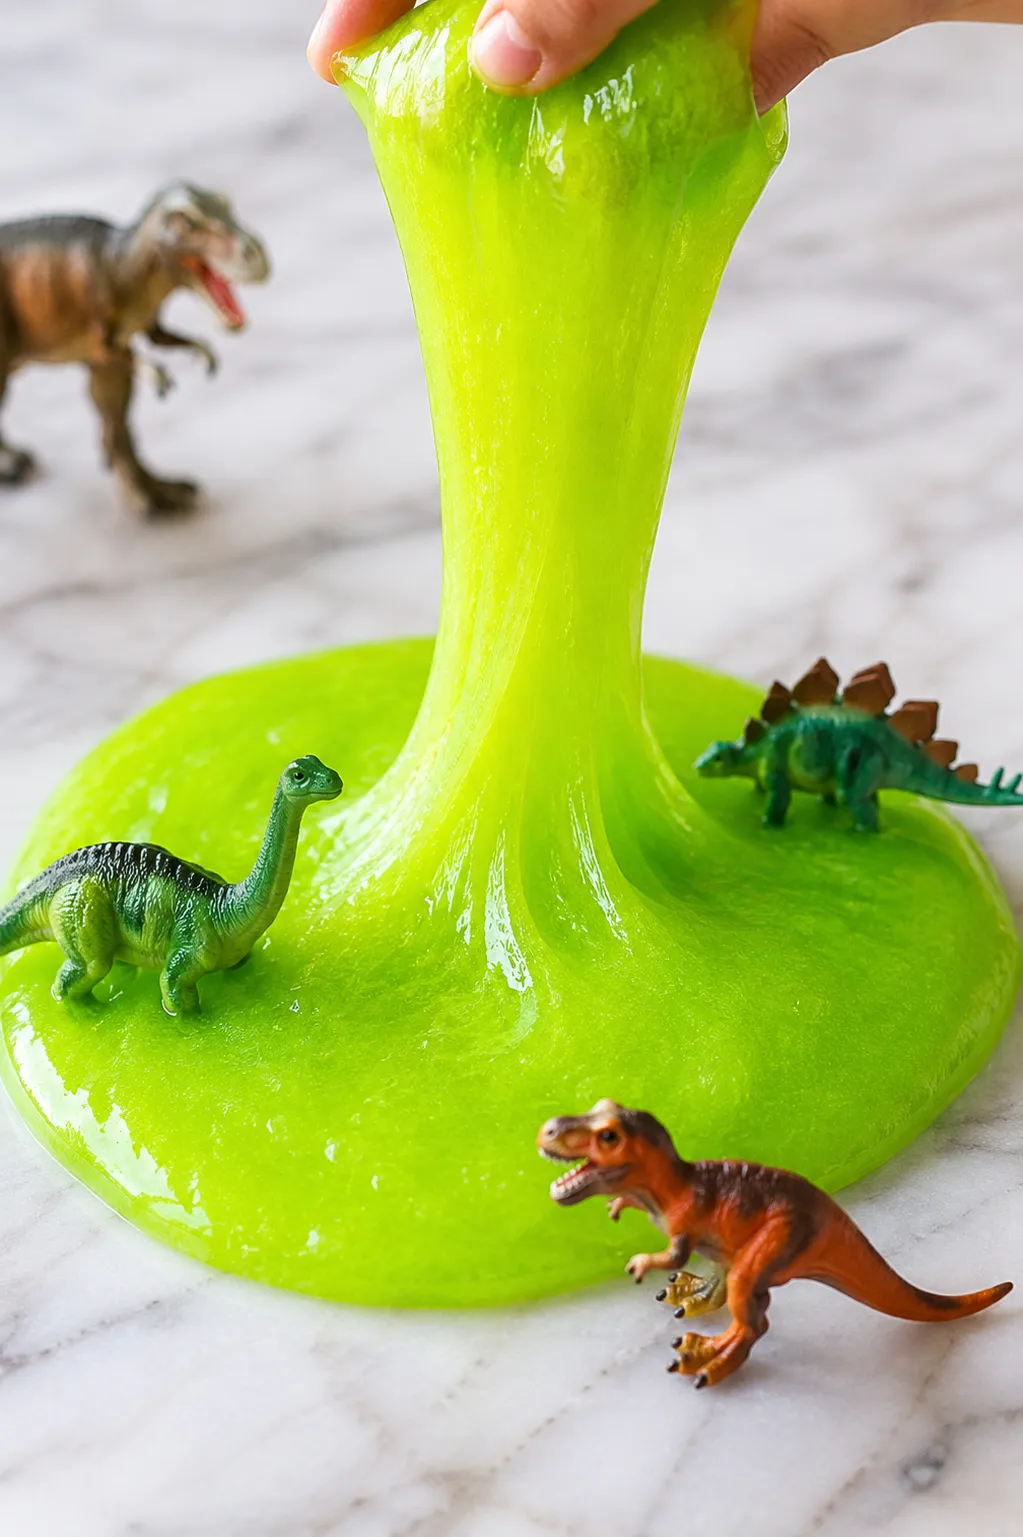
Dinosaur slime is one of those activity combinations that makes complete sense the moment you see it. Kids who love dinosaurs already want to handle them, bury them, excavate them, and create worlds for them. Adding slime as the environment those dinosaurs live in takes that play to a completely different level, turning what might have been a five-minute toy interaction into an hour of focused, imaginative sensory play.
The slime itself can be as simple or as elaborate as you want it to be. A basic green slime with a few plastic dinosaurs pressed into it is genuinely enough for most toddlers and preschoolers. An older kid might want a full dino world with multiple slime colors for different terrain types, foam beads for texture, and a whole collection of dinosaurs excavated from frozen slime icebergs. Both versions use the same base recipe, and the upgrade path between them is as easy or involved as you want to make it.
Here’s how to make the base dinosaur slime, the best color and texture variations for a dino theme, and how to build the full sensory play setup around it.
What You’ll Need
For the basic dinosaur slime:
- 1 cup of white PVA school glue
- 1 teaspoon of baking soda
- 1 to 2 tablespoons of contact lens solution containing boric acid
- Green gel food coloring or liquid watercolors
- Black or brown liquid watercolors for depth and texture (optional)
- Plastic dinosaur toys in various sizes
- A large mixing bowl and spoon
- Airtight container for storage
For an extended dino slime sensory setup:
- Additional slime batches in brown, gray, or volcanic red for different terrain types
- Foam beads or fishbowl beads for texture
- Fake moss, small pebbles, or dried leaves as environmental details
- A large sensory bin or tray for display and play
Choosing the Right Colors for Dinosaur Slime
Color selection sets the entire atmosphere of the dino play world, and thinking about it beyond just green opens up a much more interesting sensory environment.
Swamp green is the classic and most immediately recognizable dino slime color. A deep, slightly murky green that looks like prehistoric bog water. Achieve this by combining green food coloring with a very small amount of brown or black to create a darker, less bright green.
Volcanic lava in deep red or orange makes a dramatic base for carnivore territory and contrasts beautifully with green slime in the same setup. A few drops of red and orange gel coloring in roughly equal parts produces the right volcanic tone.
Mud brown mimics the muddy terrain of a jungle floor and looks particularly convincing when a small amount of brown foam beads are added to give it a gritty, earthy texture.
Jungle yellow-green for a brighter, more tropical feel, using yellow-dominant green rather than the standard darker green. Works well paired with a brown or darker green batch for terrain variation.
Tar pit black using a very deep charcoal or black slime that looks convincingly like a prehistoric tar pit. This is one of the most fun play scenarios for this theme, with dinosaurs getting “stuck” in the tar pit during play.
Ice age white using a white fluffy slime base for a woolly mammoth or ice age themed version of the setup, with white and pale blue slime representing frozen terrain.
How to Make Dinosaur Slime
The Base Recipe
- Pour the white glue into a large mixing bowl.
- Add green gel food coloring and stir until fully distributed. Start with three to four drops and assess the color before adding more.
- For a deeper, more swampy tone, add a single drop of brown or black coloring to the green at this stage and stir through.
- Add the baking soda and stir thoroughly until no powder remains visible.
- Add contact lens solution one teaspoon at a time, stirring continuously after each addition.
- Continue adding gradually until the slime pulls away from the bowl sides and comes together as a cohesive mass.
- Remove from the bowl and knead for two to three minutes until smooth and non-sticky.
- If stickiness remains, add contact lens solution one drop at a time while kneading until it resolves.
- Once the base slime feels smooth and stretchy, it’s ready for the dino additions.
Adding Dino Theme Texture
The base slime alone is perfectly playable, but a few additions give the dinosaur world more visual and tactile depth.
- Flatten the finished slime and add foam beads or small pebbles in a handful across the surface.
- Fold the slime over the additions and knead gently to work them through.
- Add dried herbs or small pieces of fake moss to the surface of the slime and press them in partially, leaving some sticking out to mimic prehistoric plant growth.
- Press plastic dinosaurs partially into the slime surface in the display container, positioning them as if they’re moving through the terrain.
The Full Dino Slime Sensory World Setup
This is the extended version that takes the basic dinosaur slime from a single batch of green goo to a complete prehistoric play environment, and it’s the version that holds older kids’ attention the longest.
Setting Up Different Terrain Zones
Make three separate slime batches in different colors and place them side by side in a large sensory bin, each representing a different part of the prehistoric world.
The jungle zone uses the standard swamp green with foam beads and fake moss pressed throughout. Position herbivore dinosaurs here, triceratops, brachiosaurus, and stegosaurus, since these creatures are naturally associated with plant-heavy environments.
The volcanic zone uses the red-orange lava slime with a handful of small black pebbles mixed through. Place carnivore dinosaurs like T-rex and velociraptor in this zone for narrative purposes.
The tar pit zone uses the black slime, poured into one corner of the bin in a separate pool from the other terrains. Leave this one without add-ins so the smooth, deep black color reads clearly as tar.
Adding Environmental Details
Beyond the slime itself, a few low-cost additions make the dino world feel genuinely immersive.
Small stones and pebbles scattered between the slime zones create natural-looking terrain borders. Dried herbs like thyme or oregano pressed into the surface of the green slime create convincing prehistoric foliage at scale with the toy dinosaurs. Small plastic ferns or jungle plants from a dollar store set alongside the bin complete the environment. A couple of dinosaur eggs made from salt dough or purchased as toys add a nest-building play element.
The Excavation Activity
One of the most popular dino slime activities extends the play into an excavation scenario that mimics real paleontology.
- Press dinosaur toys deeply into the slime so they’re mostly or completely buried and allow the slime to settle over them.
- Provide kids with small tools like a wooden skewer, a plastic spoon, or a popsicle stick.
- Challenge them to excavate the buried dinosaurs from the slime using the tools without using their hands.
- This adds a fine motor challenge and a narrative layer that makes the activity feel purposeful rather than just open-ended sensory play.
Frozen Dino Rescue
This is the cold-version of the excavation activity and one of the most reliably engaging dino activities for toddlers and preschoolers.
- Press dinosaurs into ice cube trays or small containers filled with water.
- Freeze until solid.
- Place the frozen dino blocks into the sensory bin alongside the slime.
- Provide warm water in a spray bottle and let kids rescue the frozen dinosaurs while also playing with the slime.
The contrast between the cold, hard ice and the soft, squishy slime adds an extra sensory dimension that makes this combination particularly effective.
Dino Slime Variations
Glitter Swamp Slime
Add holographic green and gold glitter to the base swamp green slime for a slime that looks like a primordial bog lit by fireflies. Use fine glitter mixed into the glue before activating for the most even distribution throughout the finished slime.
Fluffy Dino Slime
Make the base recipe using fluffy slime technique, adding half a cup of white shaving cream to the glue before the baking soda and activator, then color with green food coloring. The resulting fluffy green slime has a softer, cloudier appearance and texture that looks more like dense jungle foliage than the standard version.
Crunchy Dino Terrain Slime
Add fishbowl beads in brown, green, and clear to the finished green slime base for a crunchy, terrain-like texture that looks like a mix of rocks and vegetation when the beads are distributed through the slime. The clicking sound of the beads when dinosaurs are pressed through this version adds an extra satisfying sensory element.
Glow in the Dark Dino Slime
Mix glow in the dark pigment powder into the green glue base before activating. Under normal lighting the slime looks like standard swamp green slime. In a darkened room or under a UV blacklight it glows an eerie green that looks genuinely like bioluminescent prehistoric bog. Reveal it in the dark after a regular play session for maximum dramatic effect.
Scented Dino Slime
Add a few drops of earthy, natural fragrance oil, pine, fresh grass, or petrichor (rain scent) into the glue before activating for a dinosaur slime that smells as well as looks like a prehistoric environment. The scent adds an extra sensory dimension that makes the whole dino world feel more complete and immersive.
Quick Fixes for Common Problems
| Problem | Potential Solution | Alternative Approach |
|---|---|---|
| Green slime looks too bright and unrealistic | Add a single drop of brown or black coloring to the green base and stir through | Mix two green shades together, one darker and one lighter, for a more natural, varied tone |
| Dinosaurs keep sinking all the way through the slime | Make the slime slightly firmer by adding one extra drop of activator, since a firmer slime holds toys in place better | Use larger dinosaur toys that sit higher in the slime rather than smaller ones that sink easily |
| Foam beads falling out of the slime terrain | The slime base is slightly too soft—add one drop of activator and knead before adding beads | Work beads in more gradually with smaller handfuls and more kneading time between additions |
| Different colored terrain zones blending at the edges | Allow each batch to rest for 20 minutes before placing in the bin, since rested slime resists blending better | Create a border of small stones or craft sticks between terrain zones to keep them physically separated |
| Slime sticking to the plastic dinosaur toys | Dust the toys with a tiny amount of cornstarch before pressing into the slime | Choose larger-scale toys with fewer fine detail crevices where slime tends to stick most |
| Kids lose interest quickly | Add the excavation element by burying dinosaurs and providing tools for rescue | Introduce the frozen dino rescue alongside the slime for a temperature contrast that refreshes the activity |
Setting Up for Different Ages
For toddlers aged 18 months to 3 years, keep the setup simple and taste-safe concerns in mind. A single batch of green slime in a shallow tray with two or three large chunky dinosaur toys is genuinely enough. Supervise closely and choose dinosaur toys large enough to not be choking hazards. Skip the beads and small environmental add-ins for this age group.
For preschoolers aged 3 to 5 years, this is the sweet spot where dino slime sensory play is most intensely engaging. Include multiple terrain colors, the excavation activity, and a selection of dinosaur types. Prompt the play with a simple story setup like “the dinosaurs need help crossing the swamp” to give the imagination a starting point.
For school-age kids aged 6 and up, the making process is as engaging as the playing. Involve them in making the slime from scratch, choosing colors, mixing terrain types, and designing the dino world layout. The glow in the dark version and the scientific excavation framing (using real paleontology vocabulary) keep this age group engaged with material that might otherwise feel too young.
FAQ
What size dinosaur toys work best in slime?
Medium-sized plastic dinosaurs, roughly three to five inches long, work best in slime. Very small dinosaurs sink too easily and can become choking hazards for young children. Very large dinosaurs are unwieldy in a standard sensory bin and don’t interact with the slime as satisfyingly as medium ones. A set of medium-scale plastic dinosaurs available at most toy stores or dollar stores is ideal.
How long does dinosaur slime last?
Stored properly in an airtight container, the standard slime base lasts two to three weeks. Environmental add-ins like dried herbs or real moss should be removed before storage since organic materials can promote mold growth in the sealed, moist environment of stored slime.
Can I use air dry clay dinosaurs instead of plastic toys?
Yes, and making your own clay dinosaurs as a separate craft activity before the slime session is a great two-part activity for older kids. Allow clay dinosaurs to dry completely before putting them in slime, since uncured clay absorbs moisture from the slime and can affect both the slime consistency and the clay structure.
Is this activity safe for very young toddlers?
With appropriate supervision and toy selection, yes. Use large plastic dinosaur toys with no small detachable parts, skip all small bead add-ins, and consider a taste-safe slime recipe for babies and toddlers still likely to mouth everything. The cornstarch and conditioner recipe from the sensitive skin slime article works well as a taste-safer alternative base for very young participants.
Can I add real dirt or sand to the dino slime terrain?
Small amounts of sand can be worked into slime without significantly affecting the texture, and the visual of sand mixed through brown or green slime is convincingly terrain-like. Real dirt introduces bacteria and organic material that accelerate slime deterioration and can cause mold growth significantly faster than clean add-ins, so it’s better used in a separate section of the sensory bin rather than mixed directly into the slime.
Closing Thoughts
Dinosaur slime works as well as it does because it combines something kids already love with an activity that engages every sensory channel simultaneously. The basic version is genuinely simple and takes fifteen minutes to make. The full sensory world version with multiple terrain types, excavation activities, and frozen dino rescue elements is an hour-long experience that kids ask to repeat. Start with the base green slime and one set of dinosaurs, see how engaged the response is, and build from there. The upgrade path from simple to elaborate is easy and every step of it is worth doing.
Enjoyed this project? Get even more DIY ideas that save (and make) you money.
Join our free newsletter for profitable DIY projects, clever cleaning hacks, home ideas, and creative crafts delivered straight to your inbox.
✓ Free forever • No spam • Unsubscribe anytime




