
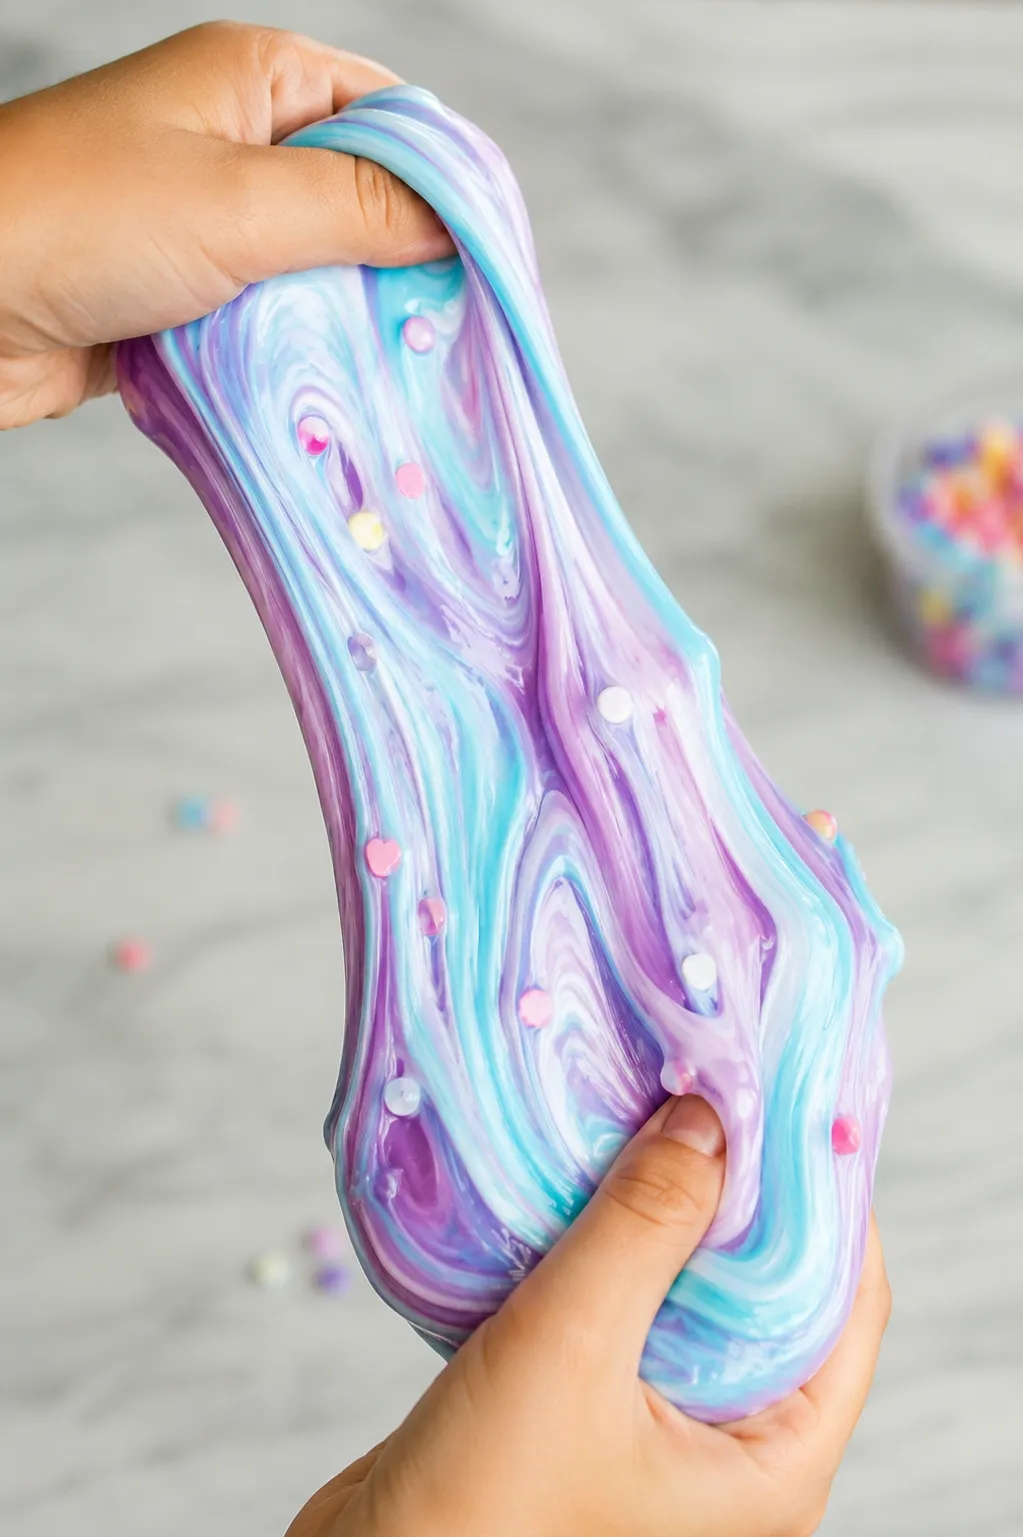
Marble slime is one of those results that looks more impressive than the process that created it. Two colors twisted and folded through each other in a way that genuinely mimics the veining pattern of marble stone, with defined swirl lines running through the slime rather than blending into a single muddy tone. When it’s done right it looks like something that required careful technique. When it’s done wrong it looks like two colors that got accidentally mixed together.
The difference between those two outcomes comes down to three things: color contrast, base consistency, and restraint during the swirling step. Here’s the full process.
What You’ll Need
- 1 cup of white or clear PVA school glue, divided equally between two colors
- 1 teaspoon of baking soda per color batch
- Contact lens solution containing boric acid
- Two contrasting colors of gel food coloring or liquid watercolors
- Glitter (optional)
- Two mixing bowls
- Airtight container for storage
Choosing Colors for Marble Slime
Color selection matters more for marble slime than almost any other slime type because the visual effect depends entirely on contrast between the two colors staying visible rather than blending.
The most effective color combinations are:
- Black and white — the most classic marble look, the highest contrast, and the most forgiving of any swirling mistakes since the colors don’t produce a muddy blend when they do touch
- White and gold — elegant and striking, particularly with gold glitter mixed into the gold batch
- Navy and white — clean and bold, produces a blue marble effect that looks genuinely stone-like
- Black and rose gold — dramatic and modern, particularly popular for display jars
- Gray and white — subtler and more realistic as actual marble mimicry
- Purple and white — vivid and distinctive, sits somewhere between a realistic marble and a fantasy version
Avoid colors that are direct complements on the color wheel when choosing two colors for marble slime, since these blend into brown or gray at the points where they touch rather than staying as distinct swirl lines.
How to Make Marble Slime
Making Each Color Batch
Each color is made separately before combining, exactly like unicorn or galaxy slime. Both batches need to be at the right consistency before swirling begins.
- Divide the glue evenly between two bowls, half a cup per bowl.
- Add gel food coloring to each bowl and stir until fully distributed. Use enough coloring for a vivid, saturated result since pale colors lose contrast faster during swirling.
- Add glitter to either or both batches at this stage if using.
- Add one teaspoon of baking soda to each bowl and stir thoroughly.
- Add contact lens solution to the first color one teaspoon at a time, stirring continuously.
- Continue adding solution until the slime pulls away from the bowl and comes together as a cohesive mass.
- Knead for two to three minutes until smooth and non-sticky.
- If stickiness remains, add contact lens solution one drop at a time while kneading.
- Set aside in a sealed container and repeat for the second color.
- Allow both batches to rest for fifteen to twenty minutes before combining, since slightly cooled, rested slime holds color definition significantly better than warm fresh slime.
Combining and Swirling
This is the step that determines the final result, and the single most important instruction is to stop sooner than you think you need to.
- Place both slime batches on a clean flat surface side by side, touching at one edge.
- Pick up both batches together and gently twist them once, like wringing a towel, so the colors spiral around each other once from top to bottom.
- Fold the twisted log in half and twist gently once more.
- Pull the slime into a long rope shape and observe the swirl pattern. If the color lines are still clearly distinct, the marble effect is already there.
- Repeat the fold-and-twist sequence one more time maximum if you want more defined veining throughout the whole piece.
- Stop. Place the slime in a display container or press it flat to show the marble pattern.
The entire swirling process should take no more than four to five manipulations total. Every additional fold or twist blends the colors further and reduces the contrast between the swirl lines until eventually the two colors fully combine.
Getting Defined Marble Veining
The classic marble stone look has thin, defined veining lines rather than broad color zones. Achieving that in slime requires a slightly different approach from the basic swirl method above.
- Roll each finished color batch into a long, thin rope shape separately before combining.
- Lay the two ropes side by side and twist them together along their full length, producing a two-tone twisted rope with very defined color separation.
- Fold the twisted rope in half once and twist gently.
- Place in the container without further manipulation, pressing flat so the pattern is visible on the top surface.
This method produces much finer, more defined swirl lines than placing the two batches together as masses, since the thin rope shapes keep the two colors in long, narrow contact zones rather than large blended areas.
Making It Look Like Real Marble
A few specific additions take the basic two-color swirl and give it a more convincingly stone-like appearance.
Add pearl or metallic shimmer pigment to the lighter of the two batches before activating. Real marble has a subtle luster that matte slime doesn’t capture, and shimmer pigment in the white or light-colored batch produces a convincing version of that stone quality.
Use a base of translucent gray rather than pure white for one batch if you want a more realistic marble effect. Pure white is visually striking but real marble has more variation in its lighter areas, and a very pale gray captures that more accurately.
Add thin glitter lines by using a fine paintbrush or skewer to drag a very small amount of gold or silver fine glitter through the swirl lines after the slime is in its display container, mimicking the metalite mineral deposits that run through real marble stone.
Press the slime into a flat, smooth surface rather than leaving it in a rounded blob, since marble slime shows its pattern most clearly when viewed as a flat sheet from above rather than as a three-dimensional rounded shape.
Marble Slime Variations
Black and White Classic Marble
The most recognizable version and the most forgiving to make. Use white glue for both batches, coloring one with a generous amount of black gel food coloring. The inherent opacity of white glue suits the opaque, stone-like quality of marble better than clear glue. Add silver glitter to the white batch for extra depth.
Gold Vein Marble
Use a white batch as the main base and a deep gold or amber batch for the veining, mimicking the gold-veined white marble found in luxury interiors. Adding actual gold leaf flakes to the gold batch produces a particularly realistic effect for this version.
Blue Sodalite Marble
Based on the royal blue mineral sodalite rather than standard white marble, this version uses a deep midnight blue as the primary color and white as the veining color. The proportions are reversed from standard marble, with more blue than white in the batch so the finished slime is predominantly blue with white veining running through it.
Watercolor Marble
Uses two batches of clear glue slime in complementary translucent colors rather than the opaque white glue typically used for marble slime. The transparency of the two colors creates a softer, more watercolor painting-like swirl effect rather than the hard-edged veining of stone marble.
Quick Fixes for Common Problems
| Problem | Potential Solution | Alternative Approach |
|---|---|---|
| Colors blended into one uniform color | Too many swirl manipulations were made—start again and stop after three to four folds maximum | Rest both batches longer before combining, since warmer slime blends faster than rested, cooler slime |
| Swirl lines are too thick and broad | Use the rope method rather than placing both batches as masses—thin ropes produce finer, more defined swirl lines | Make each batch slightly firmer before combining so they resist blending into each other |
| Colors produced a muddy blend where they touch | The two colors chosen are complementary on the color wheel and mix to brown—choose colors that blend more gracefully | Use black and white specifically, since these always produce gray rather than brown where they mix |
| One color is much stiffer than the other | The stiffer batch had slightly too much activator—knead in a small amount of lotion to match the softer batch | Remake the stiffer batch with slightly less activator before combining |
| Marble pattern only visible on outside | Press the slime flat and view from above rather than looking at it as a rounded shape | Roll into a rope, cut cross-sections, and display those for a more cross-sectional marble view |
| Pattern disappeared after one play session | This is expected—the pattern is a display feature rather than a permanent texture | Store each color separately and re-swirl before each play session for a fresh marble effect every time |
| Slime is sticky after combining | Individual batches weren’t fully activated before combining—add one drop of contact lens solution while gently kneading the combined slime | Separate the batches as much as possible, add activator to the stickier one individually, then recombine |
How to Keep the Marble Pattern for Display
Marble slime is as much a display piece as a play material, and a few specific steps help maintain the visual pattern for as long as possible.
Press the finished marble slime into a wide, flat-bottomed clear container and smooth the top surface so the swirl pattern is visible from above. A wide-mouthed mason jar or a flat clear acrylic display box works particularly well for this.
Once in the display container, don’t play with it immediately if the visual is the priority. Let it rest for a few hours in the container, during which time the swirl lines often become slightly more defined as the two batches settle against each other.
Store each color batch separately in individual airtight containers if you want to remake the marble effect repeatedly. The pattern disappears after a single play session as the colors inevitably blend during handling, but separate storage means you can re-swirl fresh before each session for a consistently dramatic presentation.
FAQ
How many times can I swirl the slime before the colors blend permanently?
In most batches, somewhere between three and six total manipulations (folds, twists, or pulls) before the colors are blended beyond recovery. The exact number depends on how firm the batches are and how warm the slime is, since firmer, cooler slime resists blending longer than soft, warm slime.
Can I add more than two colors to marble slime?
Yes, though three colors is the practical maximum before the swirl starts to look busy rather than clean. Three-color marble works best with one dominant color making up roughly half the total batch and the other two colors used in smaller amounts as veining.
Should I use white glue or clear glue for marble slime?
White glue produces a more stone-like, opaque result that better mimics real marble. Clear glue produces a translucent swirl effect that looks more like watercolor or glass than stone. Both are valid choices depending on the aesthetic you’re going for, but white glue is the better starting point for a realistic marble effect.
Why does my marble slime always end up one color after storage?
Colors continue blending slowly at their contact boundaries even without active play, so stored marble slime will gradually blend more over time regardless of how carefully it was swirled. Separate storage of each color batch is the only way to consistently maintain the marble effect across multiple sessions.
Can I make marble slime with fluffy slime as the base?
Yes, and fluffy marble slime produces a particularly interesting result since the lighter texture makes the swirl lines look slightly softer and more diffuse, similar to marble seen through frosted glass rather than polished stone. Follow the same two-batch method but use fluffy slime as the base for each color instead of standard slime.
Closing Off
Marble slime gets its reputation as one of the most visually impressive slime types because when the color contrast is right and the swirling restraint is practiced, the result genuinely looks like a piece of stone captured in a jar rather than two colors of school glue mixed together. Make both batches separately, let them rest before combining, use the rope method for finer veining, and stop swirling before the colors blend. The whole thing takes under thirty minutes and produces something genuinely worth displaying.
Enjoyed this project? Get even more DIY ideas that save (and make) you money.
Join our free newsletter for profitable DIY projects, clever cleaning hacks, home ideas, and creative crafts delivered straight to your inbox.
✓ Free forever • No spam • Unsubscribe anytime




